| Shelf | Level | Time | Hook | Yarn |
|---|---|---|---|---|
| Mini and keychains | Beginner | 2-3 Hours | 2.5 mm | DK |
Simple Soft Crochet Bird Amigurumi — Free Beginner Pattern
Make a simple soft crochet bird amigurumi with this free pattern: a round cotton body with a long tail, two contrast wings and a tiny beak, ideal for beginners.
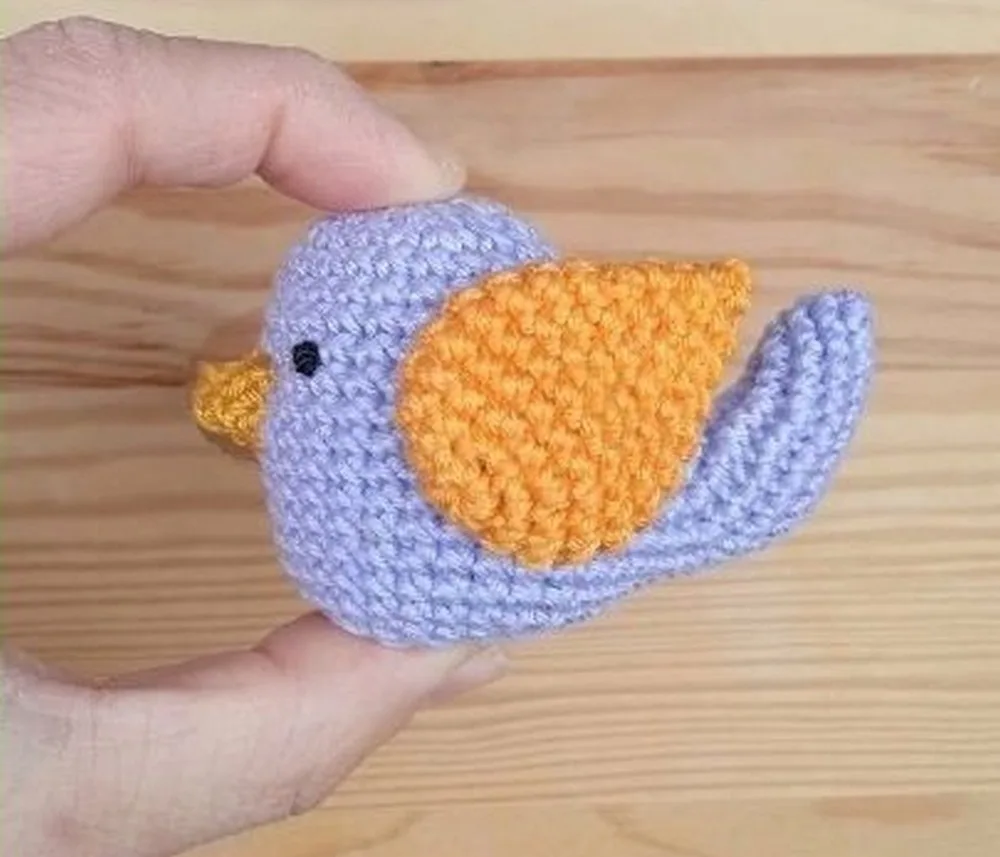
01 · The pieceWhat Simple Soft Crochet Bird Amigurumi — Free Beginner Pattern actually is
This pattern makes a plump little spring bird with a rounded cotton body, a long shaped tail, two contrast-colored wings and a tiny pointed beak. What makes it special is how much personality comes out of so few pieces — the whole bird is just three pattern parts, worked in the round, with the body running twenty rounds and each wing only twelve. It's a perfect project for anyone who has made a few amigurumi basics and wants a finished, huggable result the same day they start.
The techniques here are the friendly core of amigurumi: a magic ring to open each piece, single crochet worked in a continuous spiral, shaping increases to build the body's curve, and invisible decreases to close it neatly around the stuffing. The tail grows out of a 7-chain loop in Round 12 that you work back along, sew shut with a piece of purple yarn and stuff. The wings are made in a second color so you get contrast without any mid-round color changes, and the eyes are embroidered with black thread rather than set with safety eyes.
Worked at a tight gauge on a 2,5 mm hook with Schachenmayr Catania cotton, the finished bird is small, firm and satisfyingly dense — the kind of toy that sits upright on a windowsill and holds its shape for years. The cotton gives it a smooth, slightly matte surface with crisp stitch definition, so the round body reads clean rather than fuzzy. It makes a lovely handmade gift, a baby-shower table decoration, or a whole flock in graduated colors.
The texture is what wins people over: soft, cuddly and adorable in the hand, which is exactly why this little bird belongs in a collection of crochet crafts. The pattern itself was written to stay genuinely simple, so even if you haven't done much crochet before you can still make this bird in light, pretty colors. It's a lot of fun to work, and before long you'll find yourself holding a delightful little crochet bird you made entirely by yourself.
- Start the body from a magic ring and work single crochet in a spiral, increasing to 24 stitches by Round 4.
- Work straight through Round 8, then add the shaping increases of Rounds 9-11, marking the first stitch of every round so the spiral stays honest.
- Build the long tail from the 7-chain in Round 12, crochet back along it in Round 13, widen the body through Rounds 14-16, then split the piece with the skipped stitches of Round 17.
- Sew the two sides of the long tail together with purple yarn, work Round 18, stuff the body and tail, then decrease through the last rounds, close the hole and weave the tail in.
- Work two wings in your contrast color over twelve rounds each, leaving long tails for sewing.
- Make the tiny beak from a magic ring across its two rounds and fasten off leaving a long tail.
- Pin the beak, both wings and the eye positions in place, then check the face from every angle.
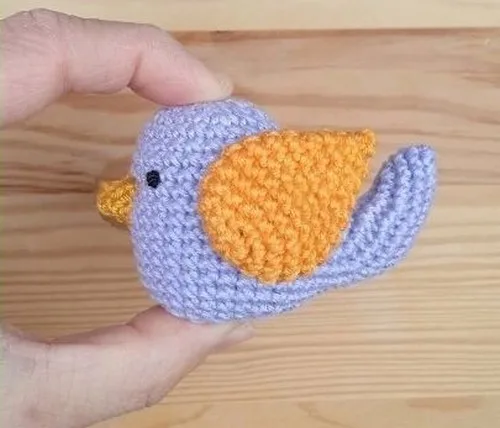
- Sew the beak in the middle of the face between Rnd 7 and 12, sew the wings on both sides, and embroider the eyes between Rnd 7 and 8 with black thread, hiding your knots inside the body.
02 · The count run29 rounds across 3 parts, each with its count
US terms throughout. Every row below ends with the count that round finishes on.
| Part | Qty | Finishes on |
|---|---|---|
| Spring Bird | 1 | - |
| Create 2 wings with different color | 2 | - |
| Beak | 1 | - |
Work in spiral! The abbreviations are in US terms, and the rounds are not joined or turned — keep working around in a continuous spiral.
| Round | Instruction | Count |
|---|---|---|
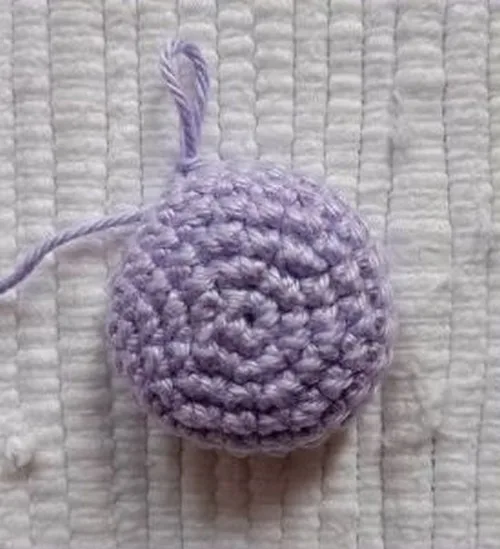
| Round 1 | magic ring (6) | - |
| Round 2 | inc 6x (12) | - |
| Round 3 | (1 sc, inc) 6x (18) | - |
| Round 4 | (2 sc, inc) 6x (24) | - |
| Round 5-8 | 1 sc in each st around (24) | - |
| Round 9 | inc 3x, 21 sc (27) | - |
| Round 10 | (1 sc, inc) 3x, 21 sc (30) | - |
| Round 11 | (2 sc, inc) 3x, 21 sc (33) | - |
| Round 12 | 7 sc, 7 ch, 6 sc back from the 2nd ch, 1 sc in the previous st, 26 sc (40) | - |
| Round 13 | 7 sc, 6 sc in the chainlink, 6 sc back on the other side, 27 sc (46) | - |
| Round 14 | 3 sc, (1 sc, inc) 5x, (inc, 1 sc) 5x, 23 sc (56) | - |
| Round 15 | (5 sc, inc) 2x, 12 sc, (inc, 5 sc) 2x, 20 sc (60) | - |
| Round 16 | 1 sc in each st around (60) | - |
| Round 17 | 5 sc, skip 30 sc, 25 sc (30) | - |
With a piece of purple yarn sew together the two sides of the long tail.
| Round | Instruction | Count |
|---|---|---|
| Round 18 | (3 sc, dec) 6x (24)Stuff the body and the long tail. | - |
| Round 19 | dec 12x (12)The original pattern numbers this last round "Rnd 18" a second time; it is worked after Rnd 19 and is the final closing round of the body. | - |
| Round 20 | dec 6x (6) | - |
FO and close the hole in the end.
| Round | Instruction | Count |
|---|---|---|
| Round 1 | magic ring (6) | - |
| Round 2 | inc 6x (12) | - |
| Round 3 | (1 sc, inc) 6x (18) | - |
| Round 4-6 | 1 sc in each st around (18) | - |
| Round 7 | (4 sc, dec) 3x (15) | - |
| Round 8 | 1 sc in each st around (15) | - |
| Round 9 | (3 sc, dec) 3x (12) | - |
| Round 10 | (1 sc, dec) 4x (8) | - |
| Round 11 | 1 sc in each st around (8) | - |
| Round 12 | dec 4x (4) | - |
FO and close the hole in the end.
Hide the tail inside the wing. Pin the wings on both sides of the body, and sew them on.
| Round | Instruction | Count |
|---|---|---|
| Round 1 | magic ring (5 sc) | - |
| Round 2 | 4 sc, inc (6)Finally, embroider eyes between Rnd 7 and 8 (2-2 sts away from the beak). | - |
FO leaving long tail. Sew the beak in the middle of the face between Rnd 7 and 12.
Or you can use small glass beads as well.
03 · Before it goes to a childWhat has to be right, and what is allowed to drift
- 💡 All abbreviations in this pattern are written in US terms, and every piece is worked in a spiral — do not join or turn at the end of a round.
- 💡 The 2,5 mm hook is deliberately small for this cotton — it's what keeps the twenty-round body dense enough to hide the stuffing. If your usual amigurumi tension runs loose, size down rather than up.
- 💡 Schachenmayr Catania at 50 gr / 125 m goes a very long way here. A single ball of the main color easily covers the body, and you only need scraps for the two wings and the beak, so this is a great stash-buster.
- 💡 Keep a stitch marker in the first stitch of each round on all three parts. Even the two-round beak benefits from one, because it's small enough that a miscounted stitch shows immediately.
- 💡 Stuff the body and the long tail with small pinches of toy filling rather than one large clump. Clumps create lumps that show right through cotton, and cotton has none of the forgiving fuzz that hides them in acrylic.
- 💡 Make both wings back-to-back in the same sitting so your tension matches. Wings worked days apart at slightly different tensions will not sit symmetrically no matter how carefully you pin them.
- 💡 Leave a long tail on the wings and beak when fastening off — the beak round says so explicitly. That tail is your sewing thread, and joining a fresh strand for such small pieces is far fussier than it needs to be.
- 💡 Pin the beak and eyes together before sewing either one. The beak sits in the middle of the face between Rnd 7 and 12 and the eyes go between Rnd 7 and 8, two stitches out on each side, so judging them together saves a lot of unpicking.
04 · Snag listWhat went wrong on the bench, and the fix
Snag 1
Starting the body with a chain-2 ring
Use a proper magic ring for the body, both wings and the beak. Work all first-round stitches into the loop, then pull the tail firmly to close it before you continue. Give that tail one more tug after round three, when the ring has settled, and weave it in on the inside so it can never loosen again.
Snag 2
Losing track of the round in
Place a stitch marker in the first stitch of every round and move it up as you go. If you realize you're off, count the stitches in your current round against the pattern's stitch count rather than guessing — it's far quicker to frog two rounds than to fight a crooked body for the rest of the piece.
Snag 3
Working the stitches too loosely
Amigurumi wants a tighter tension than garments. If you can see daylight through your first few rounds, go down to a 2 mm hook rather than trying to crochet tighter by force. The cotton should feel firm and slightly stiff — that density is what lets this small bird hold its round shape.
Snag 4
Skipping the tail seam and stuffing
After Round 18 the pattern has you sew the two sides of the long tail together with a piece of purple yarn, and only then stuff the body and the tail. Do it in that order: once you start Round 19's twelve decreases the opening closes fast, and neither the seam nor the filling can be reached comfortably afterwards.
Snag 5
Sewing the two wings on by eye
Pin both wings before sewing anything — this is exactly what the pins in the materials list are for. Count stitches down from the same round and out from the center on each side so both wings sit at matching coordinates, then look at the bird from the front, back and above before you commit a single stitch.
Snag 6
Embroidering the black eyes too close
The pattern places the eyes between Rnd 7 and 8, two stitches away from the beak on each side — mark both positions with pins first and check them against the beak before you stitch. Bring the embroidery thread through the body and out again, keeping just enough tension for the stitch to sit flat without sinking. Knot off inside the body and pull the tail out through a distant stitch before trimming so the knot disappears.
05 · VariantsOther ways to issue this one
The three-part structure makes this bird endlessly re-mixable, and the wings are the easiest place to start. Because they're already worked in a different color, you can go tonal — a soft sage body with deeper forest wings — or go bold with a cream body and coral wings and a mustard beak. Real bird palettes work beautifully too: slate grey body with white wings for a little dove, chocolate body with cream wings for a sparrow, or a deep teal body with black wings for a magpie feel. Schachenmayr Catania has a huge shade card, so you can build a whole graduated flock from one brand; Paintbox Cotton DK, Ricorumi and Scheepjes Catona are close substitutes if Catania isn't available where you are, and Catona in particular matches the gauge almost exactly. For a bigger bird, keep every stitch count identical and simply move up to a 3,5 mm or 4 mm hook with a worsted cotton — the proportions stay right and the bird grows by roughly half again. For a tiny flock, drop to a 2 mm hook with lace-weight cotton and make ornaments. Seasonal versions are fun: a pale blue and white bird for winter, warm rust and gold wings for autumn, fresh yellow and green for spring. The purple yarn used to sew the tail closed can be swapped for any shade you like, since it barely shows once the tail is stuffed. You can also add a small chain loop to the top of the body before closing it and turn the bird into a hanging decoration, or sew a tiny embroidered heart onto one wing. Swapping the embroidered eyes for two French knots in navy instead of black softens the whole face considerably.
I have a soft spot for patterns that give you a real, finished creature before your tea goes cold, and this bird is exactly that. What I love most is the moment the body closes: you work up through twenty rounds, stuff it firm, and suddenly this shapeless cotton tube becomes a round little bird with a proper posture. The long tail is the clever bit — a seven-chain loop made in Round 12 that you crochet back along, sew shut with a scrap of purple yarn and stuff, so the bird gets a real silhouette instead of just a ball. The wings are my favorite trick — worked separately in a contrasting color over twelve rounds, so you get that two-tone look without wrestling a single color change mid-round. And the beak! Two rounds. That's it. Two rounds and your bird has a face. Embroidering the black eyes is the part I always slow down for, because moving them a stitch wider or a row lower completely changes the bird's expression, from curious to sleepy to slightly indignant. Working with Catania cotton on a 2,5 mm hook also means no gaps, no stuffing peeking through, just tidy, dense stitches. It's a pattern that rewards care but never demands it, and I've never made just one.
06 · QueriesQuestions logged against this build
Can I use safety eyes instead of embroidering them with black thread?
You can, and 4-6 mm safety eyes suit a bird this size, but they must go in before you close and stuff the body since the backs lock permanently. The pattern also suggests small glass beads as an alternative. If the bird is intended for a baby or toddler, stay with the embroidered black thread — it's the safer choice and it gives a softer, more hand-drawn expression anyway.
What if I can't find Schachenmayr Catania where I live?
Any DK-weight 100% cotton at a similar 50 gr / 125 m ratio will work. Scheepjes Catona, Paintbox Cotton DK and Ricorumi are the closest matches and hold the same crisp stitch definition. Just check your first few rounds for gaps and adjust the hook if your substitute runs thinner or thicker.
How big is the finished bird?
The pattern doesn't give a gauge or finished measurement. Worked as written on a 2,5 mm hook with DK cotton, the twenty-round body makes a small, palm-sized bird that sits comfortably in one hand, plus the long tail. Your exact size depends on your tension, so a tighter crocheter will end up with a slightly more compact bird than a relaxed one.
Do I need to make both wings in the same contrasting color?
Not at all — the pattern just asks for a color different from the body. Two different wing colors gives a playful, mismatched look that works especially well in a flock, and since each wing is only twelve rounds you can experiment freely without committing much yarn or time.
My bird won't sit upright — what went wrong?
This is almost always a stuffing issue rather than a stitching one. Either the base is under-filled and collapsing, or the body is over-stuffed and the weight has shifted forward. Ease filling out or push more toward the bottom until the bird finds its balance, check that the long tail is stuffed evenly, and make sure both wings are sewn at the same height.
Original pattern: https://redagapeblog.com/crochet-bird-amigurumi/
07 · Made byWho counted this one

Who writes Amigurumi Addict, how a build gets its number, and why every round on the site carries a stitch count.
08 · Next off the benchThree builds that sit near this one
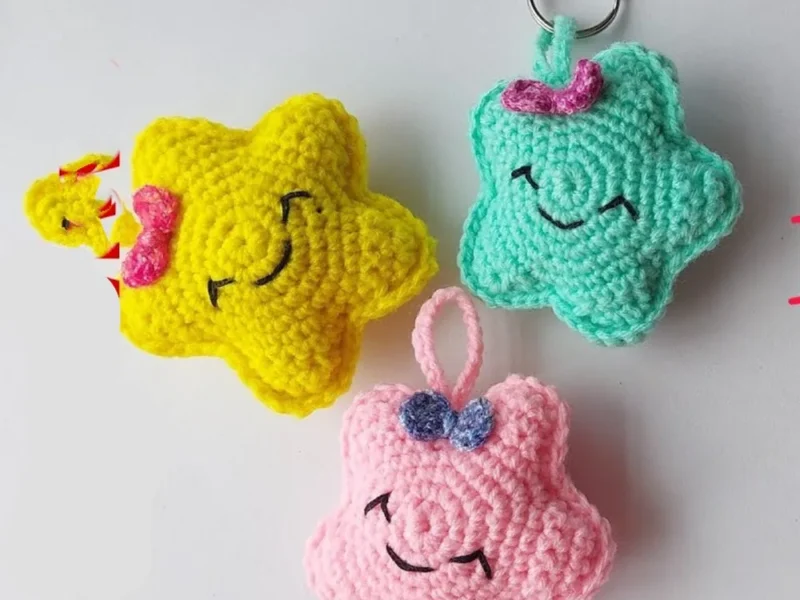
Mini and keychains
Star amigurumi keychain: a beginner’s build
How do you crochet a star amigurumi keychain? Crochet a five-pointed star from two pieces, sew and stuff them, add a

Mini and keychains
Crochet lips keychain: a two-piece amigurumi build
How do you crochet a lips keychain? Two lip pieces stuffed, closed, and seamed for a quick amigurumi gift.
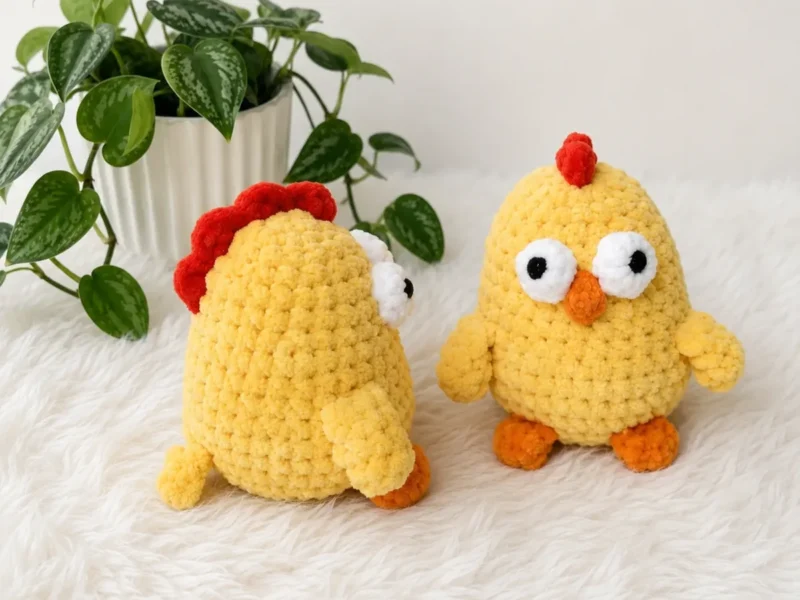
Mini and keychains
How to crochet a chick keychain amigurumi
How do you crochet a chick keychain? Shape the body-head, fold the legs flat, then attach eyes and beak.
Join the build log
One message when a build is issued
A drawing and its parts list, when one leaves the bench.