| Shelf | Level | Time | Hook | Yarn |
|---|---|---|---|---|
| Animals | Intermediate | 4-6 hours | 4 mm | Worsted |
Rudy dog amigurumi: head, ears, muzzle and smile guide
How do you crochet the Rudy dog amigurumi? Build the head, ears, muzzle, head stripe, eye circles, and tongue with a
01 · The pieceWhat Rudy dog amigurumi: head, ears, muzzle and smile guide actually is
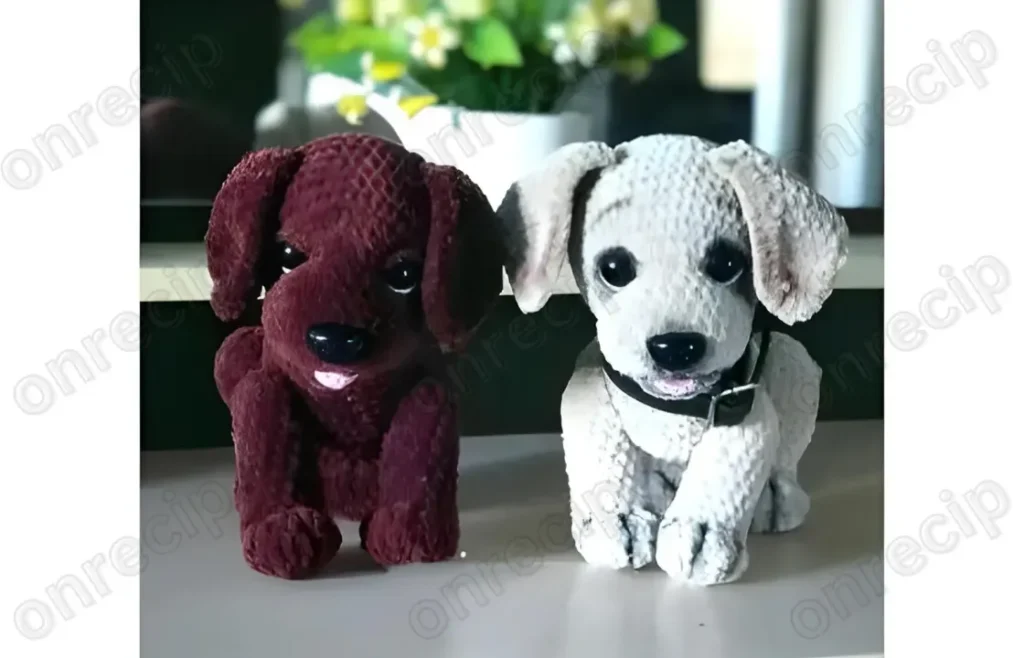
Rudy the dog builds from six named parts: the Head, worked in the round over 24 rounds from a magic ring; a pair of Ears worked separately and pinned to the head; a Muzzle worked in rounds with a back-loops-only round for texture; a Head Stripe worked flat in turned rows off a starting chain and pinned in place; a pair of optional Eye Circles worked in tan to frame the safety eyes; and a Tongue, a four-stitch ring left deliberately unjoined to form the smile. No body piece appears in this set, so the finished figure holds together on the strength of the stuffed Head, the pinned-and-stitched ears, muzzle, and stripe, plus the smile tacked on as its own separate curve.
Precision matters most in the Head's opening rounds, where the jump from 6 to 12 stitches sets the curve the rest of the skull will follow — drift here reads as a lopsided muzzle later. The Ears, Muzzle, and Head Stripe are more forgiving, since each gets pinned and eyeballed against the head before it's stitched down for good. The Tongue needs no shaping precision at all: it's tightened by hand into whatever curve the smile calls for, which is the entire reason it's left unjoined.
02 · The count run38 rounds across 6 parts, each with its count
US terms throughout. Every row below ends with the count that round finishes on.
| Part | Qty | Finishes on |
|---|---|---|
| Head | 1 | - |
| Ears (Make 2) | 2 | - |
| Muzzle | 1 | - |
| Head Stripe | 1 | - |
| Eye Circles (Optional, Make 2) | 2 | - |
| Tongue | 1 | - |
IN MAIN COLOR
| Round | Instruction | Count |
|---|---|---|
| Round 1 | 6 Sc in Magic Ring (6) | - |
| Round 2 | *Inc* all around (12) | - |
| Round 3 | *Inc, Sc* all around (18) | - |
| Round 4 | *Inc, Sc 2* all around (24) | - |
| Round 5 | *Inc, Sc 3* all around (30) | - |
| Round 6 | *Inc, Sc 4* all around (36) | - |
| Round 7 | *Inc, Sc 5* all around (42) | - |
| Rounds 8–9 | *Sc* all around (42) | - |
| Round 10 | *Inc, Sc 6* all around (48) | - |
| Round 11 | Sc in next 28 st. Sc in next st and add a different colored st marker to Sc just made. This marks where we will place the eye. Sc in next 8 st. Sc in next st and add different colored st marker to Sc just made. Sc in next 10 st (48) | - |
| Round 12 | Sc in next 18 st. Repeat *Inc in next st, Sc in next st* 3 times. Sc in next 18 st. Repeat *Inc in next st, Sc in next st* 3 times (54) | - |
| Rounds 13–16 | *Sc* all around (54) | - |
| Round 17 | Sc in next 18 st. Repeat *Dec, Sc* 3 times, Sc in next 18 st, repeat *Dec, Sc* 3 times (48) | - |
| Round 18 | *Dec, Sc 6* all around (42) | - |
| Round 19 | *Dec, Sc 5* all around (36)Add safety eyes in here. (Note: If making a black corgi, make eye circles mentioned further in this pattern now before inserting safety eyes.) | - |
| Round 20 | *Dec, Sc 4* all around (30) | - |
| Round 21 | *Dec, Sc 3* all around (24)Stuff here. Stuff gradually as closing. | - |
| Round 22 | *Dec, Sc 2* all around (18) | - |
| Round 23 | *Dec, Sc* all around (12) | - |
| Round 24 | *Dec* all around (6)Finish off and add any additional stuffing. Sew closed. | - |
IN ORANGE OR TAN
| Round | Instruction | Count |
|---|---|---|
| Round 1 | 6 Sc in Magic Ring (6) | - |
| Round 2 | *Inc* all around (12) | - |
| Round 3 | *Sc* all around (12) | - |
| Round 4 | *Inc, Sc* all around (18) | - |
| Rounds 5–7 | *Sc* all around (18)Finish off and pin to the head as shown further in this pattern. | - |
IN WHITE
| Round | Instruction | Count |
|---|---|---|
| Round 1 | 6 Sc in Magic Ring (6) | - |
| Round 2 | *Inc* all around (12) | - |
| Round 3 | *Sc* all around (12) | - |
| Round 4 | *Inc, Sc* all around (18) | - |
| Round 5 | *Sc* all around in Back Loops Only (18) | - |
| Rounds 6–7 | In BOTH Loops, *Sc* all around (18)Finish off and insert safety nose directly in the middle of the muzzle. Stuff. Pin to the head as shown on page 5. | - |
IN WHITE
| Round | Instruction | Count |
|---|---|---|
| Round 1 | Ch 5. Sc in 2nd Ch from the hook. Sc in next 3 st (4) | - |
| Rounds 2–11 | Turn, Sc in next 4 st (4)Finish off. Pin to the head as shown on page 5. | - |
IN TAN
| Round | Instruction | Count |
|---|---|---|
| Round 1 | 6 Sc in Magic Ring (6) | - |
| Round 2 | *Inc* all around (12) | - |
| Round 3 | *Inc, Sc* all around (18) | - |
| Round 4 | Sc in next 2 st, Dc in next st, Trc in next st, Dc in next st, Sc in next 2 st, SlSt in remaining st (18)Finish off and place safety eye in circle. Now place circle on the head and snap the safety eye on. | - |
IN RED
| Round | Instruction | Count |
|---|---|---|
| Round 1 | 4 Sc in Magic Ring (4)Tighten ring and finish off. Be sure to NOT join the ring. Now refer to Smile Assembly. | - |
Techniques on this build
- Magic ring start
- Opens the Head, Ears, Muzzle, Eye Circles, and Tongue (Round 1 in each); keep the center cinched tight or the smile piece won't hold its curve.
- Single crochet increase
- Drives the Head's Round 2 jump from 6 to 12 stitches; work into the correct stitch each time or the shaping skews off-center.
- Flat rows with turning chains
- The Head Stripe is built back and forth from a starting chain of 5; skipping the turn twists the strip before it's pinned in place.
- Unjoined finish
- The Tongue is tightened and fastened off without ever joining the round — this is what lets the piece pull into a smile shape rather than a flat disc.
- Back loops only
- The Muzzle's Round 5 works into back loops only before returning to both loops for Rounds 6–7, building the ridge that separates the muzzle from the rest of the face.
Final fit-up
- Weave in ends from every color change — white into orange or tan, and any red or black segments — before assembly so seams stay clean at the head's surface.
- Insert the safety eyes and nose into the Head and stuff firmly while the round is still open, since both must go in before the last stitches close it off.
- Close the Head's final round and fasten off, cinching the remaining stitches tight so no gap is visible at the top of the skull.
- Pin the Ears, Muzzle, and Head Stripe to the Head as directed, then position the Tongue for the smile, adjusting each by eye before stitching them down permanently with the tapestry needle.
How the parts fit
- The Head's Round 2 doubles the Round 1 stitch count from 6 to 12, which is the standard opening rate for a rounded amigurumi skull and sets the curve every later round builds on.
- The Head Stripe is worked flat, in turned rows off a 5-chain base, rather than in the round — a piece meant to lie flat against the head doesn't need to be shaped as a closed 3D form.
- The Tongue is explicitly instructed not to be joined; the tightened, unjoined ring itself becomes the mouth's curve, so the shaping happens by hand-tension rather than by stitch count.
- Eye Circles use a mixed-height round — Sc, Dc, and Trc worked side by side and closed with a slip stitch — to build a raised, petal-like frame around each safety eye rather than a flat disc.
Scaling the build
| Larger | Move to a hook larger than 4mm with the same medium weight yarn; stitches loosen and the Head grows without changing any round count. |
|---|---|
| Smaller | Drop to a hook smaller than 4mm; the same 24 Head rounds produce a tighter, more compact skull. |
| Taller head | Repeat one of the non-increase rounds partway through the Head's 24 rounds to add height between the widest point and the closing rounds, without disturbing the Round 1-2 shaping. |
03 · Snag listWhat went wrong on the bench, and the fix
Snag 1
Joining the Tongue's ring
Leave it unjoined as instructed — closing the round flattens the piece and it won't pull into a smile shape.
Snag 2
Losing count on the Head's increase round
Place a stitch marker every few stitches through Round 2 so the jump to 12 lands evenly rather than bunching on one side.
Snag 3
Skipping the turn
Turn at the end of every row on the Head Stripe's flat strip; forgetting it twists the stripe before it's pinned in place.
Snag 4
Stuffing before setting the eyes
Insert the safety eyes and nose while the Head is still open — once it's stuffed and closed, there's no way to seat the posts.
04 · QueriesQuestions logged against this build
Does the smile piece (Tongue) get sewn on or embroidered over?
The Tongue is crocheted separately as an unjoined ring and then positioned per the smile assembly reference, not embroidered directly. Tighten it by hand until the curve matches the face before stitching it down.
What changes between the orange Rudy and the black corgi color version?
The Head's main color swaps from orange to tan, with white for the muzzle in both, plus red and black added for the corgi's markings, and the optional tan Eye Circles are worked before the eyes go in. The construction — 24 rounds, same parts — stays identical.
Are the eye circles required?
No, the pattern notes them as optional, worked in tan for the corgi version. Skip them if the safety eyes alone give enough definition.
05 · Made byWho counted this one

Who writes Amigurumi Addict, how a build gets its number, and why every round on the site carries a stitch count.
06 · Next off the benchThree builds that sit near this one

Animals
Crochet a bunny or frog from one amigurumi base
How do you crochet a bunny and a frog from one base? Share Legs, Body, and Head; swap ears or eyes.

Animals
Crochet giraffe amigurumi pattern with horns and ears
How do you crochet a giraffe amigurumi? Shape head, body, legs, ears and horns in worsted yarn.

Animals
Amigurumi cat crochet pattern with oval muzzle and bow
How do you crochet an amigurumi cat with a flat muzzle? Shape it separately, pinch it, then sew it on.
Join the build log
One message when a build is issued
A drawing and its parts list, when one leaves the bench.