| Shelf | Level | Time | Hook | Yarn |
|---|---|---|---|---|
| Animals | Intermediate | 10-14 hours | 3.25 mm | Worsted |
Crochet giraffe amigurumi pattern with horns and ears
How do you crochet a giraffe amigurumi? Shape head, body, legs, ears and horns in worsted yarn.
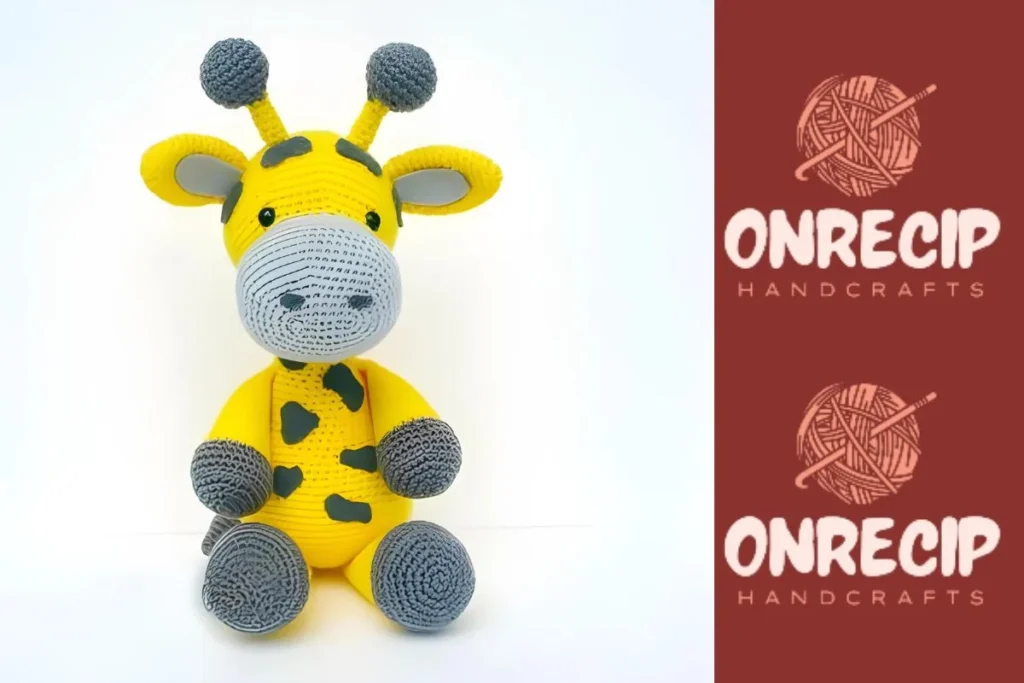
01 · The pieceWhat Crochet giraffe amigurumi pattern with horns and ears actually is
The giraffe assembles from seven components: one Head, one Body, one Tail, two Ears, two Arms, two Legs, and two Horns. The Head begins as a flat oval built from a starting chain worked on both sides, then climbs through increase rounds into a full sphere before settling into a plain-round neck. The Body starts from a magic ring and grows into a rounded torso worked in a continuous spiral. Horns, Ears, and Tail attach after stuffing, so what holds the figure together is sewn seams, not joins built into the stitches themselves.
02 · The count run120 rounds across 7 parts, each with its count
US terms throughout. Every row below ends with the count that round finishes on.
| Part | Qty | Finishes on |
|---|---|---|
| Head | 1 | - |
| Body | 1 | - |
| Tail | 1 | - |
| Ears (Make 2) | 2 | - |
| Arms (Make 2) | 2 | - |
| Legs (Make 2) | 2 | - |
| Horns (Make 2) | 2 | - |
Crocheted from front of nose to back of head.
With Color A: Ch 9 to begin.
Change to Color B before Round 16.
Place eyes between rounds 16 and 17 leaving 12 holes between. Make sure you place the eyes in the middle of the increases instead of where the 12 scs are.
F/O and sew the opening of the head closed.
| Round | Instruction | Count |
|---|---|---|
| Round 1 | Sc in the 2nd chain from hook, 5 sc, inc3 in next chain, sc in the next chain, working on the opposite side of the chain: 5 sc, inc3. (18) | - |
| Round 2 | (6 sc, inc x 3) x 2. (24) | - |
| Round 3 | 7 sc, inc, sc, inc, sc, inc, 7 sc, inc, sc, inc, sc, inc. (30) | - |
| Round 4 | (inc, 4 sc) x 6. (36) | - |
| Round 5 | (inc, 5 sc) x 6. (42) | - |
| Round 6 | (inc, 6 sc) x 6. (48) | - |
| Round 7 | (inc, 7 sc) x 6. (54) | - |
| Rounds 8–12 | sc around. | - |
| Round 13 | (7 sc, dec) x 6. (48) | - |
| Round 14 | (6 sc, dec) x 6. (42) | - |
| Round 15 | (5 sc, dec) x 6. (36) | - |
| Round 16 | 12 sc, (3 sc, inc) x 6. (42) | - |
| Round 17 | 12 sc, (4 sc, inc) x 6. (48) | - |
| Round 18 | 12 sc, (5 sc, inc) x 6. (54) | - |
| Round 19 | 12 sc, (6 sc, inc) x 6. (60) | - |
| Rounds 20–27 | sc around. | - |
| Round 28 | (8 sc, dec) x 6. (54) | - |
| Round 29 | (7 sc, dec) x 6. (48) | - |
| Round 30 | (6 sc, dec) x 6. (42) | - |
| Round 31 | (5 sc, dec) x 6. (36) | - |
| Round 32 | (4 sc, dec) x 6. (30) | - |
| Round 33 | (3 sc, dec) x 6. (24) | - |
| Round 34 | (2 sc, dec) x 6. (18) | - |
| Round 35 | (1 sc, dec) x 6. (12) | - |
| Round 36 | dec x 6. (6) | - |
With Color B: Starting with Color C.
Start stuffing the body at Round 25.
F/O and leave a long tail for sewing.
| Round | Instruction | Count |
|---|---|---|
| Round 1 | Make 6 sc into a magic ring. (6) | - |
| Round 2 | Increase in each st around. (12) | - |
| Round 3 | (sc, inc) x 6. (18) | - |
| Round 4 | (2 sc, inc) x 6. (24) | - |
| Round 5 | (3 sc, inc) x 6. (30) | - |
| Round 6 | (4 sc, inc) x 6. (36) | - |
| Round 7 | (5 sc, inc) x 6. (42) | - |
| Round 8 | (6 sc, inc) x 6. (48) | - |
| Round 9 | (7 sc, inc) x 6. (54) | - |
| Round 10 | (8 sc, inc) x 6. (60) | - |
| Round 11 | (9 sc, inc) x 6. (66) | - |
| Rounds 12–18 | Sc in each st around. | - |
| Round 19 | (9 sc, dec) x 6. (60) | - |
| Rounds 20–21 | sc in each st around. | - |
| Round 22 | (8 sc, dec) x 6. (54) | - |
| Rounds 23–24 | Sc in each st around. | - |
| Round 25 | (7 sc, dec) x 6. (48) | - |
| Rounds 26–27 | sc in each st around. | - |
| Round 28 | (6 sc, dec) x 6. (42) | - |
| Rounds 29–30 | sc in each st around. | - |
| Round 31 | (5 sc, dec) x 6. (36) | - |
| Rounds 32–33 | sc in each st around. | - |
| Round 34 | (4 sc, dec) x 6. (30) | - |
| Round 35 | (3 sc, dec) x 6. (24) | - |
| Rounds 36–46 | sc in each st around. | - |
| Round 47 | 8 sc, 2 hdc, 4 dc, 2 hdc, 8 sc. | - |
Stop stuffing the tail after Round 11.
Change to Color B before Round 12.
F/O and leave a long tail for sewing.
| Round | Instruction | Count |
|---|---|---|
| Round 1 | Make 4 sc into a magic ring. (4) | - |
| Round 2 | Inc x 4. (8) | - |
| Round 3 | Sc in each st around. | - |
| Round 4 | (sc, inc) x 4. (12) | - |
| Round 5 | (2 sc, inc) x 4. (16) | - |
| Round 6 | (3 sc, inc) x 4. (20) | - |
| Rounds 7–8 | Sc in each st around. | - |
| Round 9 | (3 sc, dec) x 4. (16) | - |
| Round 10 | (2 sc, dec) x 4. (12) | - |
| Round 11 | (sc, dec) x 4. (8) | - |
| Rounds 12–26 | Sc in each st around. | - |
With Color B.
Do not stuff the ears.
Sc the ear closed and F/O and leave a long tail for sewing.
| Round | Instruction | Count |
|---|---|---|
| Round 1 | Make 6 sc into a magic ring. (6) | - |
| Round 2 | Increase in each st around. (12) | - |
| Round 3 | sc in each st around. | - |
| Round 4 | (3 sc, inc) x 3. (15) | - |
| Round 5 | sc in each st around. | - |
| Round 6 | (4 sc, inc) x 3. (18) | - |
| Rounds 7–11 | sc in each st around. | - |
| Round 12 | (4 sc, dec) x 3. (15) | - |
| Round 13 | Sc in each st around. | - |
| Round 14 | (3 sc, dec) x 3. (12) | - |
Starting with Color C.
Change to Color B before Round 10.
Start stuffing the arms at Rounds 16-17.
F/O and leave a long tail for sewing.
Tip: If you single crochet the arms and legs closed, sewing will be much easier.
| Round | Instruction | Count |
|---|---|---|
| Round 1 | Make 6 sc into a magic ring. (6) | - |
| Round 2 | Increase in each st around. (12) | - |
| Round 3 | (sc, inc) x 6. (18) | - |
| Round 4 | (2 sc, inc) x 6. (24) | - |
| Round 5 | (3 sc, inc) x 6. (30) | - |
| Round 6 | BLO sc in each st around. | - |
| Rounds 7–8 | sc in each st around. | - |
| Round 9 | (3 sc, dec) x 6. (24) | - |
| Round 10 | BLO sc in each st around. | - |
| Round 11 | sc in each st around. | - |
| Round 12 | (6 sc, dec) x 3. (21) | - |
| Rounds 13–14 | sc in each st around. | - |
| Round 15 | (5 sc, dec) x 3. (18) | - |
| Rounds 16–17 | sc in each st around. | - |
| Round 18 | (4 sc, dec) x 3. (15) | - |
| Rounds 19–20 | sc in each st around. | - |
| Round 21 | (3 sc, dec) x 3. (12) | - |
| Rounds 22–23 | sc in each st around. | - |
Starting with Color C.
Change to Color B before Round 11.
Start stuffing the legs at Rounds 23-24.
F/O and leave a long tail for sewing.
| Round | Instruction | Count |
|---|---|---|
| Round 1 | Make 6 sc into a magic ring. (6) | - |
| Round 2 | Increase in each st around. (12) | - |
| Round 3 | (sc, inc) x 6. (18) | - |
| Round 4 | (2 sc, inc) x 6. (24) | - |
| Round 5 | (3 sc, inc) x 6. (30) | - |
| Round 6 | (4 sc, inc) x 6. (36) | - |
| Round 7 | BLO sc in each st around. | - |
| Rounds 8–9 | Sc in each st around. | - |
| Round 10 | (4 sc, dec) x 6. (30) | - |
| Round 11 | BLO sc in each st around. | - |
| Round 12 | Sc in each st around. | - |
| Round 13 | (8 sc, dec) x 3. (27) | - |
| Rounds 14–15 | Sc in each st around. | - |
| Round 16 | (7 sc, dec) x 3. (24) | - |
| Rounds 17–18 | Sc in each st around. | - |
| Round 19 | (6 sc, dec) x 3. (21) | - |
| Rounds 20–21 | Sc in each st around. | - |
| Round 22 | (5 sc, dec) x 3. (18) | - |
| Rounds 23–24 | Sc in each st around. | - |
| Round 25 | (4 sc, dec) x 3. (15) | - |
| Rounds 26–27 | Sc in each st around. | - |
Starting with Color C.
Change to Color B before Round 10.
F/O and leave a long tail for sewing.
| Round | Instruction | Count |
|---|---|---|
| Round 1 | Make 6 sc into a magic ring. (6) | - |
| Round 2 | Increase in each st around. (12) | - |
| Round 3 | (sc, inc) x 6. (18) | - |
| Round 4 | (5 sc, inc) x 3. (21) | - |
| Rounds 5–6 | sc in each st around. | - |
| Round 7 | (5 sc, dec) x 3. (18) | - |
| Round 8 | (sc, dec) x 6. (12) | - |
| Round 9 | dec x 6. (6) | - |
| Rounds 10–16 | Sc in each st around. | - |
Techniques on this build
- Magic ring start
- Opens the Body and Tail; pull the tail firmly closed before Round 2 so no gap shows at the center.
- Chain-and-return oval base
- Head Round 1 works down one side of a 9-chain and back up the other; keep tension even or the oval skews to one side.
- Triple increase (inc3)
- Turns the corners of the Head's oval base; placed at each end of the starting chain, it is what pushes the count to 18 by the end of Round 1.
- Mid-piece color change
- Occurs on the Head before Round 16, on the Body from Color C into Color B, and on the Tail before Round 12; change color on the last pull-through of the prior stitch, not at the start of the new round.
Final fit-up
- Weave in the starting tail on each part (Head, Body, Tail, Ears, Arms, Legs, Horns) before stuffing hides the access.
- Stuff firmly through the working opening, packing the Head and Body fuller than the Ears and Horns, which need only enough fill to hold shape.
- Close the last round of each part using the long F/O tail, cinching through the remaining stitches rather than leaving them open.
- Attach Horns to the Head first, then Ears just beside them, then sew the Head to the Body, adding stuffing through the seam as needed before it closes.
How the parts fit
- The Head skips the magic ring: a 9-chain worked on both sides plus two inc3 corners produces an oval of 18 stitches at Round 1, a count the Body only reaches by its own Round 3 after starting from a 6-stitch magic ring.
- Every part is worked in a continuous spiral with no slip-stitch join, which is why a stitch marker carries the real information about where a round starts — the yarn itself gives no visual cue.
- Color transitions on the Head (before Round 16), Body (Color C into Color B), and Tail (before Round 12) all fall inside plain sc rounds rather than on an increase or decrease round, so the shaping stays uninterrupted while the palette changes.
Scaling the build
| Larger | Move up one hook size from the D/3.25 mm called for and keep the same worsted-weight yarn; the fabric loosens and every part grows without changing any round's stitch count. |
|---|---|
| Larger, more dramatic | Substitute a bulky-weight yarn with a proportionally bigger hook; the Head's 25 rounds and Body's 26 rounds stay the same, but each stitch covers more ground. |
| Longer limbs | Repeat one plain sc round in the Legs (21 rounds) or Arms (18 rounds) before the decrease sequence begins; this adds length without altering the stitch count of any individual round. |
03 · Putting it togetherHow the pieces go together
- S1
Head and Body: Pin the horns onto the head approximately between rounds 22 and 23 of the head. Sew the horns onto the head.
- S2
Pin the ears about 4 stitches away from the horns on the side of the head and sew into place.
- S3
Embroider some nostrils with dark gray yarn approximately between rounds 6 and 7 of the head.
- S4
Pin the head to the body for extra support. You may need to add more stuffing as you sew. (Make sure the double crochets from round 47 are on the back of the head.)
- S5
Sew the head to the body.
- S6
Arms: Pin the arms onto the side of the body. There are no particular rounds specified for placement; make sure they are facing forward and are on the side of the body slightly underneath the beginning of the neck.
- S7
Sew the arms onto the body.
- S8
Legs: Turn the body upside down with the nose facing away from you. Pin the legs underneath the body approximately between rounds 5 and 6.
- S9
Sew the legs onto the body.
- S10
Tail and spots: Pin the tail onto the back of the body approximately between rounds 17 and 18.
- S11
Sew the tail onto the body.
- S12
Cut many shapes out of dark gray felt and glue or sew onto the body.
- S13
Cut the ear shapes out of light gray felt and sew or glue them into the ears.
04 · Snag listWhat went wrong on the bench, and the fix
Snag 1
Miscounting the inc3 corners
After Head Round 1, count stitches; it should read 18. If it does not, one of the two inc3 corners was worked as a plain inc instead.
Snag 2
Losing the spiral start point
Move the stitch marker up into the first stitch of every new round immediately after working it, since no slip stitch marks the join.
Snag 3
Changing color a round early or late
Work the color change on the last yarn-over of the stitch before the stated round — Head before Round 16, Tail before Round 12 — not at the start of that round.
05 · QueriesQuestions logged against this build
What size safety eyes does this giraffe use?
The materials list calls for 15 mm safety eyes. Going smaller reads as more realistic and larger as more cartoonish; either sits fine within the Head's stitch counts.
How much yarn do I need for each color?
Plan on roughly 100 g of the main color and 50-75 g each of the two accent colors. The Head, Body, Legs, and Tail carry most of the color-change yardage.
Can I skip the felt listed in the materials?
Yes, the gray felt is marked optional. It stands in for embroidered details such as nostrils if you would rather appliqué than stitch with Color C.
06 · Made byWho counted this one

Who writes Amigurumi Addict, how a build gets its number, and why every round on the site carries a stitch count.
07 · Next off the benchThree builds that sit near this one

Animals
Crochet a bunny or frog from one amigurumi base
How do you crochet a bunny and a frog from one base? Share Legs, Body, and Head; swap ears or eyes.

Animals
Amigurumi cat crochet pattern with oval muzzle and bow
How do you crochet an amigurumi cat with a flat muzzle? Shape it separately, pinch it, then sew it on.
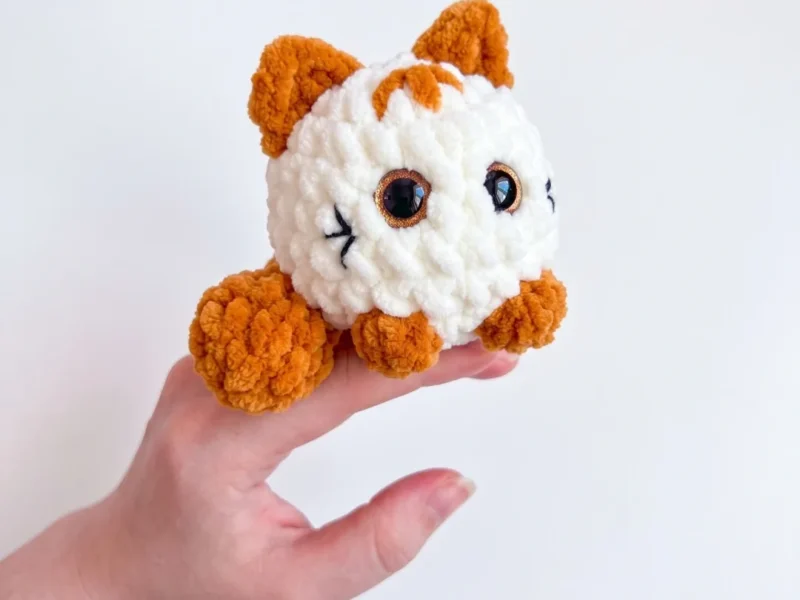
Animals
Chubby round cat amigurumi pattern with built-in ears
How do you crochet a chubby round cat amigurumi? Body, built-in ears, and tail assemble in one piece.
Join the build log
One message when a build is issued
A drawing and its parts list, when one leaves the bench.