| Shelf | Level | Time | Hook | Yarn |
|---|---|---|---|---|
| Animals | Intermediate | 4-6 Hours | 4.0 mm | Bulky |
Ray the Bull Amigurumi Crochet Pattern
Crochet Ray the Bull, a plush amigurumi with curled horns and a soft muzzle. Free pattern with clear rounds for a huggable 9-inch farmyard friend.
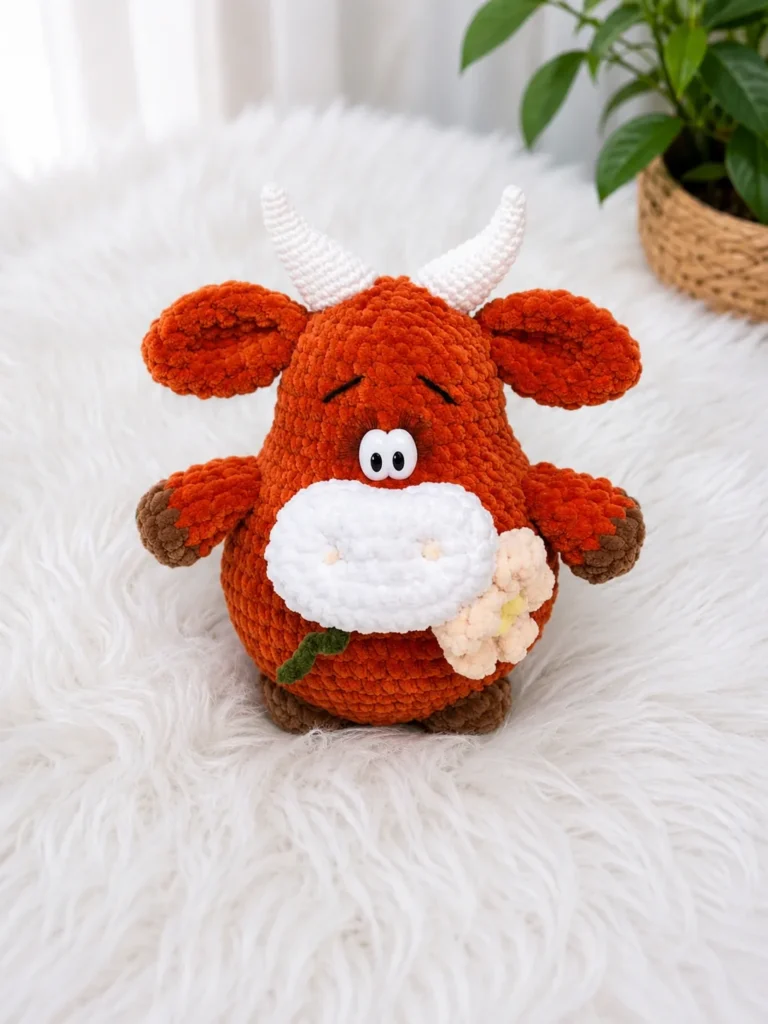
01 · The pieceWhat Ray the Bull Amigurumi Crochet Pattern actually is
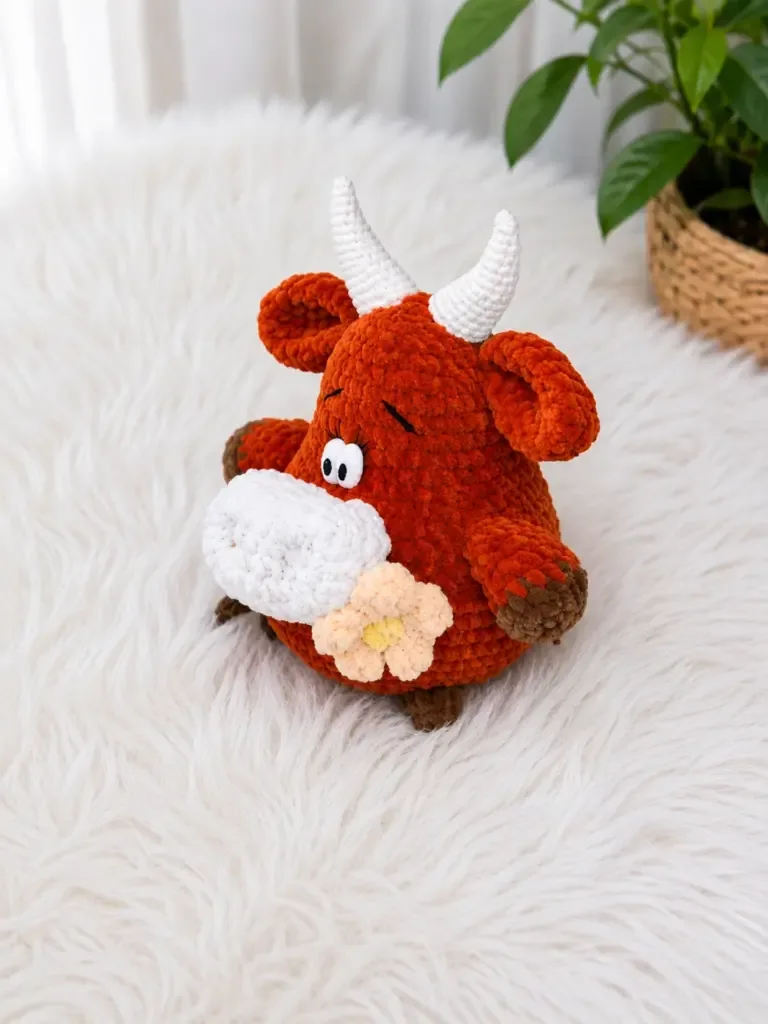
Meet Ray, a sweet little bull who trades his usual tough reputation for a soft, huggable body made entirely of plush bulky yarn. This pattern brings together a rounded body, perky ears, sturdy front and back legs, and a two-tone muzzle to create a farmyard character with real personality. He's ideal for anyone who loves animal amigurumi with a bit more structure — the horns and hooves give him a distinct silhouette that sets him apart from the usual bear-or-bunny crowd.
Finished, Ray measures approximately 23 cm (9 inches) tall, with a plush, squeezable body thanks to the bulky-weight yarn and generous fiberfill stuffing. His light muzzle and dark hooves create nice visual contrast against the main body color, and the optional decorative flower adds a playful finishing touch. He's sturdy enough for imaginative play, soft enough for cuddling, and charming enough to sit proudly on a nursery shelf or arrive as a thoughtful handmade gift.
- Start by crocheting the rounded body in a continuous spiral, shaping it with increases and decreases as you stuff it firmly.
- Work the two ears separately in shorter rounds, giving them a slightly curved, floppy shape.
- Shape the muzzle as its own small piece, worked in the lighter contrast color for a soft, rounded snout.
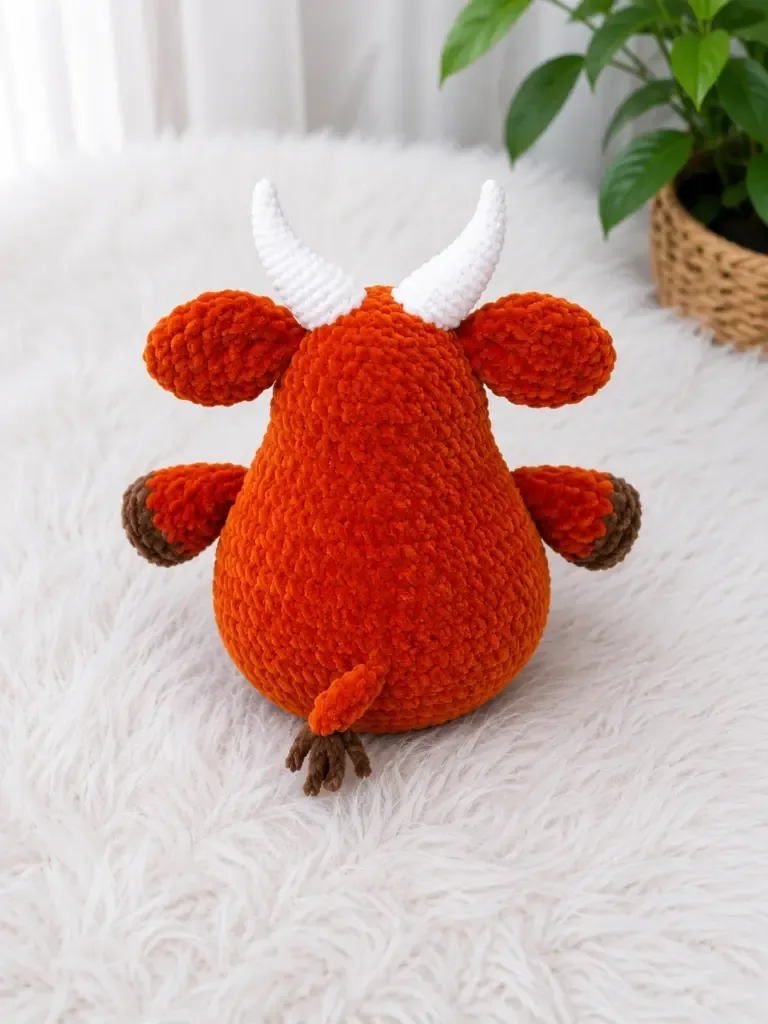
- Add the short tail piece as a simple final small component before assembly.
- Stuff every piece firmly, then sew the ears, muzzle, horns, and tail onto the body, finishing with the decorative flower detail.
02 · The count run65 rounds across 7 parts, each with its count
US terms throughout. Every row below ends with the count that round finishes on.
| Part | Qty | Finishes on |
|---|---|---|
| Body | 1 | - |
| Ears (make 2) | 1 | - |
| Arms / Front Legs (make 2) — Begin with hoof color | 1 | - |
| Muzzle | 1 | - |
| Legs / Hind Legs (make 2) — Begin with hoof color | 1 | - |
| Horns (make 2) — Use horn yarn and smaller hook (US B-1 / 2.0 mm) | 1 | - |
| Tail | 1 | - |
| Round | Instruction | Count |
|---|---|---|
| Round 1 | 6 sc in MR. (6) | - |
| Round 2 | inc in each st around. (12) | - |
| Round 3 | sc, inc repeat 6 times around. (18) | - |
| Round 4 | 2 sc, inc repeat 6 times around. (24) | - |
| Round 5 | 3 sc, inc repeat 6 times around. (30) | - |
| Round 6 | 4 sc, inc repeat 6 times around. (36) | - |
| Round 7 | 5 sc, inc repeat 6 times around. (42) | - |
| Round 8 | 6 sc, inc repeat 6 times around. (48) | - |
| Round 9 | 7 sc, inc repeat 6 times around. (54) | - |
| Round 10 | 8 sc, inc repeat 6 times around. (60) | - |
| Round 11-15 | sc in each st around. (60) | - |
| Round 16 | 8 sc, dec repeat 6 times around. (54) | - |
| Round 17 | sc in each st around. (54) | - |
| Round 18 | 7 sc, dec repeat 6 times around. (48) | - |
| Round 19 | sc in each st around. (48) | - |
| Round 20 | 6 sc, dec repeat 6 times around. (42) | - |
| Round 21 | 5 sc, dec repeat 6 times around. (36) | - |
| Round 22-25 | sc in each st around. (36) | - |
| Round 26 | 4 sc, dec repeat 6 times around. (30) | - |
| Round 27 | sc in each st around. (30) | - |
| Round 28 | 3 sc, dec repeat 6 times around. (24) | - |
| Round 29 | 2 sc, dec repeat 6 times around. (18) | - |
| Round 30 | sc, dec repeat 6 times around. (12) | - |
| Round 31 | dec 6 times around. (6)Pull the opening closed and weave the yarn tail through to the inside of the body. | - |
| Round | Instruction | Count |
|---|---|---|
| Round 1 | 6 sc in MR. (6) | - |
| Round 2 | sc, inc repeat 3 times around. (9) | - |
| Round 3 | 2 sc, inc repeat 3 times around. (12) | - |
| Round 4 | 3 sc, inc repeat 3 times around. (15) | - |
| Round 5-6 | sc in each st around. (15) | - |
| Round 7 | 3 sc, dec repeat 3 times around. (12) | - |
| Round 8 | 2 sc, dec repeat 3 times around. (9)Fold the ear in half and work 4 sc through both layers to close the bottom edge. Fold in half once more and sew the ear into its final shape. | - |
| Round | Instruction | Count |
|---|---|---|
| Round 1 | 6 sc in MR. (6) | - |
| Round 2 | inc in each st around. (12) | - |
| Round 3 | sc in each st around through BLO. Switch to body color at the end of this round. (12) | - |
| Round 4-5 | sc in each st around. (12) | - |
| Round 6 | 10 sc, dec. (11) | - |
| Round 7 | 9 sc, dec. (10)Fold flat and work 5 sc through both layers to close. Do not stuff. | - |
| Round | Instruction | Count |
|---|---|---|
| Round 1 | ch 7. Starting in the 2nd ch from hook: work 1 inc in first ch, 4 sc across, then work 4 sc into the last ch (turning the corner); continuing along the other side of the foundation chain: 4 sc, 1 inc. (16) | - |
| Round 2 | inc, inc, 4 sc, inc, inc, inc, inc, 4 sc, inc, inc. (24) | - |
| Round 3 | sc, inc twice, 4 sc, sc, inc 4 times, 4 sc, sc, inc twice. (32) | - |
| Round 4 | sc in each st around. (32) | - |
| Round 5 | dec, 14 sc repeat twice. (30) | - |
| Round 6 | sc in each st around. (30) | - |
| Round 7 | sc, dec, 9 sc, dec, 2 sc, dec, 9 sc, dec, sc. (26) | - |
Before closing, shape the nostrils by pulling the yarn tail through the muzzle to indent them. Stuff lightly.
| Round | Instruction | Count |
|---|---|---|
| Round 1 | 6 sc in MR. (6) | - |
| Round 2 | inc in each st around. (12) | - |
| Round 3 | sc, inc repeat 6 times around. (18) | - |
These small hoof bases are sewn directly to the body. Stuff lightly before closing if desired.
| Round | Instruction | Count |
|---|---|---|
| Round 1 | 4 sc in MR. (4) | - |
| Round 2 | 3 sc, inc. (5) | - |
| Round 3 | 4 sc, inc. (6) | - |
| Round 4 | 5 sc, inc. (7) | - |
| Round 5 | 6 sc, inc. (8) | - |
| Round 6 | 7 sc, inc. (9) | - |
| Round 7 | 8 sc, inc. (10) | - |
| Round 8 | 7 sc, inc, sc, inc. (12) | - |
| Round 9 | 10 sc, inc, sc. (13) | - |
| Round 10 | 11 sc, inc, sc. (14) | - |
| Round 11 | 12 sc, inc, sc. (15) | - |
| Round 12 | 13 sc, inc, sc. (16) | - |
| Round 13 | 13 sc, inc, 2 sc. (17) | - |
| Round 14 | 14 sc, inc, 2 sc. (18) | - |
| Round 15 | 15 sc, inc, 2 sc. (19) | - |
| Round 16 | 15 sc, inc, 3 sc. (20)Fasten off and stuff the horns firmly before sewing to the head. | - |
| Round | Instruction | Count |
|---|---|---|
| Round 1 | ch 10. | - |
| Round 2 | Starting in the 2nd ch from hook, work 9 hdc along the foundation chain.Fasten off, leaving a sewing tail. Using the hoof color yarn, attach a small tassel to the end of the tail. | - |
03 · Putting it togetherHow the pieces go together
- S1
Sew the muzzle onto the lower front of the body , centering it and using the yarn tail in a whipstitch. Pull through to create the nostril indentations before fully closing.
- S2
Attach the safety eyes above the muzzle. Apply craft glue to secure the lashes to the backs of the eyes.
- S3
Embroider eyebrows above the safety eyes using the horn yarn or a coordinating color.
- S4
Sew the ears onto the upper sides of the head, positioning them symmetrically on either side.
- S5
Sew the horns onto the top of the head, between and slightly behind the ears.
- S6
Sew the arms onto the upper sides of the body at the shoulder position, angling them slightly forward.
- S7
Sew the hind legs onto the lower sides of the body, positioning them so Ray sits or stands stably.
- S8
Sew the tail onto the back of the body at the lower center.
- S9
Optionally glue or sew a small decorative flower near the mouth or on one ear.
- S10
Weave in all remaining ends.
04 · Before it goes to a childWhat has to be right, and what is allowed to drift
- 💡 Keep two hook sizes on hand — the US G-6 / 4.0mm for the body, muzzle, ears, arms, legs, and tail, and the US B-1 / 2.0mm specifically for the horns.
- 💡 Since every part is worked in a continuous spiral, a stitch marker in the first stitch of each round is non-negotiable for keeping your round count accurate.
- 💡 Stuff the body and limbs in stages as you crochet, packing fiberfill firmly into the lower rounds before you close them off to avoid a saggy finished shape.
- 💡 When working the hoof color change on the arms and legs, weave in yarn tails as you go rather than leaving them all for the end — bulky yarn tails can be bulky to hide later.
- 💡 Because the main pattern uses bulky plush yarn and the horns use a smooth worsted-weight yarn, expect a visible texture contrast — this is intentional and helps the horns read clearly.
- 💡 Before attaching the small decorative flower, decide whether you want it at the mouth or on an ear, and try both placements with a pin first to see which suits your Ray best.
- 💡 This pattern is written in US crochet terminology.
- 💡 Gauge is not critical for this project — consistent tension is more important than a specific measurement. Using the recommended hook and yarn should yield a finished toy of approximately 23 cm (9 inches).
05 · Snag listWhat went wrong on the bench, and the fix
Snag 1
Losing track of rounds because joins
Place a stitch marker in the first stitch of every round and move it up as you go — this is essential since the body, muzzle, and limbs are worked without joining.
Snag 2
Visible bumps or holes at decrease
Use the invisible decrease technique (working through the front loops only of the next two stitches) instead of a standard decrease to keep the surface smooth and rounded.
Snag 3
Under-stuffing the body and limbs
Stuff firmly and in small amounts as you go, especially before closing each shaping round, rather than trying to stuff everything at the very end.
Snag 4
Attaching the ears, horns, or muzzle
Pin all face and head pieces in place with stitch markers or scrap yarn, step back to check symmetry, and adjust before sewing anything down permanently.
06 · VariantsOther ways to issue this one
Ray is wonderfully adaptable once you've got the base pattern down. For a classic look, stick with a warm brown or rust main color paired with a cream muzzle and deep espresso hooves, but don't be afraid to go bold — try a dusty lavender body with a soft pink muzzle for a whimsical, non-traditional bull, or a charcoal-and-white palette for a striking highland-cattle vibe. Brands like Bulky Fun Fur alternatives, Bernat Blanket, or Hobbii Amiguroo work beautifully for the plush main sections, while a smooth worsted like Soft or Paintbox Simply DK gives the horns crisp, defined stitch texture. If you want a mini Ray, drop to a US E-4 / 3.5mm hook for the body, muzzle, and limbs while keeping the same round counts — your stitches will simply pull tighter, shrinking the whole toy by roughly 15-20% without changing the instructions. For a bigger cuddle buddy, size up to a US H-8 / 5.0mm hook with the same bulky yarn for an extra-plush, oversized finish, adding one or two extra increase rounds to the body if you want him noticeably taller. Seasonal fans can swap the decorative flower for a tiny knit scarf around the neck in winter, or attach a small daisy chain for a spring farmyard theme. You could also make a whole mini herd — a black-and-white Ray for a dairy cow cousin, or a soft gray version with tiny felt horns for a water buffalo twist. However you customize him, keep the muzzle and hoof color contrast intact, since that two-tone detail is really what makes his face and feet read clearly as "bull" rather than generic bear.
07 · QueriesQuestions logged against this build
What yarn weight do I need for Ray the Bull?
You'll need bulky-weight plush yarn for the main color, muzzle color, and hoof color, plus a smooth light worsted or DK-weight yarn in natural or cream for the horns. Using the recommended weights keeps the proportions between the plush body and defined horns correct.
How big will the finished bull be?
Using the recommended bulky yarn and G-6 hook, Ray finishes at approximately 23 cm, or about 9 inches, tall. Exact size can vary slightly depending on your tension and how firmly you stuff him.
Do I need to join rounds as I work?
No — this pattern is worked in a continuous spiral throughout, so you should not join or slip stitch at the end of each round unless specifically instructed. A stitch marker to track your first stitch each round is highly recommended.
Original pattern: https://amistitch.com/ray-the-bull-amigurumi-free-crochet-pattern/
08 · Made byWho counted this one

Who writes Amigurumi Addict, how a build gets its number, and why every round on the site carries a stitch count.
09 · Next off the benchThree builds that sit near this one

Animals
Crochet a bunny or frog from one amigurumi base
How do you crochet a bunny and a frog from one base? Share Legs, Body, and Head; swap ears or eyes.

Animals
Crochet giraffe amigurumi pattern with horns and ears
How do you crochet a giraffe amigurumi? Shape head, body, legs, ears and horns in worsted yarn.

Animals
Amigurumi cat crochet pattern with oval muzzle and bow
How do you crochet an amigurumi cat with a flat muzzle? Shape it separately, pinch it, then sew it on.
Join the build log
One message when a build is issued
A drawing and its parts list, when one leaves the bench.