| Shelf | Level | Time | Hook | Yarn |
|---|---|---|---|---|
| Animals | Intermediate | 4-6 hours | 3 mm | Worsted |
Three-color granny square motifs for a mix-and-match set
How do you crochet granny square motifs? Work 3 color changes per round into a magic ring, join, cut, repeat.
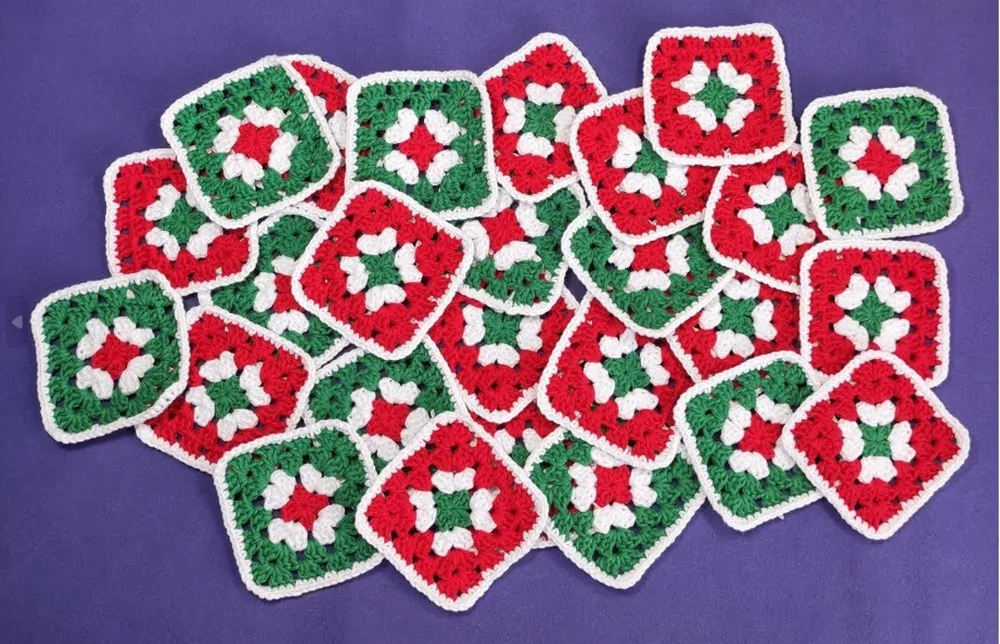
01 · The pieceWhat Three-color granny square motifs for a mix-and-match set actually is
The motif builds from the center out. A magic ring anchors the first round; four clusters of 3 double crochets, each separated by a chain-2 corner, form the square's basic geometry before the yarn is cut and a new color picked up. Each round closes with a slip stitch to the top of the starting chain-3, the join that squares off the round and gives the next color a clean edge to build from.
Tolerance is loose at the center and tighter at the corners. The magic ring can sit a little uneven under the first round's clusters without showing once later rounds cover it. The chain-2 corners are where it counts: keep them consistent round to round, since every later round's clusters land into that same corner space, and a stretched or tight chain-2 will throw the square's edges out of alignment.
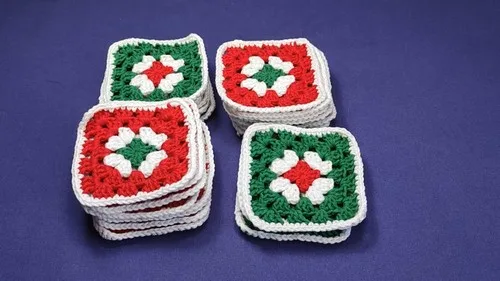
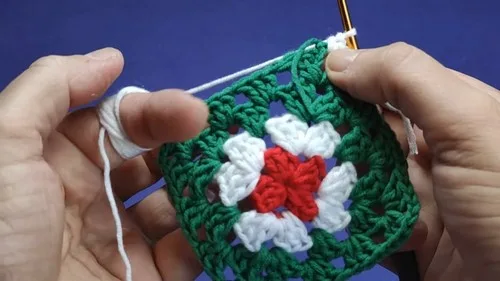
02 · The count run5 rounds across 1 part, each with its count
US terms throughout. Every row below ends with the count that round finishes on.
| Part | Qty | Finishes on |
|---|---|---|
| Main Pattern | 1 | - |
| Round | Instruction | Count |
|---|---|---|
| Round 1 | Start with a magic ring using the red color yarn. Chain 3 (counts as the first double crochet).Step by step: Make 2 double crochets into the ring. Chain 2, then make 3 double crochets into the ring. Repeat step 4 three more times, making sure you have four "clusters" of 3 double crochets separated by 2 chains each. Join with a slip stitch to the top of the beginning chain-3 to close the round, and then cut the yarn. | - |
| Round 2 | (Switch to White Yarn): Attach white yarn with a slip knot to any corner space. Chain 3 (counts as the first double crochet).Step by step: Make 2 more double crochets, 1 chain, then, in the same corner space, make another 3 double crochets. 1 chain, in the next corner space, make 3 double crochets, 2 chains, and 3 more double crochets. Repeat from * to * for remaining corners. Join with a slip stitch to the top of the beginning chain-3 and cut the yarn. | - |
| Round 3 | (Switch to Green Yarn): Attach green yarn with a slip knot to any corner space. Chain 3 (counts as the first double crochet).Step by step: Make 2 more double crochets, 1 chain, then, in the same corner space, make another 3 double crochets. 1 chain. In each space between the clusters from the previous round, make 3 double crochets. Repeat from to to the corner. In each corner space, make 3 double crochets, 2 chains, and 3 more double crochets. Join with a slip stitch to the top of the beginning chain-3. Do not cut the yarn. | - |
| Round 4 | (Continue with Green Yarn): Continue with the green yarn, chain 3 (counts as the first double crochet).Step by step: Follow the pattern as established in Round 3, increasing the sides by making 3 double crochets in each space between clusters around the square, and in each corner space make 3 double crochets, 2 chains, and 3 more double crochets. Join with a slip stitch to the top of the beginning chain-3 and cut the yarn. | - |
| Final Edging | (Switch back to White Yarn): Attach white yarn with a slip knot to any corner space.Step by step: In each corner space, make 3 single crochets. Make 1 single crochet in each stitch around the square, and 1 single crochet in each space between clusters. Once you have single crocheted around the entire square, join with a slip stitch to the beginning single crochet, chain 1, and then cut the yarn. | - |
Techniques on this build
- Magic ring
- Opens Round 1; keep the tail snug before working the first cluster so the center doesn't gap once the ring is cinched.
- Cluster stitch (3 dc groups)
- Forms each side of the square in Round 1; work all 3 double crochets into the same ring space, not spread around it.
- Corner chain-2 spacing
- Separates each cluster; uneven chain length here is what makes a square look lopsided once later rounds are added.
- Color change with cut yarn
- Happens at the join of each round; cut and rejoin cleanly at the slip stitch rather than carrying yarn, since the pattern calls for a fresh cut per round.
Final fit-up
- Weave in the tail left from the magic ring first, running it through the base of the first cluster.
- Weave in each color-change end along the round it belongs to, keeping ties inside the double crochet posts.
- Weave in the final round's join tail last, securing it at the slip stitch point.
- Trim all woven ends flush with the darning needle before setting the motif aside.
How the parts fit
- Round 1 places all four increases at once: the four 3-dc clusters are set into the magic ring in a single pass, giving the square its four corners before any further rounds are worked.
- The chain-2 between clusters, not an increase stitch, is what defines the corner; later rounds work into that chain-2 space to keep the corner square rather than curving.
- The slip-stitch join at the top of the beginning chain-3 closes each round flat and marks the point where the yarn is cut, so each round is a discrete color layer rather than a continuous spiral.
Scaling the build
| Smaller | Drop to a finer yarn with a smaller hook; the magic ring and 3-dc clusters tighten accordingly, shrinking the finished motif. |
|---|---|
| More rounds | Continue adding rounds beyond the pattern's sequence, working into each chain-2 corner as established; each added round increases the square's size while keeping the same corner structure. |
03 · Putting it togetherHow the pieces go together
- S1
Weave in all ends with a darning needle.
04 · Snag listWhat went wrong on the bench, and the fix
Snag 1
Loose magic ring center
Pull the tail tight after the first round's clusters are worked, not just after the ring is formed, since stitches can loosen it as they're added.
Snag 2
Uneven chain-2 corners
Count the two chains at each corner deliberately rather than eyeballing them; a short or long chain-2 shifts where the next round's stitches land.
Snag 3
Clusters split across ring space
Work all 3 double crochets of a cluster into the same point of the ring instead of letting them spread; check the cluster looks like one solid group before moving to the next chain-2.
Snag 4
Skipping the yarn cut between colors
Cut the yarn at each round's join as instructed rather than carrying it to the next round; carried yarn will show through the color change and pull the join tight.
05 · QueriesQuestions logged against this build
Why cut the yarn after every round instead of carrying it?
The pattern uses a fresh color change at each round's join, so cutting keeps the color block clean at the slip stitch point. Carrying the yarn would drag the previous color across the next round's stitches.
Can the 3 colors be arranged in any order?
Yes, the pattern names red for Round 1 as an example but the sequence of colors across rounds is a personal choice. Any 3 colors will follow the same construction.
Do the corners need blocking to stay square?
Light shaping by hand after weaving in ends is usually enough, since the chain-2 corners hold their angle once the rounds are joined. Heavier blocking is optional and depends on the yarn's fiber content.
06 · Made byWho counted this one

Who writes Amigurumi Addict, how a build gets its number, and why every round on the site carries a stitch count.
07 · Next off the benchThree builds that sit near this one

Animals
Crochet a bunny or frog from one amigurumi base
How do you crochet a bunny and a frog from one base? Share Legs, Body, and Head; swap ears or eyes.

Animals
Crochet giraffe amigurumi pattern with horns and ears
How do you crochet a giraffe amigurumi? Shape head, body, legs, ears and horns in worsted yarn.

Animals
Amigurumi cat crochet pattern with oval muzzle and bow
How do you crochet an amigurumi cat with a flat muzzle? Shape it separately, pinch it, then sew it on.
Join the build log
One message when a build is issued
A drawing and its parts list, when one leaves the bench.