| Shelf | Level | Time | Hook | Yarn |
|---|---|---|---|---|
| Animals | Intermediate | 4-6 Hours | 3.5 mm | Fingering/Sport |
Googly-Eyes Kitten Amigurumi Crochet Pattern
Crochet an adorable Googly-Eyes Kitten amigurumi with a one-piece body-head, 16mm safety eyes, and embroidered face details. Free pattern inside!
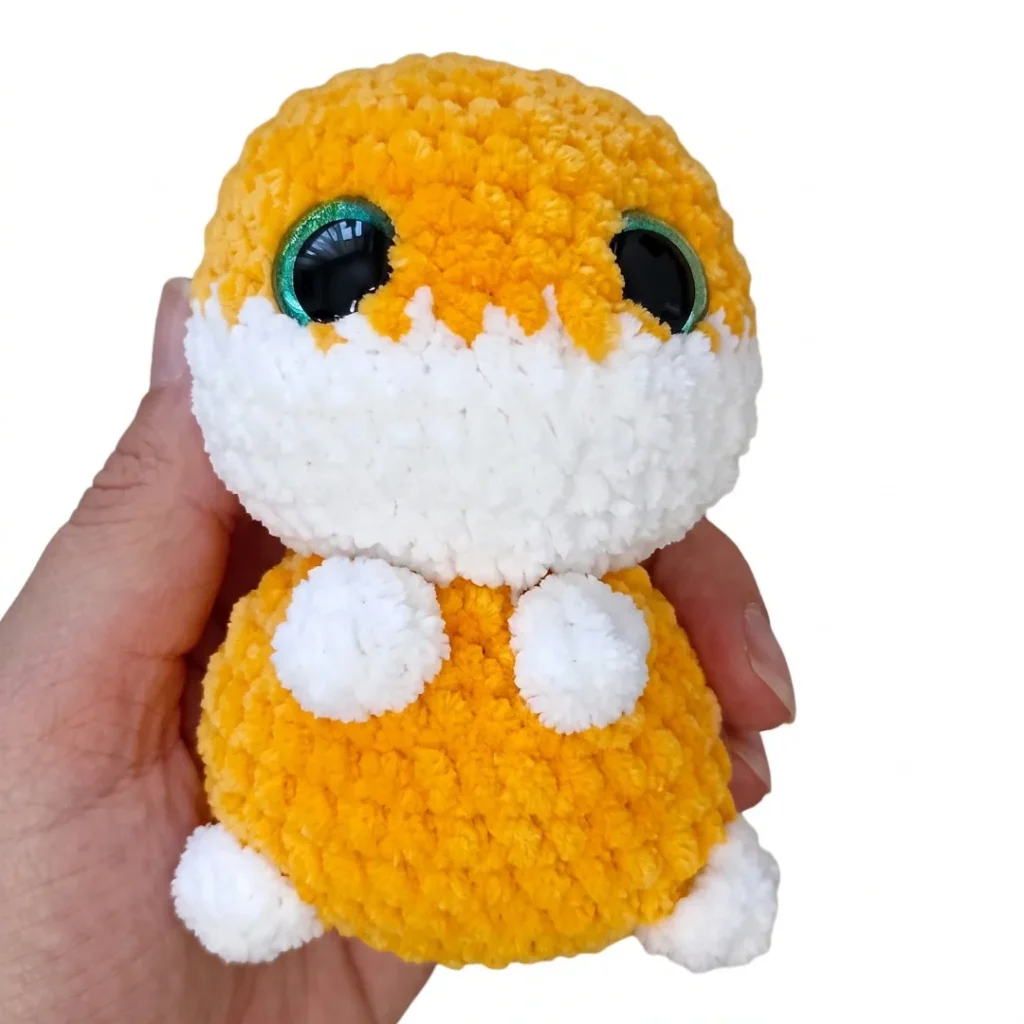
01 · The pieceWhat Googly-Eyes Kitten Amigurumi Crochet Pattern actually is
This Googly-Eyes Kitten is the kind of amigurumi that gets a reaction the moment someone sees it those oversized 16 mm eyes practically demand a double-take. Worked as a single continuous piece from tail tip to ear base, the body-head shape gives you a kitten with real presence, not just another round blob with a face stuck on. It's perfect for crocheters who want a project that feels a little different from the usual amigurumi lineup, and for anyone shopping for a gift that photographs beautifully sitting on a shelf.
The main techniques here are a continuous spiral construction, standard amigurumi increases and decreases, and a set of hand-embroidered face details eye whites, eyelids, brows, and a center muzzle line that you stitch on after the crochet is done. None of it is technically hard, but it does reward someone who's already comfortable with magic rings and stitch counting, since there's no seaming to hide small errors. Budget a relaxed evening or two: roughly 4-6 hours total, split between the 18-round body-head, the two quick 3-round ears, and the embroidery pass at the end.
The finished kitten has a compact, huggable amigurumi silhouette with a noticeably plush, dense fabric thanks to the tight gauge and firm stuffing amigurumi work demands. Those giant googly eyes give it a slightly comic, endearing expression that's very different from a realistic cat toy, closer to a beloved character than a lifelike animal. It makes a wonderful handmade gift for a cat person, a shelf-and-desk companion for yourself, or a standout addition to a craft fair table.
This pattern is written in US crochet terminology.
- Start the body-head at the tail end with a magic ring and build upward in one continuous spiral, no joins or turns.
- Increase steadily through the early rounds to shape the body, then transition smoothly into the head without any seam.
- Decrease through the final rounds to close the top of the head, leaving an opening for stuffing along the way.
- Stuff the piece firmly as you go so the finished kitten holds its shape without any fiberfill showing through.
- Crochet two small ears separately using just a few rounds each, then attach them to the head.
- Insert and secure the oversized safety eyes, test-fitting placement before locking them in permanently.
- Finish by hand-embroidering the eye whites, eyelids, brows, and center muzzle line to bring the kitten's face to life.
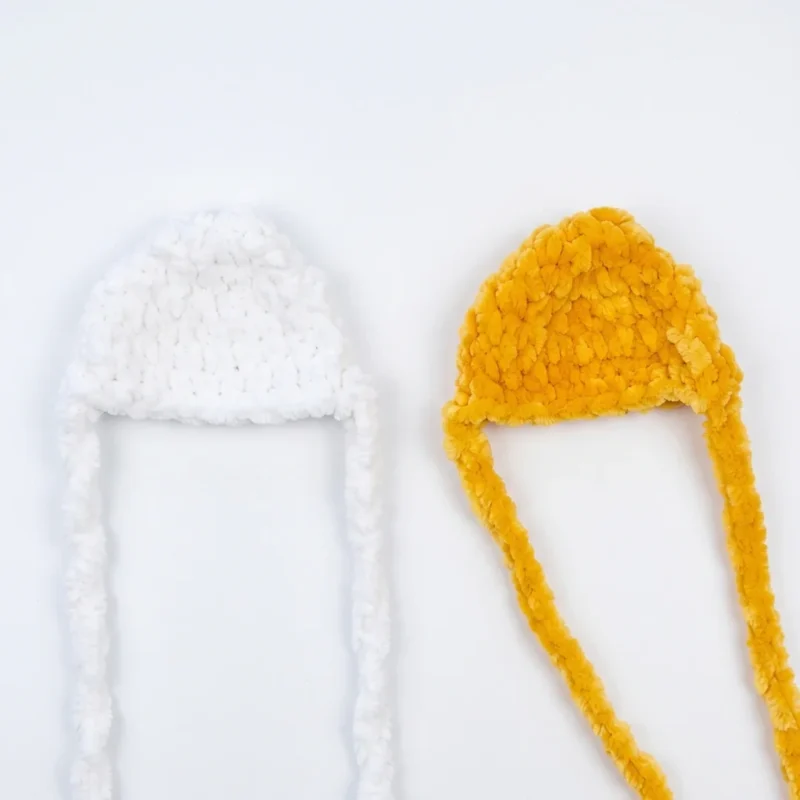
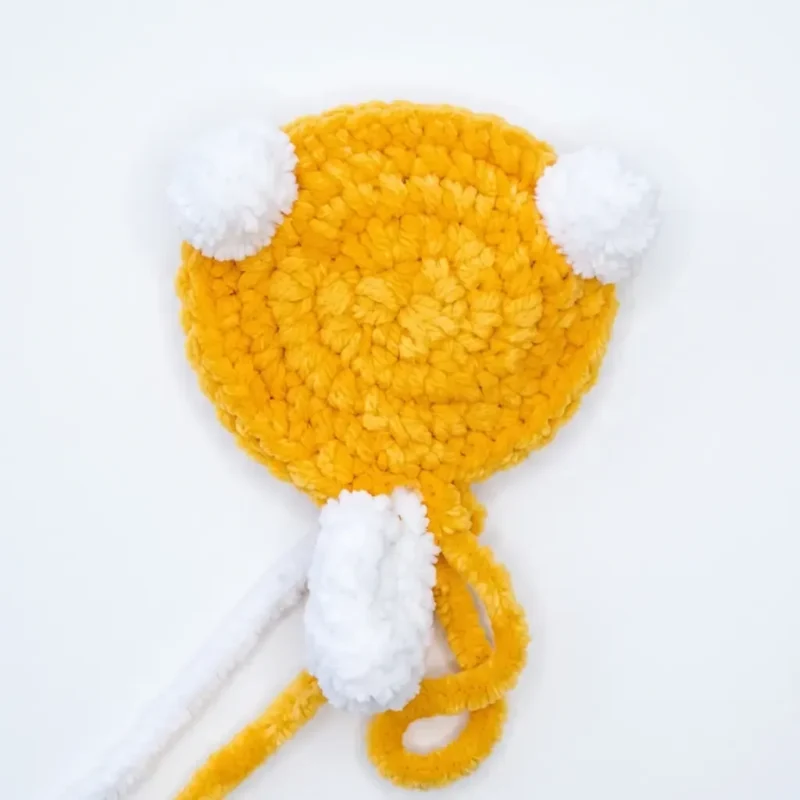
02 · The count run21 rounds across 2 parts, each with its count
US terms throughout. Every row below ends with the count that round finishes on.
| Part | Qty | Finishes on |
|---|---|---|
| Body-Head (worked as one piece) | 1 | - |
| Ears (make 2) | 1 | - |
Begin with main color yarn. The stitch marker tracks the center back throughout.
| Round | Instruction | Count |
|---|---|---|
| Round 1 | 8 sc in MR. (8) | - |
| Round 2 | inc in each st around. (16) | - |
| Round 3 | 2 sc, inc, inc, inc, inc, 4 sc, inc, inc, inc, inc, 2 sc. (24) | - |
| Round 4 | 2 sc, 1 sc, inc repeat 4 times, 4 sc, 1 sc, inc repeat 4 times, 2 sc. (32) | - |
| Round 5 | 10 sc, Front Paw (Bobble): work 4 dc into the next st with a shared top closure (bobble stitch), 10 sc, Front Paw (Bobble): work 4 dc into the next st with a shared top closure (bobble stitch), 10 sc, Tail: ch 11, then starting from the 2nd ch from hook work: 3 sl st, 3 sc, 4 hdc; continue in the round. (32 sts in the main round, not counting the tail chain) | - |
| Round 6-8 | sc in each st around. (32) (3 rounds) | - |
| Round 9 | 7 sc, dec, 14 sc, dec, 7 sc. (30) | - |
| Round 10 | 3 sc, dec repeat 2 times, 2 sc, Back Paw (Bobble): work 4 hdc into the next st with a shared top closure (bobble stitch), dec, 2 sc, Back Paw (Bobble): work 4 hdc into the next st with a shared top closure (bobble stitch), dec, 3 sc, dec repeat 2 times. (24) | - |
| Round 11 | 2 sc, dec repeat 6 times. (18) | - |
| Round 12 | 1 sc, dec repeat 6 times. (12) | - |
Stuff the body firmly before continuing. If you are making a two-tone muzzle, switch to your contrast color now for Rounds 13–17.
| Round | Instruction | Count |
|---|---|---|
| Round 13 | (BLO): inc in each st around. (24) | - |
| Round 14 | 1 sc, inc repeat 12 times. (36) | - |
| Round 15-17 | sc in each st around. (36) (3 rounds) | - |
| Round 18 | 9 sc, 1 sc, dec repeat 6 times, 9 sc. (30) | - |
| Round 19-21 | sc in each st around. (30) (3 rounds)Insert 16 mm safety eyes between Rounds 19 and 20, with 3–4 stitches between them. Secure the washers firmly on the inside. | - |
| Round 22 | 3 sc, dec repeat 6 times. (24) | - |
| Round 23 | 2 sc, dec repeat 6 times. (18) | - |
| Round 24 | dec 9 times. (9)Add any remaining stuffing to the head now, making it firm and even. Close the opening by drawing the yarn needle through the front loops of the remaining 9 stitches and pulling tight. | - |
Worked flat in turned rows. Foundation chain is worked separately.
Foundation: ch 8. Starting from the 2nd ch from hook, work 7 sc. Ch 1, turn.
| Round | Instruction | Count |
|---|---|---|
| Round 1 | Starting from the 2nd ch from hook: dec, 3 sc, dec. Ch 1, turn. (5) | - |
| Round 2 | Starting from the 2nd ch from hook: dec, 1 sc, dec. Ch 1, turn. (3) | - |
| Round 3 | Starting from the 2nd ch from hook: work a 3-stitch decrease (insert hook through all 3 remaining sts and close together). (1)Fasten off. Leave a yarn tail of 20–30 cm for sewing. Thread the short starting tail onto a needle and weave it down through the ear to hide it. | - |
03 · Putting it togetherHow the pieces go together
- S1
Face Sculpting: Thread a long strand of yarn onto your tapestry needle. To create the eye socket indentations, run the needle through the head at the following sequence of points (refer to your own reference points T1–T6 around the eye area): enter at Point 3, exit at Point 1, re-enter at Point 2, exit at Point 4. Pull gently to create a slight indentation. Tie off with 2 secure knots. Using the same yarn, run the needle from Point 5 to Point 6 to shape the center muzzle bridge. Tie off with 2 knots. Bury all ends inside the head.
- S2
Sew the Ears: Position each ear between Rounds 18 and 22 on either side of the head, with approximately 4 stitches between the two ears at the center. Use the long yarn tail and a whipstitch to sew each ear securely in place. Weave in ends inside the head.
- S3
Embroider the Face: Using white embroidery thread or thin white yarn, embroider the eye whites around the safety eyes. Add eyelids and brows using a contrasting color. Embroider or draw the center muzzle dividing line.
- S4
Attach the Nose: Glue a small plastic nose button to the center of the muzzle, or embroider a nose shape in a contrast color.
- S5
Weave in all remaining ends.
04 · Before it goes to a childWhat has to be right, and what is allowed to drift
- 💡 Use an E-4/3.5 mm hook, or size down until your fabric is dense and firm amigurumi needs a tighter gauge than garment crochet to keep the fiberfill fully hidden.
- 💡 Keep one stitch marker moving up the center back of the piece every single round; since the body-head is worked in a continuous spiral, this is your only reliable way to know where each round starts and ends.
- 💡 If you're adding the optional contrasting muzzle color for Rounds 13-17, weave in your color-change tail ends as you go rather than saving them all for the finish, since the muzzle area has multiple short color runs.
- 💡 Stuff the body-head gradually as you complete each section rather than waiting until all 18 rounds are done overstuffing at the very end can distort the shape and make the final decrease rounds hard to close neatly.
- 💡 Don't lock your 16 mm safety eyes into place until you've test-fit them from a few angles the oversized googly look depends entirely on getting the spacing and height right for this specific kitten shape.
- 💡 Have your embroidery thread or thin contrasting yarn ready before you finish the ears; stitching the eye whites, eyelids, brows, and center muzzle line goes faster if you're not hunting for supplies mid-embroidery.
- 💡 This pattern is written in US crochet terminology gauge is not critical for amigurumi, but your fabric must be tight enough that stuffing does not show through, and stitch counts are given in parentheses at the end of each round.
05 · Snag listWhat went wrong on the bench, and the fix
Snag 1
Losing track of the spiral
Place your stitch marker in the very last stitch of Round 1 and move it up into the last stitch of every subsequent round without fail this is what tracks your 'center back' seam line and keeps the whole 18-round body-head aligned.
Snag 2
Working the gauge too loose
Swap to a hook one size smaller than you'd normally use for that yarn weight (the pattern calls for E-4/3.5 mm) and test a small swatch; you want a firm, dense fabric with no visible gaps between stitches.
Snag 3
Under-stuffing the head area before
Stuff firmly and evenly as you go rather than all at once at the end use small pieces of fiberfill and check the shape against a mirror or photo reference before you finish decreasing.
Snag 4
Placing the 16 mm safety eyes too close
Insert the eye posts but don't lock the washers yet; hold the piece at arm's length and adjust spacing and height until the expression looks right, then secure permanently.
Snag 5
Embroidering the eye whites, eyelids
Attach and lock the safety eyes first, then use them as your anchor points when embroidering the surrounding white, eyelid, and brow details so everything is proportioned correctly.
06 · VariantsOther ways to issue this one
The easiest swap is color: try a classic orange tabby in a warm amber main color with cream for the muzzle contrast rounds (13-17), or go dramatic with a jet-black body and bright white muzzle for a tuxedo-cat vibe. For a calico look, work random-length color changes across the body rounds using leftover fingering or sport weight scraps from your stash Scheepjes Catona or 24/7 Cotton both work beautifully at this gauge. If you want a fluffier, wilder-eyed effect, size up to a lighter worsted weight yarn and a 4.0-4.5 mm hook, which will produce a slightly larger kitten than the pattern's default E-4/3.5 mm gauge just remember to keep tension tight enough that stuffing doesn't peek through. For a mini version to make as a keychain or ornament-style piece, drop down to a fine fingering or lace weight with a 2.5 mm hook and use smaller 9-10 mm safety eyes instead of the 16 mm pair, scaling the overall kitten down while keeping the same 18-round body-head and 3-round ear structure. Seasonal fans can lean into holiday palettes without adding new rounds: a red-and-white muzzle contrast reads festive, while pastel lavender or mint with a white muzzle gives a whimsical, almost candy-colored kitten perfect for spring gifting. If you love the googly-eye concept but want a different animal entirely, this same one-piece construction and embroidery approach translates well to a puppy or bunny simply adjust your ear shaping and add a few extra rounds for longer ears or a fluffier tail.
I adore this pattern because the body-head is worked as one continuous piece there's no separate head to sew on later, no lumpy neck seam to fuss with. You just keep spiraling from the magic ring all the way up, moving your stitch marker along the center back, and suddenly you're holding a kitten shape. The 16 mm safety eyes are the showstopper for me; they're deliberately oversized, and popping them into place is the moment this project goes from 'cute crochet blob' to 'personality.' I also love that the muzzle area invites a contrasting color in Rounds 13-17, so you get to make a small design decision that changes the whole look. And the embroidery step at the end genuinely is where you make it yours white eye whites, colored eyelids, brows, that little center muzzle line. It's forgiving, satisfying handwork after all the counting. Two quick 3-round ears finish things off fast, so you're not stuck making four fiddly pieces. This is the kind of pattern I hand to friends who say they're 'ready for something a bit more than a basic ball.'
07 · QueriesQuestions logged against this build
What size are the safety eyes used for this pattern?
The pattern calls for one pair of 16 mm safety eyes, which is deliberately oversized to create the signature 'googly-eyed' look. You can size down for a subtler expression, but the larger eyes are really what defines this design.
Can I skip the contrasting muzzle color?
Yes, the contrasting color for the muzzle area in Rounds 13-17 is listed as optional. Working the entire body-head in a single main color still produces a complete, adorable kitten.
Is this pattern good for a first amigurumi project?
It's better suited to someone who already knows magic rings, increases, decreases, and continuous spiral crocheting, since there's no seam to hide mistakes. A beginner who has made at least one simple amigurumi before should be able to follow along comfortably.
Why is my stitch marker so important for this pattern?
Because the body-head is worked in one continuous spiral with no joining slip stitches, the marker is the only way to track where each of the 18 rounds begins and ends. It also marks the center back seam line, which helps keep the piece's shaping symmetrical.
Original pattern: https://amigurumiarts.com/googly-eyes-kitten-amigurumi-free-crochet-pattern/
08 · Made byWho counted this one

Who writes Amigurumi Addict, how a build gets its number, and why every round on the site carries a stitch count.
09 · Next off the benchThree builds that sit near this one

Animals
Crochet a bunny or frog from one amigurumi base
How do you crochet a bunny and a frog from one base? Share Legs, Body, and Head; swap ears or eyes.

Animals
Crochet giraffe amigurumi pattern with horns and ears
How do you crochet a giraffe amigurumi? Shape head, body, legs, ears and horns in worsted yarn.

Animals
Amigurumi cat crochet pattern with oval muzzle and bow
How do you crochet an amigurumi cat with a flat muzzle? Shape it separately, pinch it, then sew it on.
Join the build log
One message when a build is issued
A drawing and its parts list, when one leaves the bench.