| Shelf | Level | Time | Hook | Yarn |
|---|---|---|---|---|
| Animals | Intermediate | 6-8 Hours | 2 mm | Sport |
Eeyore Amigurumi Crochet Pattern – Free Donkey Plush Tutorial
Crochet a sweet Eeyore amigurumi with this free pattern featuring a droopy tail, floppy ears, and cozy blue yarn. Perfect for Pooh fans!
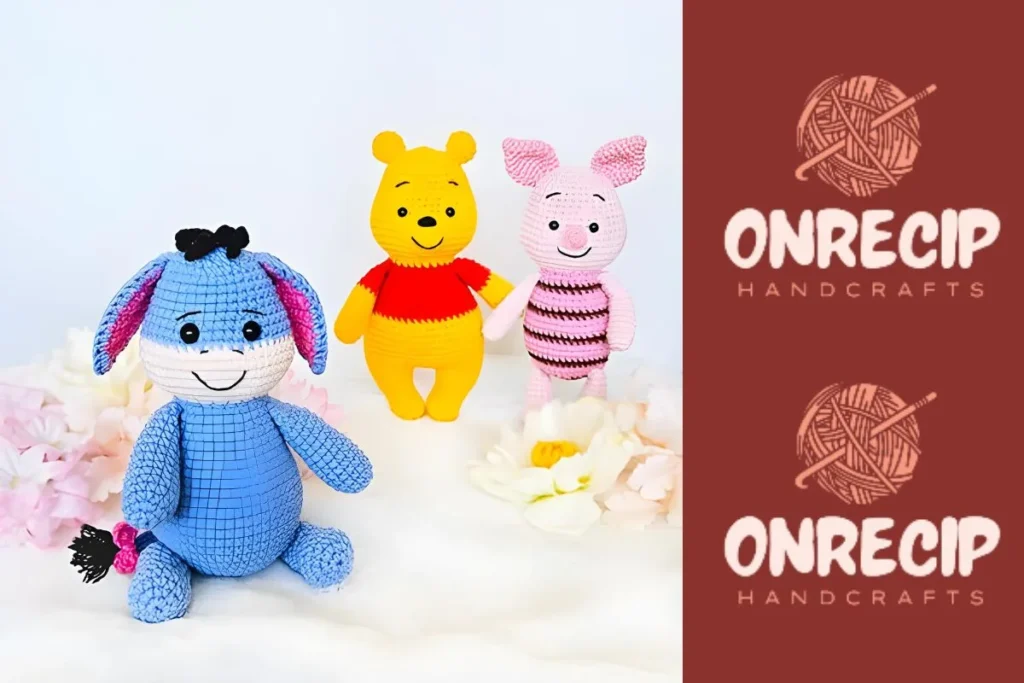
01 · The pieceWhat Eeyore Amigurumi Crochet Pattern – Free Donkey Plush Tutorial actually is
This pattern brings everyone's favorite gloomy-but-lovable donkey to life in soft sport-weight yarn. Eeyore's droopy ears, subtle pink accents, and that signature knotted tail make him instantly recognizable to any Winnie the Pooh fan. He's perfect for nursery shelves, gift baskets for new babies, or as a nostalgic treat for adult collectors who grew up with the Hundred Acre Wood gang. Whether displayed solo or lined up with Pooh and Piglet, Eeyore adds a quietly charming, huggable presence to any room.
You'll work through the body, two arms, two legs, and ears using continuous rounds of single crochet with strategic increases and decreases to shape his rounded muzzle and sturdy little legs. Color changes between the blue and beige sections require some tidy yarn management, and the black thread embroidery for his facial details adds a nice finishing touch. Expect this project to take a solid weekend, especially if you're new to juggling multiple color sections within one amigurumi.
The finished Eeyore lands in classic amigurumi scale — small enough to cuddle in one hand, sturdy enough to sit upright on a shelf. His soft sport-weight yarn body has a plush, huggable feel that's gentle on little hands, while the 7mm safety eyes and embroidered details give him real personality. He makes a heartfelt handmade gift for baby showers, Pooh-themed nurseries, or anyone who needs a small dose of Eeyore's grumpy comfort in their life.
- Begin each limb and body piece with a magic ring, building up in continuous rounds of single crochet.
- Shape the two arms over six quick rounds, keeping the stitches tight for a clean finished look.
- Work the two legs over ten rounds, increasing early on to create sturdy little donkey feet.
- Build the body across twenty rounds, using increases and decreases to form the rounded muzzle and back.
- Crochet the ears separately over six rounds each, shaping them to curve softly for that classic droopy look.
- Add the mane and tail pieces to give Eeyore his signature scruffy topknot and knotted tail.
- Stuff each piece firmly but evenly before closing, checking shape and symmetry as you go.
- Assemble the arms, legs, and ears onto the body, then finish with embroidered eyes and mouth using black thread.
02 · The count run45 rounds across 6 parts, each with its count
US terms throughout. Every row below ends with the count that round finishes on.
| Part | Qty | Finishes on |
|---|---|---|
| Arms (Make 2) | 1 | - |
| Legs (Make 2) | 1 | - |
| Body | 1 | - |
| Ears | 1 | - |
| Mane | 1 | - |
| Tail | 1 | (2) |
Crochet with blue yarn.
Stuff only 2/3 of the arm.
Step by step: Start crocheting with the beige yarn; Stuff as you go; 21 inc (42).
| Round | Instruction | Count |
|---|---|---|
| Round 1 | 6 sc into a magic ring (6) | - |
| Round 2 | 6 inc (12) | - |
| Round 3 | (5sc,inc)*2 (14) | - |
| Round 4-13 | 14 sc (10 rounds)Step by step: 54 sc (3 rounds). | - |
| Round 15 | 12 sc | - |
| Round 16 | Fold the arm in half and crochet 6 sc through both sides. Fasten off and cut the yarn, leaving a tail for sewing.Step by step: Change the yarn to blue color. | - |
We’ve completed the arms, now it’s time to crochet the legs.
Crochet with blue yarn. Stuff as you go.
| Round | Instruction | Count |
|---|---|---|
| Round 1 | 6 sc into a magic ring (6) | - |
| Round 2 | 6 inc (12) | - |
| Round 3 | (sc,inc)*6 (18) | - |
| Round 4-5 | 18 sc (2 rounds) | - |
| Round 6 | 3sc, 6 dec, 3sc (12) | - |
| Round 7 | 12 sc | - |
| Round 8 | (3sc,inc)*3 (15) | - |
| Round 9-12 | 15 sc (4 rounds) | - |
| Round 13 | (3sc,dec)*3 (12) | - |
| Round 14 | 6 dec (6)Step by step: Make sure that the head is stuffed firmly; Close the opening and hide the yarn inside. | - |
Crochet with blue yarn. Stuff as you go.
| Round | Instruction | Count |
|---|---|---|
| Round 1 | 6 sc in a MR (6) | - |
| Round 2 | 6 inc (12) | - |
| Round 3 | (sc,inc)*6 (18) | - |
| Round 4 | sc, inc, (2sc,inc)*5, sc (24) | - |
| Round 5 | (3sc,inc)*6 (30) | - |
| Round 6 | 2sc, inc, (4sc,inc)*5, 2sc (36) | - |
| Round 7 | (5sc,inc)*6 (42) | - |
| Round 8 | 3sc, inc, (6sc,inc)*5, 3sc (48) | - |
| Round 9 | (7sc,inc)*6 (54) | - |
| Round 10-15 | 54 sc (6 rounds) | - |
| Round 16 | (7sc,dec)*6 (48) | - |
| Round 17 | 48 sc | - |
| Round 18 | 3 sc, dec, (6sc,dec)*5, 3sc (42) | - |
| Round 19 | 42 sc | - |
| Round 20 | (5sc,dec)*6 (36)Step by step: 36 sc (4 rounds) Insert the safety eyes between rounds 9 and 10 with 6st between them; There must be 4 stitches visible. | - |
| Round 21-22 | 36 sc (2 rounds) | - |
| Round 23 | 2sc, dec, (4sc,dec)*5, 2 sc (30) | - |
| Round 24-25 | 30 sc (2 rounds) | - |
| Round 26 | (3sc,dec)*6 (24)Step by step: sc,dec,(2sc,dec)*5,sc (18); (sc,dec)*6 (12). | - |
| Round 27 | (5sc,dec)*3 (21)Stuff the body firmly, especially in the neck. | - |
Crochet two pieces with pink yarn and two pieces with blue yarn. Crochet in turning rounds.
| Round | Instruction | Count |
|---|---|---|
| Round 1 | 2 sc into a magic ring (2) | - |
| Round 2 | ch 1, turn, sc, inc (3) | - |
| Round 3 | ch 1, turn, sc, inc, sc (4) | - |
| Round 4 | ch 1, turn, inc, 2sc, inc (6)Rnd 5-10. ch 1, turn, 6sc (6 rounds) | - |
| Round 11 | ch 1, turn, dec, 2sc, dec (4) | - |
| Round 12-14 | ch 1, turn, 4 sc (3 rounds) For the pink pieces: Fasten off and cut the yarn. For the blue pieces: Don’t cut the yarn. Put a blue and a pink piece together (the blue piece should be towards you) and crochet sc-c around the ear through both pieces.Fasten off and cut the yarn, leaving a long tail for sewing. Sew the ears to the sides of the head between rounds 16 and 17. Sew them down a few rows in the back so they don’t stick out. | - |
Crochet with the black yarn.
Make chain 9 and crochet on it: Slst, 4 sc (starting in the second chain from the hook).
Make a slst and crochet: (Chain 6: slst, 4 sc (on the chain): slst in the next stitch)*3 Fasten off and cut the yarn, leaving a long tail for sewing.
Sew the main to the top of the head.
You can also make mane from yarn pieces and sew it to the head.
| Round | Instruction | Count |
|---|---|---|
| Round 1 | Make chain 16 with the blue yarn and crochet on it 15 sc (starting in the second chain from the hook). Fasten off and cut the yarn, leaving a long tail for sewing.Make a tassel with the black yarn and separate the threads with a comb. Sew it to the tail’s end. | (15) |
| Round 2 | Crochet a ribbon with the pink yarn: Make a magic ring (or chain 2) and crochet in it: (3 ch, 2 dc, 3 ch, slst)*2. | (2) |
| Round 3 | Tighten the magic ring, fasten off and cut the yarn leaving a tail for sewing.Wrap the yarn around the bow tie a few times. Make a knot. | - |
Designer: marizzatoys
03 · Before it goes to a childWhat has to be right, and what is allowed to drift
- 💡 Use a 2mm hook consistently throughout — sizing up even slightly will leave gaps in the fabric that let stuffing show through, especially on the smaller arm and ear pieces.
- 💡 Keep separate small yarn bobbins or butterfly wraps for your blue 15, pink 42, and beige 05 so you're not constantly cutting and rejoining yarn mid-round.
- 💡 Place a locking stitch marker at the start of every round for the 20-round body — it's easy to lose your place on a piece this long without one.
- 💡 Stuff firmly but evenly as you go, adding small amounts every few rounds rather than trying to stuff the whole piece at the very end.
- 💡 Save the black thread embroidery for last, after the head is attached to the body, so you can eyeball the final expression in context.
- 💡 Weave in ends from color changes as you finish each section rather than saving them all for the end — it makes assembly much less overwhelming.
04 · Snag listWhat went wrong on the bench, and the fix
Snag 1
Losing track of round counts during the 20-round body, causing the shaping to look uneven.
Use a stitch marker in the first stitch of every round and move it up as you go — this is essential for a piece this long.
Snag 2
Overstuffing the small 6-round arms and ears, causing them to bulge or lose their shape.
Stuff these smaller pieces lightly and evenly with small pinches of fiberfill, checking the shape against the body before closing the seam.
Snag 3
Placing the black thread embroidery for the eyes and mouth before the head is fully assembled and stuffed.
Always embroider facial features after stuffing and attaching the head to the body, so you can adjust placement based on the final, filled shape.
Snag 4
Skipping gauge checks with the tiny 2mm hook, resulting in loose stitches where stuffing peeks through.
Work a quick test swatch first, and size down your hook if your stitches look at all gappy — tight, dense stitches are essential for amigurumi.
Snag 5
Attaching the 7mm safety eyes without first testing placement using pins.
Insert removable stitch markers or pins where you think the eyes should go, sit the head next to the body, and adjust before locking the safety eyes in permanently.
05 · QueriesQuestions logged against this build
What yarn weight does this Eeyore pattern use?
This pattern calls for sport weight yarn, specifically YarnArt Jeans in blue 15, bright pink 42, and beige 05. Any sport weight yarn with similar yardage will work as a substitute if you can't find this exact brand.
How big is the finished Eeyore amigurumi?
a 2mm hook and sport weight yarn, this Eeyore comes out to a classic small amigurumi size, roughly palm-sized. Sizing up to a worsted weight yarn and larger hook will produce a noticeably bigger finished piece.
Do I need embroidery skills for the face?
You'll need basic comfort with simple straight and satin stitches using black thread for the eyes and mouth details. It's a beginner-friendly embroidery step, not full facial sculpting, so a little practice on scrap fabric first can help build confidence.
Why does this pattern use a 2mm hook with sport yarn?
The smaller hook size relative to the yarn weight creates a tight, dense fabric that prevents stuffing from poking through the stitches. This is standard practice in amigurumi and is especially important for smaller pieces like the arms and ears.
Can I skip the mane and tail sections?
The mane and tail are part of what gives Eeyore his signature silhouette, so skipping them would change his look significantly. That said, if you're short on time, you could simplify the tail to a basic tassel while keeping the rest of the pattern intact.
Original pattern: https://onrecip.com/winnie-the-pooh-eeyore-amigurumi-free-pattern/
06 · Made byWho counted this one

Who writes Amigurumi Addict, how a build gets its number, and why every round on the site carries a stitch count.
07 · Next off the benchThree builds that sit near this one

Animals
Crochet a bunny or frog from one amigurumi base
How do you crochet a bunny and a frog from one base? Share Legs, Body, and Head; swap ears or eyes.

Animals
Crochet giraffe amigurumi pattern with horns and ears
How do you crochet a giraffe amigurumi? Shape head, body, legs, ears and horns in worsted yarn.

Animals
Amigurumi cat crochet pattern with oval muzzle and bow
How do you crochet an amigurumi cat with a flat muzzle? Shape it separately, pinch it, then sew it on.
Join the build log
One message when a build is issued
A drawing and its parts list, when one leaves the bench.