| Shelf | Level | Time | Yarn |
|---|---|---|---|
| Animals | Intermediate | 4-6 Hours | Bulky (Plush Yarn) |
Cute Kitten Plush Amigurumi Free Pattern
Make an adorable kitten plush with this free amigurumi crochet pattern using plush yarn, safety eyes, and simple rounds—perfect for gifting or cuddling.
01 · The pieceWhat Cute Kitten Plush Amigurumi Free Pattern actually is
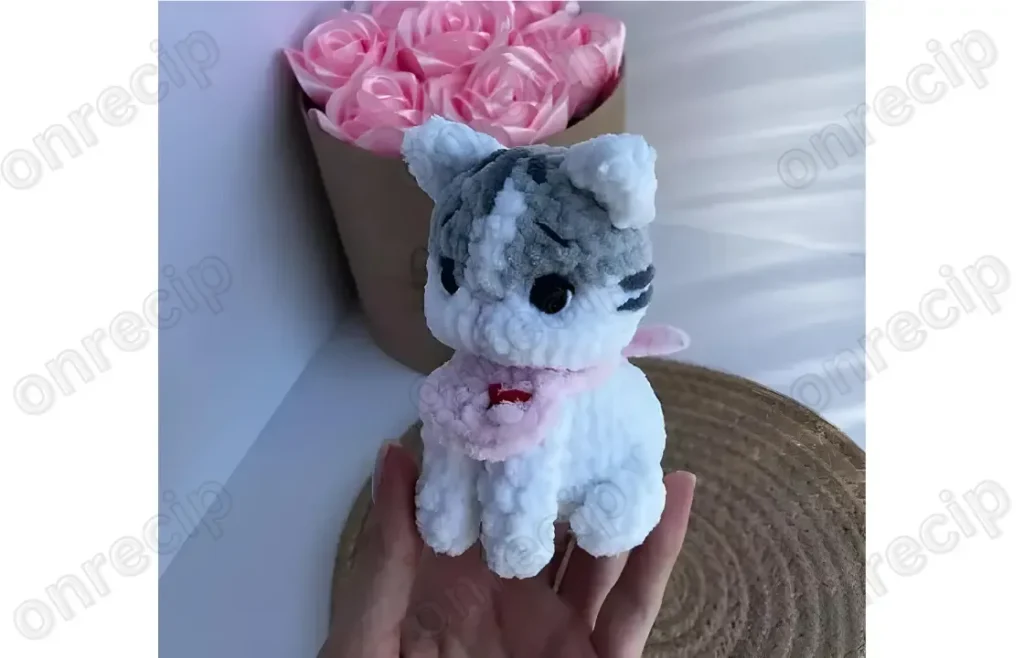
This Cute Kitten plush amigurumi is the kind of pattern that makes you want to drop everything and start crocheting right now. Worked up in irresistibly soft plush yarn, this little kitten has that squishy, huggable texture that's become so popular in the amigurumi world. It's perfect for cat lovers, nursery decor, or anyone who wants a quick handmade gift that looks far more polished than the time invested actually required.
The main body comes together over twelve rounds, giving you a compact project that moves quickly without sacrificing that adorable amigurumi shape. Expect to work with plush yarn's slightly fuzzy texture, which behaves a little differently than smooth cotton but creates that signature velvety finish once stuffed. This is a great next-step project if you've made a round or two of amigurumi before and are ready to work with a fluffier yarn type and add embroidered facial details.
Once stuffed and finished, you'll have a small, soft kitten with a rounded, plush body, safety eyes, and a hand-embroidered face that gives it real personality. The plush yarn texture makes it especially inviting to touch and hold, which is exactly what you want in a toy meant for snuggling. Whether it ends up on a shelf, in a child's arms, or wrapped up as a gift, this little kitten brings a lot of charm for a relatively small amount of crochet.
- Start with a magic ring to form the base of the kitten's rounded body shape.
- Increase steadily through the early rounds to widen the body into its plump, rounded form.
- Work several rounds even, without increasing, to build up the height and volume of the body.
- Begin decreasing in the later rounds to curve the shape inward toward the top.
- Stuff the body firmly in stages as you approach the final closing rounds.
- Close the top of the piece and weave in the ending yarn tail securely.
- Insert the toy eyes at the appropriate spot before fully closing and stuffing the head area.
- Embroider the nose and mouth with cotton thread to give the kitten its finished, expressive face.
02 · The count run12 rounds across 1 part, each with its count
US terms throughout. Every row below ends with the count that round finishes on.
| Part | Qty | Finishes on |
|---|---|---|
| Main Pattern | 1 | - |
| Round | Instruction | Count |
|---|---|---|
| Round 1 | 8 sc in KA (8) | - |
| Round 2 | 8 pr (16) | - |
| Round 3 | 16 pr (32)4-8th rows: 5 rows of 32 sc each (32) | - |
| Round 9 | (1 sc, 1 ub) x 6, 14 sc (26) | - |
| Round 10 | (1 sc, 1 ub) x 4, 14 sc (22) | - |
| Round 11 | 10 ub, 2 sc (12) | - |
| Round 12 | 12 pr (24) | - |
| Round 13 | (1 sc, 1 pr) x 12 (36)14-15th rows: 2 rows of 36 sc each (36) | - |
| Round 16 | 18 sc, 6 ub, 6 sc (30)17-18th rows: 20 sc in a different color, 2 sc in the main color (middle of the head), 8 sc in a different color (30) | - |
| Round 19 | (3 sc, 1 ub) x 6 (24)(3 sc, 1 ub) x 4 in gray, change thread to white, 2 sc, in gray 1 sc, 1 ub, 3 sc, 1 ub | - |
| Round 20 | (2 sc, 1 ub) x 6 (18)(2 sc, 1 ub) x 4 in gray, 2 sc in white, 1 ub in gray, 2 sc, 1 ub in gray | - |
| Round 21 | (1 sc, 1 ub) x 6 (12)22nd row: 6 ub Ready to Learn More? Open the next page for Further Guidance! Pages: 1 2 | - |
03 · Before it goes to a childWhat has to be right, and what is allowed to drift
- 💡 Plush yarn can be trickier to see individual stitches in, so consider working under a bright light or near a window to keep your stitch count accurate.
- 💡 Choose a hook size slightly smaller than you'd normally use for the yarn weight — this keeps stitches tight enough that stuffing won't show through the fuzzy texture.
- 💡 Stuff firmly but in stages, adding small amounts as you complete each section rather than cramming it all in at the final round.
- 💡 Keep a locking stitch marker on round one at all times; plush yarn's texture makes it easy to lose your place, especially in low light.
- 💡 When embroidering the face, use a sharp embroidery or tapestry needle and cotton thread in a contrasting color so the features read clearly against the plush surface.
- 💡 Have your toy eyes and stuffing on hand before you start so you're not pausing mid-project to gather materials once the shape is complete.
04 · Snag listWhat went wrong on the bench, and the fix
Snag 1
Losing track of stitch count while working through the twelve rounds since plush yarn's texture makes stitches harder to see clearly.
Use a stitch marker on the first stitch of every round and recount before moving to the next round, especially during increase or decrease sections.
Snag 2
Understuffing the body, which leaves the plush kitten looking floppy rather than rounded and firm.
Stuff in small pieces as you go rather than all at once at the end, pressing firmly into the seams and corners so the shape stays even throughout.
Snag 3
Placing the toy eyes too early, before confirming spacing and symmetry.
Insert the eyes without locking the safety backs first, hold the piece at arm's length to check placement, and only secure them once you're happy with the symmetry.
Snag 4
Embroidering the face with cotton thread that's too thin or too thick relative to the plush yarn, making the features hard to see.
Test a small embroidered stitch on scrap yarn first, and choose a thread weight that contrasts enough in color and thickness to stand out against the fuzzy plush texture.
Snag 5
Working stitches too loosely into the plush yarn, causing stuffing to peek through gaps.
Go down a hook size from what feels comfortable with smooth yarn, since plush yarn's texture can hide loose tension that would otherwise be obvious.
Snag 6
Rushing the sewing of separate parts onto the main body without matching them up evenly first.
Pin or use stitch markers to hold each piece in place, check both sides for symmetry, and only sew once positioning looks correct from multiple angles.
05 · VariantsOther ways to issue this one
One of the easiest ways to make this kitten your own is through color choice — try a soft gray plush yarn for a classic tabby look, warm caramel or orange tones for a ginger kitten, or pure white with pink embroidered details for something extra sweet. Brands like Bernat Baby Blanket, Baby Alpaca Yarn, or any 'chenille-style' plush yarn work beautifully here and come in tons of shades to match your vision. If you want a calico-inspired kitten, work small sections of a contrasting color into the body rounds for patchy color blocking, changing yarn at the start of a round to keep transitions clean. For size changes, you can scale down by using a smaller hook (try a size or two below what's called for) and a lighter worsted-weight yarn instead of plush, which will shrink the overall project noticeably while keeping the same twelve-round structure intact. Going bigger works too — a bulkier plush yarn with a larger hook gives you an oversized, pillow-like kitten perfect for a nursery accent. Seasonal fans can have fun with accessories rather than altering the pattern itself: a tiny crocheted bow, a ribbon collar, or a small embroidered heart on the chest adds a personal touch without changing the stitch count. You could also experiment with the eyes — try black safety eyes for a classic look, or colorful ones for a whimsical, cartoonish kitten. For gifting, consider making a small litter of kittens in coordinating colors so they look like a family, which is a lovely idea for baby showers, birthdays, or as a matching set for siblings.
I adore how this kitten pattern lets plush yarn do all the heavy lifting when it comes to that irresistible, pettable texture — no fussy stitch definition to worry about, just soft, forgiving rounds that build up into a rounded little body. Working through all twelve rounds of the main pattern feels satisfying because the shape reveals itself so quickly; you're not staring at an endless increase round wondering when it'll end. I especially love the moment you snap in the toy eyes and start embroidering the face with cotton thread — that's when this stops being a blob of stuffed yarn and becomes a kitten with actual personality. There's something wonderfully meditative about stuffing it firmly and feeling it take on that plush, huggable weight in your hands. It's a pattern that rewards you quickly, which makes it ideal for an evening project when you want to see real progress. Plus, plush yarn is genuinely fun to work with once you get the hang of it, and the finished texture is worth every bit of the slight learning curve.
06 · QueriesQuestions logged against this build
What size hook works best with plush yarn for this kitten pattern?
A hook one size smaller than typically recommended for the yarn weight usually gives the tightest, most even stitches. This helps prevent stuffing from peeking through the fuzzy plush texture.
Can I use regular worsted weight yarn instead of plush yarn?
Yes, worsted weight yarn works fine and will give the kitten a smoother, more traditional amigurumi texture instead of the fuzzy plush look. Just be aware the finished size may be slightly smaller since plush yarn tends to be a bit thicker.
How much yarn do I need to complete the kitten?
Since this is a small, twelve-round project, one skein of plush yarn is typically more than enough for the entire body and any small additional pieces. Exact amounts vary by brand, so keep extra on hand if you plan to add accessories.
How do I attach the safety eyes securely?
Insert the eyes before stuffing the head fully, and press the backing firmly onto the post until it clicks into place. Stuffing firmly around the eye area afterward helps keep them secure and prevents wobbling.
Original pattern: https://onrecip.com/cute-kittens-plush-amigurumi-free-pattern/
07 · Made byWho counted this one

Who writes Amigurumi Addict, how a build gets its number, and why every round on the site carries a stitch count.
08 · Next off the benchThree builds that sit near this one

Animals
Crochet a bunny or frog from one amigurumi base
How do you crochet a bunny and a frog from one base? Share Legs, Body, and Head; swap ears or eyes.

Animals
Crochet giraffe amigurumi pattern with horns and ears
How do you crochet a giraffe amigurumi? Shape head, body, legs, ears and horns in worsted yarn.

Animals
Amigurumi cat crochet pattern with oval muzzle and bow
How do you crochet an amigurumi cat with a flat muzzle? Shape it separately, pinch it, then sew it on.
Join the build log
One message when a build is issued
A drawing and its parts list, when one leaves the bench.