| Shelf | Level | Time | Hook | Yarn |
|---|---|---|---|---|
| Animals | Intermediate | 4-6 hours | 4.25 mm | Worsted |
Crochet gingerbread man pattern with joined legs and body
How do you crochet a gingerbread man amigurumi? Join Legs, Head, Arms onto one Body with sc rounds.
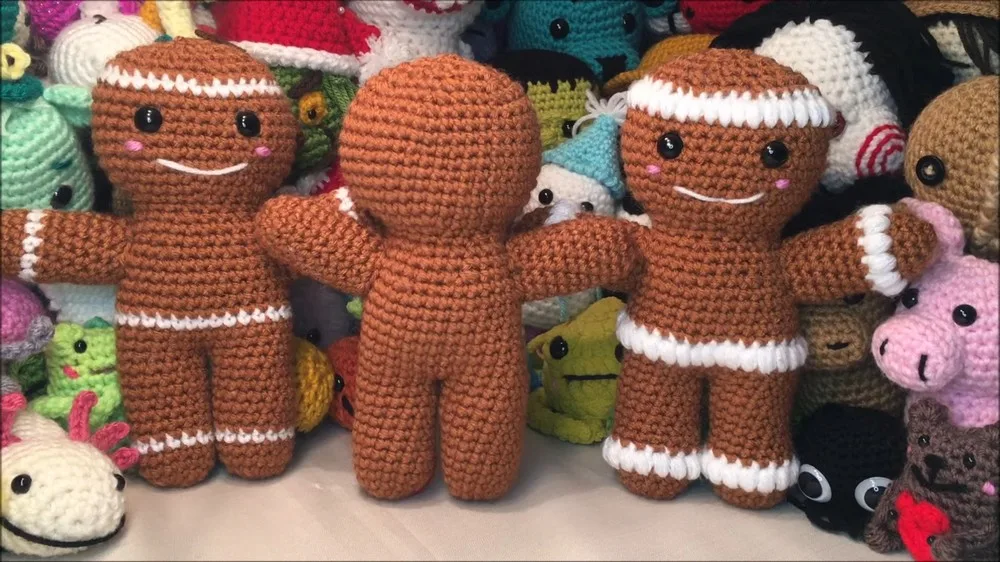
01 · The pieceWhat Crochet gingerbread man pattern with joined legs and body actually is
The gingerbread man assembles from named parts — Legs, Head, Arms, and Body — joined without external seams. Each Leg, the Head, and the Arms start as a flat ring: chain 2, single crochet into the second chain from the hook, then one increase round before working straight. The Joining Legs round is what actually holds the lower half together: it single crochets around both Leg rims in one pass, producing the 30-stitch foundation the Body continues from directly, so the legs need no separate seaming.
Precision matters most at the increase rounds and the Joining Legs round: an inc placed unevenly on the starting ring skews it oval, and a twisted Leg entering the 30-stitch join throws the Body's first round off-center. Elsewhere the margins are wider — the puff-stitch option on Leg Row 5 is cosmetic and swaps for plain sc with no effect on count, and color changes are optional throughout. Stuffing density is judged by feel rather than measurement, so a slightly firmer or softer result stays within range.
02 · The count run26 rounds across 6 parts, each with its count
US terms throughout. Every row below ends with the count that round finishes on.
| Part | Qty | Finishes on |
|---|---|---|
| Legs | 1 | - |
| Head | 1 | - |
| Arms | 1 | - |
| Joining Legs | 1 | - |
| Body | 1 | - |
| Decorations | 1 | - |
| Round | Instruction | Count |
|---|---|---|
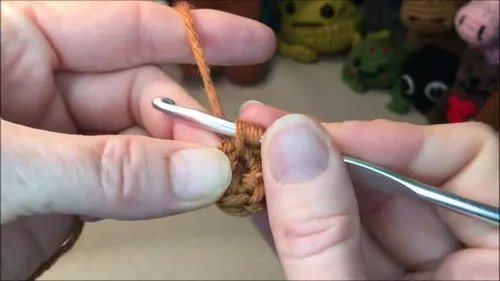
| Round 1 | ch 2 (does not count as a stitch), 10 sc in the 2nd ch from the hook. | - |
| Round 2 | 1 sc, inc, repeat around for a total of 15 stitches. | - |
| Rounds 3–4 | 15 sc around. | - |
| Round 5 | (Change color if desired) 15 sc around (or 15 puff stitches for a textured look). | - |
| Rounds 6–12 | 15 sc around (repeat 7 times for a total of 105 stitches). | - |
| Round 13 | If making the first leg, sl st in the next stitch and tie off. If making the second leg, ch 3, 3 sc, sl st in the next stitch and tie off. | - |
| Round | Instruction | Count |
|---|---|---|
| Round 1 | ch 2 (does not count as a stitch), 8 sc in the 2nd ch from the hook. | - |
| Round 2 | 1 sc, inc, repeat around for a total of 12 stitches. | - |
| Rounds 3–10 | 12 sc around. | - |
| Round 11 | Sl st in the next stitch and tie off, leaving a tail for sewing. | - |
| Round | Instruction | Count |
|---|---|---|
| Round 1 | ch 2 (does not count as a stitch), 6 sc in the 2nd ch from the hook. | - |
| Round 2 | 1 sc, inc, repeat around for a total of 8 stitches. | - |
| Rounds 3–8 | 8 sc around. | - |
| Round 9 | Sl st in the next stitch and tie off, leaving a tail for sewing. | - |
With the working yarn of the second leg, sc in the first leg under the knot where you did the sl st.
| Round | Instruction | Count |
|---|---|---|
| Round 13 | 15 sc around the first leg, then 15 sc around the second leg for a total of 30 stitches. | - |
| Round | Instruction | Count |
|---|---|---|
| Round 14 | 30 sc around. | - |
| Round 15 | 3 sc, inc, repeat around for a total of 39 stitches. | - |
| Rounds 16–21 | 39 sc around. | - |
| Round 22 | (Change color if desired) 39 sc around (or 39 puff stitches for a textured look). | - |
| Rounds 23–28 | 39 sc around. | - |
| Round 29 | 3 sc, dec (skip the next stitch), repeat around for a total of 30 stitches. | - |
| Rounds 30–33 | 30 sc around. | - |
| Round 34 | Sl st in the next stitch and tie off, leaving a tail for sewing. | - |
Eyes Attach safety eyes or embroidered eyes using yarn and a needle.
| Round | Instruction | Count |
|---|---|---|
| Mouth | Chain 5, 4 sc, ch 1, 4 sc, ch 1, 4 sc, tie off. Embroider the lips with red yarn. | - |
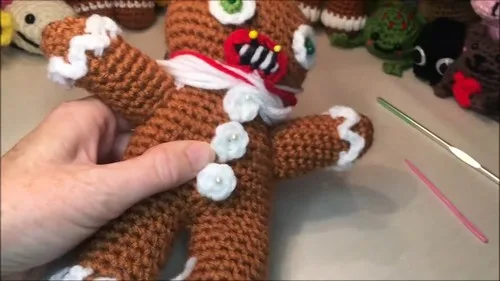
| Buttons | Chain 3, 3 sc, ch 1, 3 sc, tie off. Attach three buttons to the body. | - |
| Ripples | Starting between rows 3 and 4 from the bottom of the leg, ch 2, skip 2 stitches, sl st, ch 2, repeat around. | - |
Techniques on this build
- Chain-2 starting ring
- Opens Legs (10 sc), Head (8 sc), and Arms (6 sc) — watch that the 2nd-chain stitch count matches before moving to the increase row.
- Single crochet increase (inc)
- Row 2 of each part; one even round of inc takes Legs to 15, Head to 12, Arms to 8 — uneven spacing shows as a lump on the tube.
- Optional puff stitch
- Substitutes for plain sc on Leg Row 5 for a textured band; keep loop height uniform across all 15 stitches or the leg flares before the plain rounds resume.
- Joining two worked pieces into one round
- The Joining Legs row sc's around both Leg rims in sequence for 30 stitches total; check both Legs face the same way before starting.
Final fit-up
- Weave in the starting tails left at the chain-2 rings of Legs, Head, and Arms before assembly.
- Stuff each Leg firmly before working the Joining Legs round, then continue stuffing the Body as the remaining rounds close in.
- Close the Head at Row 11 and the Arms at Row 9 with the slip stitch and tail, cinching any remaining opening.
- Attach Head and Arms to the Body using the tails left for sewing, then set the 12mm (or 14mm) eyes.
How the parts fit
- Each part opens with its own chain-2 ring and its own starting count — 10 sc for Legs, 8 sc for Head, 6 sc for Arms — sizing the ring to the part's finished diameter before any increase happens.
- Row 2 in every part is a single dedicated increase round (10→15, 8→12, 6→8), placed immediately after the starting ring so the full working diameter is set before straight rounds begin.
- The Joining Legs round works 15 sc around the first Leg and 15 sc around the second in one continuous pass, merging two separate tubes into a single 30-stitch round that becomes the Body's starting count.
Scaling the build
| Larger | Move to a heavier yarn with a proportionally larger hook than the 4.25 mm called for; this widens each starting ring (10, 8, 6 sc) without changing any stitch count, scaling the whole figure up. |
|---|---|
| Smaller | Drop to a finer hook while keeping all stitch counts as given; the rounds pull tighter, shrinking height and width without altering the build. |
| Taller | Repeat one of the plain rounds within a part — the straight sc rounds on Legs or Arms — an extra time or two before moving on, adding length without touching the stitch counts. |
03 · Putting it togetherHow the pieces go together
- S1
Sew the legs to the body, making sure the color changes align correctly.
- S2
Sew the head to the top of the body.
- S3
Sew the arms to the sides of the body.
- S4
Add any additional decorations as desired.
04 · Snag listWhat went wrong on the bench, and the fix
Snag 1
Miscounting the increase round
Drop a stitch marker every few stitches during Row 2 so an uneven inc doesn't carry through the straight rounds that follow at 15, 12, or 8 stitches.
Snag 2
Joining Legs round worked twisted
Check both Legs sit right-side-out and upright before sc-ing around the first Leg and then the second for the 30-stitch round.
Snag 3
Losing track of round start
Since rounds are worked continuously without a slip-stitch join, mark the first stitch of each round so the tie-off points at Head Row 11 and Arms Row 9 land correctly.
Snag 4
Puff stitches worked too tall
If substituting puff stitches for Leg Row 5, keep loop height even across all 15 stitches so the tube doesn't flare before Rows 6-12 return to plain sc.
05 · QueriesQuestions logged against this build
What hook size does this pattern use?
A 4.25 mm hook is used throughout for the number 4 medium white yarn, per the materials list. The same hook carries all parts — Legs, Head, Arms, and Body.
What size eyes work for the Head?
12 mm eyes work, with 14 mm suggested for a more visible expression. They're set once the Head's rounds are complete and before final attachment.
Do the Legs need to be joined before the Body is started?
Yes — the Joining Legs round sc's around both Legs for a 30-stitch total, and that round is the Body's starting count. There's no separate seaming step for the legs.
06 · Made byWho counted this one

Who writes Amigurumi Addict, how a build gets its number, and why every round on the site carries a stitch count.
07 · Next off the benchThree builds that sit near this one

Animals
Crochet a bunny or frog from one amigurumi base
How do you crochet a bunny and a frog from one base? Share Legs, Body, and Head; swap ears or eyes.

Animals
Crochet giraffe amigurumi pattern with horns and ears
How do you crochet a giraffe amigurumi? Shape head, body, legs, ears and horns in worsted yarn.

Animals
Amigurumi cat crochet pattern with oval muzzle and bow
How do you crochet an amigurumi cat with a flat muzzle? Shape it separately, pinch it, then sew it on.
Join the build log
One message when a build is issued
A drawing and its parts list, when one leaves the bench.