| Shelf | Level | Time | Yarn |
|---|---|---|---|
| Animals | Intermediate | 4-6 Hours | Worsted |
Crochet Easy George Pig Amigurumi Pattern
Make an adorable amigurumi George Pig with this easy crochet pattern featuring a shaped head, sturdy legs, and simple joining techniques for beginners.
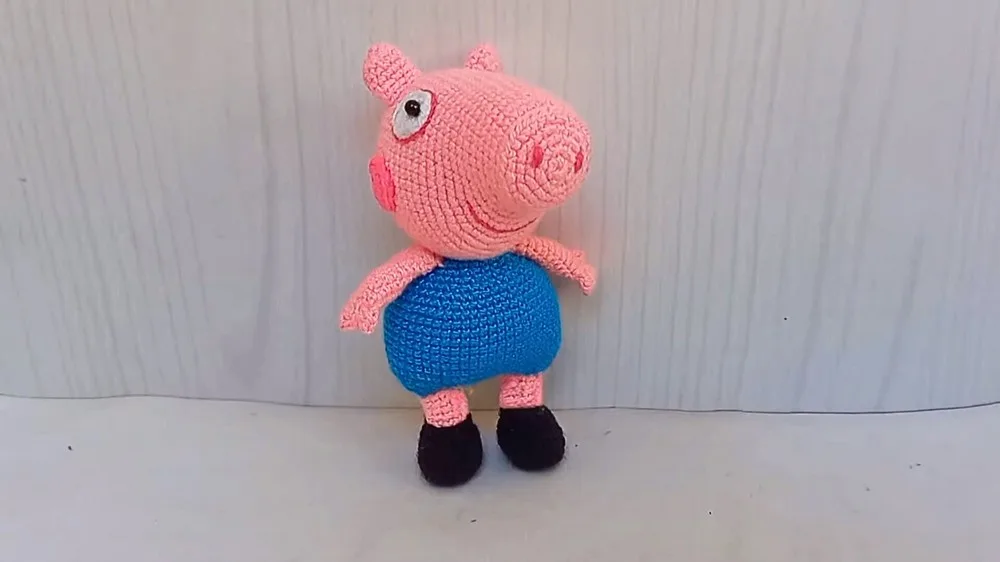
01 · The pieceWhat Crochet Easy George Pig Amigurumi Pattern actually is
This pattern brings to life George Pig, the beloved little brother everyone knows and adores, in soft huggable amigurumi form. What makes this design special is how it captures his round rosy face and stubby little legs with just pink, black, white, turquoise, and a touch of dark pink yarn. It's perfect for fans of the character, nursery decor lovers, or anyone who wants to gift a handmade toy that instantly sparks recognition and a smile from kids and adults alike.
You'll work through a 15-round head that builds up his signature rounded face, plus simple 6-round legs that get joined together using pipe cleaners for gentle poseability. Expect to use magic rings, single crochet increases and decreases, and careful color changes between rounds, plus a bit of embroidery floss work for his sweet expression. This is a comfortable intermediate project — if you've made a few amigurumi before, you'll move through it steadily in a single cozy weekend.
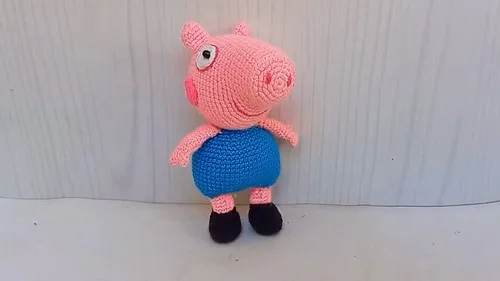
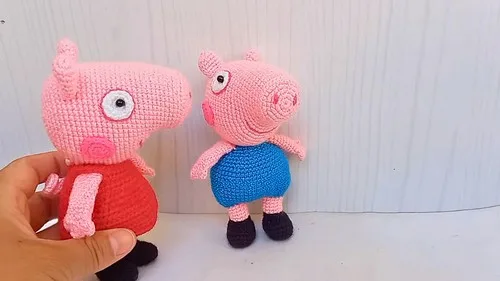
The finished George Pig comes out compact, plush, and full of personality, with a firmly stuffed head and legs reinforced with plastic canvas and pipe cleaners so he can actually stand on his own. He has that soft, huggable amigurumi feel kids love to squeeze, while still being sturdy enough to survive playtime. Whether he sits on a shelf or becomes a bedtime buddy, he makes a thoughtful, personal gift that feels far more special than anything store-bought.
- Begin with the legs, working six rounds each to form two sturdy little limbs.
- Insert plastic canvas into the base of each leg to keep the feet flat and stable.
- Shape and insert pipe cleaners into the legs before stuffing so they hold a standing pose.
- Stuff the legs firmly in small stages, working fill evenly toward the edges as you go.
- Join the legs together over eight rounds, building the base that connects into the body.
- Crochet the head across fifteen rounds, shaping the rounded face with careful increases and decreases.
- Attach small beads for the eyes and stuff the head firmly before closing it up.
- Finish with dark pink embroidery floss to stitch the nose and mouth, giving George his expression.
02 · The count run29 rounds across 3 parts, each with its count
US terms throughout. Every row below ends with the count that round finishes on.
| Part | Qty | Finishes on |
|---|---|---|
| Legs | 1 | - |
| Head | 1 | - |
| Joining the legs | 1 | - |
Ch 8, sl st in the first ch to form a ring.
| Round | Instruction | Count |
|---|---|---|
| Round 1 | Inc in each st, for a total of 18 sc. For Round 2: 3 inc, sc 5, 4 inc, sc 6, for a total of 25 sc. | - |
| Round 3 | Sc 25. For Round 4: Sc 25. | - |
| Round 5 | Sc 6, dec 6, sc 7, for a total of 19 sc. | - |
| Round 6 | Sc 2, dec 7, sc 3, for a total of 12 sc. For Round 7: Change color, sc 12 in the back loops. | - |
| Round 8 | Sl st in each st, change color, sl st in each st in the front loops. | - |
| Round 9-13 | Sc 12. | - |
Make a magic ring of 6 sc.
| Round | Instruction | Count |
|---|---|---|
| Round 2 | Inc in each st, for a total of 12 sc. Place a marker. For Round 3: 2 sc, inc, repeat 6 times, for a total of 24 sc. | - |
| Round 4 | 3 sc, inc, repeat 6 times, for a total of 30 sc. | - |
| Round 5 | Work in the back loop of each st, sc 30. For Rounds 6-8: Sc 30. | - |
| Round 9 | Sc 9, inc, repeat 3 times, for a total of 33 sc. | - |
| Round 10 | Sc 33. For Round 11: Inc 6 times, sc to marker, for a total of 39 sc. | - |
| Round 12 | Sc 39. | - |
| Round 13 | Sc, inc, repeat 6 times, sc to marker, for a total of 45 sc. For Round 14: Sc 45. | - |
| Round 15 | 2 sc, inc, repeat 6 times, sc to marker, for a total of 51 sc. | - |
| Round 16 | Sc 6, inc, repeat 3 times, sc to marker, for a total of 54 sc. For Rounds 17-28: Sc 54. | - |
| Round 29 | Sc 7, dec, repeat 6 times, for a total of 48 sc. | - |
| Round 30 | Sc 6, dec, repeat 5 times, sc 3, for a total of 42 sc. For Round 31: Sc 5, dec, repeat 6 times, for a total of 36 sc. | - |
| Round 32 | Sc 4, dec, repeat 5 times, sc 2, for a total of 30 sc. | - |
| Round 33 | Sc 3, dec, repeat 6 times, for a total of 24 sc. For Round 34: Sc 2, dec, repeat 6 times, for a total of 18 sc. | - |
| Round 35 | Sc, dec, repeat 6 times, for a total of 12 sc. | - |
| Round 36 | Dec in each st, leave a long tail for sewing. Stuff the head. | - |
With the legs still attached to the yarn, join them together by crocheting through the back loops of the corresponding stitches on each leg.
| Round | Instruction | Count |
|---|---|---|
| Round 14 | Sc 12, inc 3, sc 12, inc 3, for a total of 36 sc. | - |
| Round 15 | Sc 5, inc, repeat 6 times, for a total of 42 sc. For Round 16: Sc 6, inc, repeat 6 times, for a total of 48 sc. | - |
| Round 17 | Sc 7, inc, repeat 6 times, for a total of 54 sc. | - |
| Round 18-27 | Sc 54. For Round 28: Sc 7, dec, repeat 6 times, for a total of 48 sc. | - |
| Round 29 | Sc 6, dec, repeat 5 times, sc 3, for a total of 42 sc. | - |
| Round 30 | Sc 5, dec, repeat 6 times, for a total of 36 sc. For Round 31: Sc 4, dec, repeat 5 times, sc 2, for a total of 30 sc. | - |
| Round 32 | Sc 3, dec, repeat 6 times, for a total of 24 sc. | - |
| Round 33 | Sc 24. This is the last round. Leave a long tail for sewing. Stuff the body and legs. | - |
Sewing the head to the body: Sew the head to the top of the body, making sure to distribute the stuffing evenly.
03 · Putting it togetherHow the pieces go together
- S1
Weave in any loose ends.
- S2
Attach the pipe cleaners to the legs for stability.
- S3
Add any additional details, such as a shirt or hat, as desired.
04 · Before it goes to a childWhat has to be right, and what is allowed to drift
- 💡 Use a size 2 hook and keep your tension tight and even throughout — this keeps stitches dense enough that stuffing won't peek through, especially important on the rounded head.
- 💡 Before you start the head, sort your yarn colors and pre-cut a few lengths of dark pink for the nostril and cheek embroidery so they're ready when you reach that step.
- 💡 Place a stitch marker in the first stitch of every round on the head — with 15 rounds of shaping, it's easy to lose your place without one.
- 💡 When inserting the two small beads or pearls for eyes, position them before you finish stuffing the head completely, and use pliers to help pull thread tight through the yarn for a secure anchor.
- 💡 Stuff firmly but in stages — pack the legs solid enough to support the pipe cleaners and plastic canvas without the seams straining or the shape bulging.
- 💡 Keep your thin and thick thread and embroidery floss separated by task: thin thread for securing beads, embroidery floss for the mouth and nose details, so you're not second-guessing which to grab mid-project.
05 · Snag listWhat went wrong on the bench, and the fix
Snag 1
Starting the head's magic ring too loosely, leaving a visible hole at the very top.
Pull the tail firmly after your first round and give it an extra tug once a few more rounds are complete — check it before you move too far along since it's hard to fix later.
Snag 2
Losing track of increases and decreases across all 15 rounds of the head, causing the shape to come out lumpy or lopsided.
Place a stitch marker at the start of every round and recount your total stitches after each one before moving forward, comparing against the pattern's expected count.
Snag 3
Stuffing the head unevenly, leaving soft spots near the snout or a firm lump at the crown.
Stuff in small pinches as you go rather than all at once at the end, working the fiberfill into the edges with a pencil or chopstick so the fill is consistent throughout.
Snag 4
Skipping or rushing the plastic canvas insert in the legs, resulting in a piggy who tips over instead of standing.
Cut the plastic canvas to fit snugly inside the base of each leg before stuffing, then stuff firmly around it so the foot stays flat and weighted.
Snag 5
Inserting the pipe cleaners after the legs are already fully stuffed, making them hard to position straight.
Insert and shape your pipe cleaners first, bending the ends under, then stuff around them so they stay centered and don't poke through the yarn.
06 · VariantsOther ways to issue this one
Once you've made George in his classic pink and turquoise, there's so much room to play! Swap the pink for a soft cream or peach (like Bernat Softee Baby or Vanna's Choice in 'Blush') and turquoise for lavender to create a totally original piggy character, or make a matching set of piglet siblings in different accent colors to build a whole family. For a chunkier, faster finish, work the same round counts in a bulky weight yarn with a larger hook — you'll get a bigger, extra-squishy version perfect for a toddler's first stuffed animal, though you may want to add a round or two to the head if it looks too small relative to the legs. Going the other direction, a light worsted or DK weight with a smaller hook creates a mini keychain-sized George, though skip the plastic canvas and pipe cleaners for a project that small since they'd overwhelm the scale. Consider seasonal variations too: a tiny knit-look scarf in red for winter, a flower crown made from scrap yarn for spring, or a bandana in a fun print fabric tied around his neck for an instant personality boost. You could also experiment with the embroidery floss detailing — try a slightly different color for his nostrils or cheeks to give him a rosier, more flushed look, or add tiny eyebrow stitches for extra expressiveness. If you want to felt-proof him for heavy play, consider a cotton yarn like Lily Sugar'n Cream instead of acrylic, which will hold up beautifully to little hands and machine washing while keeping his shape crisp.
I adore how this pattern turns a handful of simple stitches into something so instantly recognizable — the moment you finish shaping that 15-round head, you'll swear George is looking right back at you! I love using the pipe cleaners and plastic canvas trick in the legs; it's such a clever, low-fuss way to give him actual stability so he can stand up on a shelf instead of flopping over like a lot of amigurumi do. The color changes between the pink body and his little turquoise details keep the project visually interesting round after round, so it never feels repetitive. Adding the beads for eyes and stitching his expression with dark pink embroidery floss at the end is my favorite part — that's the moment he really comes alive with personality. It's also just deeply satisfying to join the legs and watch a pile of separate pieces turn into a toy that can sit, stand, and be hugged. If you love amigurumi that punch above their weight in charm for the amount of yarn used, this one is an absolute treat to make.
07 · QueriesQuestions logged against this build
What yarn weight works best for this George Pig pattern?
Worsted weight acrylic yarn is recommended and pairs well with a size 2 hook for tight, even stitches. Sticking to worsted weight keeps the proportions of the head and legs true to the pattern's round counts.
Do I really need pipe cleaners and plastic canvas for the legs?
Yes, they make a big difference — the pipe cleaners give the legs poseability while the plastic canvas keeps the feet flat so George can actually stand. Skipping them results in a cuter but floppier toy.
How long does this project typically take to finish?
Most crocheters complete George Pig in about 4 to 6 hours, spread across the head, legs, joining, and final embroidery details. It's a comfortable weekend project once you're warmed up on the stitches.
What can I use if I don't have small beads or pearls for the eyes?
Small black safety eyes or even satin-stitched circles in black embroidery floss work as substitutes. Just make sure whatever you choose is securely anchored since this is a toy that may be handled often.
Is this pattern good for a first amigurumi project?
It leans intermediate because of the 15-round head shaping, color changes, and leg-joining steps, so having a couple of simpler amigurumi under your belt first is helpful. That said, a patient beginner who reads carefully can still succeed.
Original pattern: https://crocheteverything.com/crochet-easy-george-pig-pattern/
08 · Made byWho counted this one

Who writes Amigurumi Addict, how a build gets its number, and why every round on the site carries a stitch count.
09 · Next off the benchThree builds that sit near this one

Animals
Crochet a bunny or frog from one amigurumi base
How do you crochet a bunny and a frog from one base? Share Legs, Body, and Head; swap ears or eyes.

Animals
Crochet giraffe amigurumi pattern with horns and ears
How do you crochet a giraffe amigurumi? Shape head, body, legs, ears and horns in worsted yarn.

Animals
Amigurumi cat crochet pattern with oval muzzle and bow
How do you crochet an amigurumi cat with a flat muzzle? Shape it separately, pinch it, then sew it on.
Join the build log
One message when a build is issued
A drawing and its parts list, when one leaves the bench.