| Shelf | Level | Time | Hook | Yarn |
|---|---|---|---|---|
| Mini and keychains | Intermediate | 4-6 Hours | 3.5 mm | Worsted |
Crochet Chick Bunny & Totoro Swing Amigurumi Pattern
Crochet an adorable chick bunny Totoro amigurumi with this detailed pattern featuring a swing accent—perfect for car mirrors, bags, or gifting.
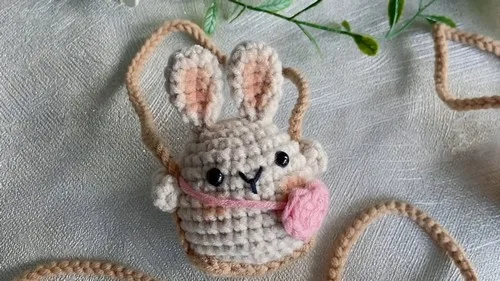
01 · The pieceWhat Crochet Chick Bunny & Totoro Swing Amigurumi Pattern actually is
This charming pattern blends three beloved characters into one huggable creation—the round softness of a chick, the long-eared sweetness of a bunny, and the whimsical charm of Totoro. With its own little swing accessory, this amigurumi is designed to dangle happily from a car mirror, backpack zipper, or nursery mobile. It's the kind of project that makes strangers smile and ask, 'where did you get that?'—perfect for crocheters who love making one-of-a-kind hybrid creatures that don't quite exist anywhere else.
You'll work through a compact six-round body, a pair of two-round arms, two sets of three-round ears, and a three-round belly panel, all worked in the round with 5-ply milk cotton yarn and a 3.5mm hook for that classic tight, no-gap amigurumi fabric. Expect to practice magic rings, single crochet increases, and careful piece assembly—this sits comfortably at an intermediate skill level, especially when attaching the ears and belly neatly. Plan for a relaxed afternoon or evening session, roughly 4 to 6 hours including stuffing and finishing touches.
When you're done, you'll have a petite, plush little companion with a soft rounded body, a contrasting belly panel, perky ears, and a swing loop ready to hang. It's small enough to tuck into a gift bag but substantial enough to feel like a real handmade treasure. Whether it ends up swaying from your rearview mirror or wrapped up for a friend who loves anything cute and quirky, this piece punches well above its size in charm.
- Start by crocheting the main body in the round, working increases over six rounds to build its rounded shape.
- Set the body aside and stitch up a single pair of arms across two quick rounds each.
- Crochet two separate ear pieces, each shaped over three rounds, so you have a matching set.
- Work the belly panel flat or in the round over three rounds to create a contrasting front detail.
- Stuff the body firmly in stages, checking the shape stays even before closing it up.
- Attach the safety eyes to the head area, positioning them evenly before securing permanently.
- Sew the arms, ears, and belly panel onto the body using a tapestry needle and matching yarn.
- Finish by attaching the swing accessory securely to the top, testing that it hangs nicely before trimming yarn tails.
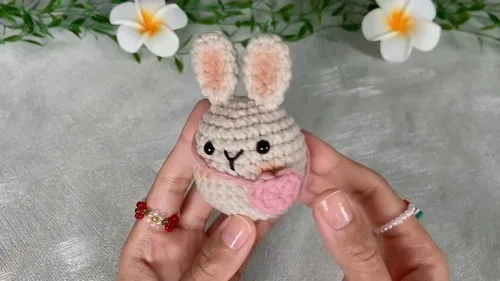
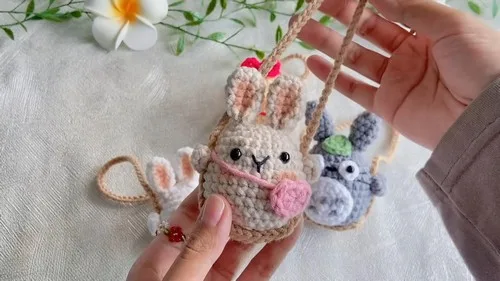
02 · The count run17 rounds across 6 parts, each with its count
US terms throughout. Every row below ends with the count that round finishes on.
| Part | Qty | Finishes on |
|---|---|---|
| Body | 1 | - |
| Arms | 1 | - |
| Ears | 1 | - |
| Ears | 1 | - |
| Belly | 1 | - |
| Swing | 1 | - |
| Round | Instruction | Count |
|---|---|---|
| Round 1 | 6 sc in magic ring After Round 2: 2 sc in each st (12 sc) | - |
| Round 3 | 1 sc, 2 sc in next st repeat 6 times (18 sc) In Round 4: 1 sc, 2 sc in next st, 1 sc repeat 6 times (24 sc) | - |
| Round 5 | 24 sc | - |
| Round 6 | 3 sc, 2 sc in next st repeat 6 times (30 sc) For Rounds 7-12: 30 sc | - |
| Round 13 | 3 sc, dec repeat 6 times (24 sc) | - |
| Round 14 | dec around (12 sc) Stuff and finish with 6 dec. | - |
| Round | Instruction | Count |
|---|---|---|
| Round 1 | 5 sc in magic ring | - |
| Round 2-3 | 5 sc Attach two arms to the body. | - |
| Round | Instruction | Count |
|---|---|---|
| Round 1 | 6 sc in magic ring | - |
| Round 2 | 1 sc, 2 sc in next st repeat 3 times (9 sc) In Rounds 3-5: 9 sc | - |
| Round 6 | 1 sc, dec repeat 3 times (6 sc) Finish off and sew the ears together slightly at the bottom to form a point.Attach the ears to the top of the chick's head. | - |
Embroider the nose and cheeks.
| Round | Instruction | Count |
|---|---|---|
| Round 1 | 4 sc in magic ring | - |
| Round 2 | 1 sc, 2 sc in next st repeat 2 times (6 sc) For Round 3: 2 sc, 2 sc in next st repeat 2 times (8 sc) | - |
| Round 4-5 | 8 sc In Round 6: dec around (4 sc) Finish off and make another ear. Attach the ears to the top of Totoro's head. | - |
| Round | Instruction | Count |
|---|---|---|
| Round 1 | 6 sc in magic ring | - |
| Round 2 | 2 sc in each st (12 sc) For Round 3: 1 sc, 2 sc in next st repeat 6 times (18 sc) | - |
| Round 4 | 18 sc Finish off and embroider five reverse smile shapes on the belly. Attach the belly to the body.Attach the eyes and ears to the body. | - |
Embroider the whiskers and nose.
Chain 11, skip 1 st, 10 sc.
Repeat this row 3 more times.
Single crochet around, increasing 2 sc in each corner.
Invisible finish off.
Chain 70 (or desired length) and attach to the opposite side of the swing.
03 · Before it goes to a childWhat has to be right, and what is allowed to drift
- 💡 Use a 3.5mm hook consistently throughout every part—body, arms, ears, and belly—to keep your gauge tight enough that stuffing won't peek through the stitches.
- 💡 Place your stitch marker in the first stitch of every round, not just at the start, so you always know exactly where each new round begins even after increases shift your stitch count.
- 💡 Since the belly panel is worked separately over three rounds, block or lightly steam it flat before sewing it on so it lies smoothly against the curved body instead of puckering.
- 💡 Stuff the body firmly but in stages—add a little, shape it with your fingers, then add more—especially important since the six-round body is your largest and most visible piece.
- 💡 Keep your yarn tails long (at least 6 inches) when finishing the arms and ears so you have plenty of length for neatly whip-stitching them onto the body later.
- 💡 Test the swing accessory's balance by hanging your finished piece before your final knot—small adjustments now prevent a lopsided hang once it's mounted in the car.
04 · Snag listWhat went wrong on the bench, and the fix
Snag 1
Losing track of increase rounds while shaping the six-round body, resulting in a lopsided sphere.
Place a stitch marker at the start of every round and count your stitches after each increase round before moving on—if the number doesn't match the pattern, unravel back to the marker and recount.
Snag 2
Working the magic ring too loosely at the start of the body, arms, or ears, leaving a visible hole at the center.
Pull the tail yarn firmly after your first round of single crochet, then give it a second tug after round two to fully close the gap before continuing.
Snag 3
Stuffing the body unevenly, causing lumps near the belly panel attachment point.
Stuff in small pinches rather than one big handful, working from the bottom up and checking the shape against a flat surface every few pinches to keep it symmetrical.
Snag 4
Sewing the two ear pieces on with mismatched angles, making the finished piece look asymmetrical.
Pin both ears in place with removable stitch markers first, step back to check they mirror each other, then sew one at a time using a tapestry needle and matching yarn.
Snag 5
Attaching safety eyes before finalizing the head shape, leading to eyes that sit too high, low, or uneven.
Insert the eyes loosely first, close the toy's opening temporarily with a stitch marker, and view it from multiple angles before snapping the safety backs on permanently.
Snag 6
Making the swing attachment too weak, causing the finished piece to droop or detach when hung.
Reinforce the swing's connection points with a few extra passes of yarn or a small amount of fabric glue at the knot, and test the hang before considering it finished.
05 · VariantsOther ways to issue this one
I adore this pattern because it takes three iconic 'cute' archetypes and mashes them into something totally new—you get the roundness of a chick, the floppy ears of a bunny, and that unmistakable Totoro whimsy all in one tiny body. Working the six-round body in 5-ply milk cotton is so satisfying because the yarn is smooth and forgiving, making your increases look crisp and even. I love that there are two separate ear pieces worked over three rounds each, so you can play with color contrast or keep them matching for a softer look. The three-round belly panel is a small but mighty detail—it's the piece that really sells the 'bunny-chick' illusion once it's stitched onto the body. And don't get me started on the swing! Adding a functional swing accessory turns this from 'just another amigurumi' into a genuinely useful car or bag accessory. It's a quick enough project to finish in a weekend, but detailed enough that you'll feel proud showing it off. This is the kind of pattern I make on repeat for gifts.
06 · QueriesQuestions logged against this build
What yarn weight works best if I can't find 5-ply milk cotton?
Any worsted-weight cotton or cotton-blend yarn will substitute well, since 5-ply milk cotton is comparable to a standard worsted weight. Just check your gauge with a 3.5mm hook and size down slightly if your stitches look loose or gappy.
Can I make this without safety eyes?
Yes, you can embroider the eyes using black yarn instead, which is actually already listed as a material for other embroidery details. This is a great substitution if the amigurumi is intended for a very young child.
How long does this pattern take to finish?
Most crocheters finish the body, arms, ears, and belly in about 4 to 6 hours, though this varies with experience. Assembly and adding the swing accessory typically adds another 30-45 minutes.
Is this pattern good for someone who has only made basic amigurumi before?
It's rated intermediate mainly because of the multiple pieces and precise assembly required to blend the chick, bunny, and Totoro features. If you're comfortable with magic rings and single crochet increases, you'll be able to follow along successfully.
How do I attach the swing so it hangs correctly?
Attach the swing piece securely to the top of the body using strong whip stitches through multiple layers of yarn, then test the hang before trimming excess tails. Reinforcing the attachment point ensures it holds up to regular movement in a car or on a bag.
Original pattern: https://crocheteverything.com/crochet-chick-bunny-totoro-tutorial-perfect-swinging-accessory-for-car/
07 · Made byWho counted this one

Who writes Amigurumi Addict, how a build gets its number, and why every round on the site carries a stitch count.
08 · Next off the benchThree builds that sit near this one
Mini and keychains
Star amigurumi keychain: a beginner’s build
How do you crochet a star amigurumi keychain? Crochet a five-pointed star from two pieces, sew and stuff them, add a

Mini and keychains
Crochet lips keychain: a two-piece amigurumi build
How do you crochet a lips keychain? Two lip pieces stuffed, closed, and seamed for a quick amigurumi gift.
Mini and keychains
How to crochet a chick keychain amigurumi
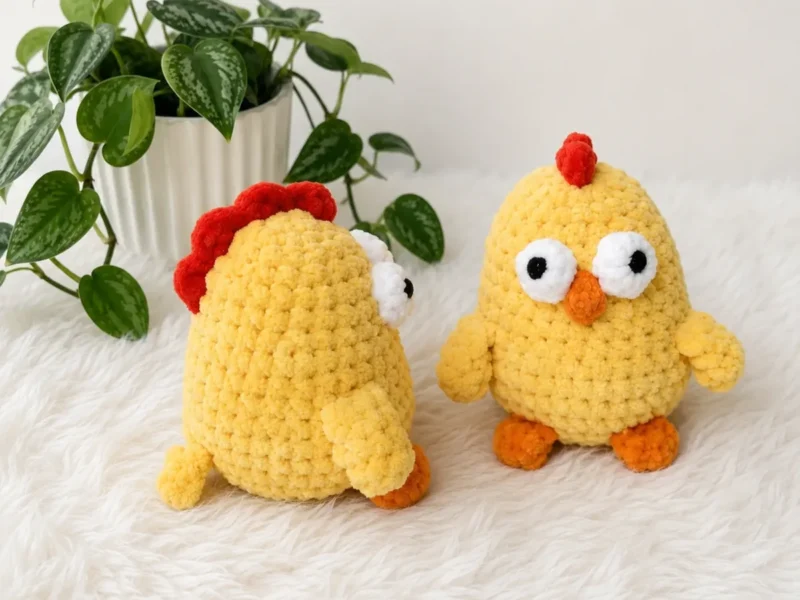
How do you crochet a chick keychain? Shape the body-head, fold the legs flat, then attach eyes and beak.
Join the build log
One message when a build is issued
A drawing and its parts list, when one leaves the bench.