| Shelf | Level | Time | Hook | Yarn |
|---|---|---|---|---|
| Animals | Intermediate | 4-6 hours | 10 mm | Worsted |
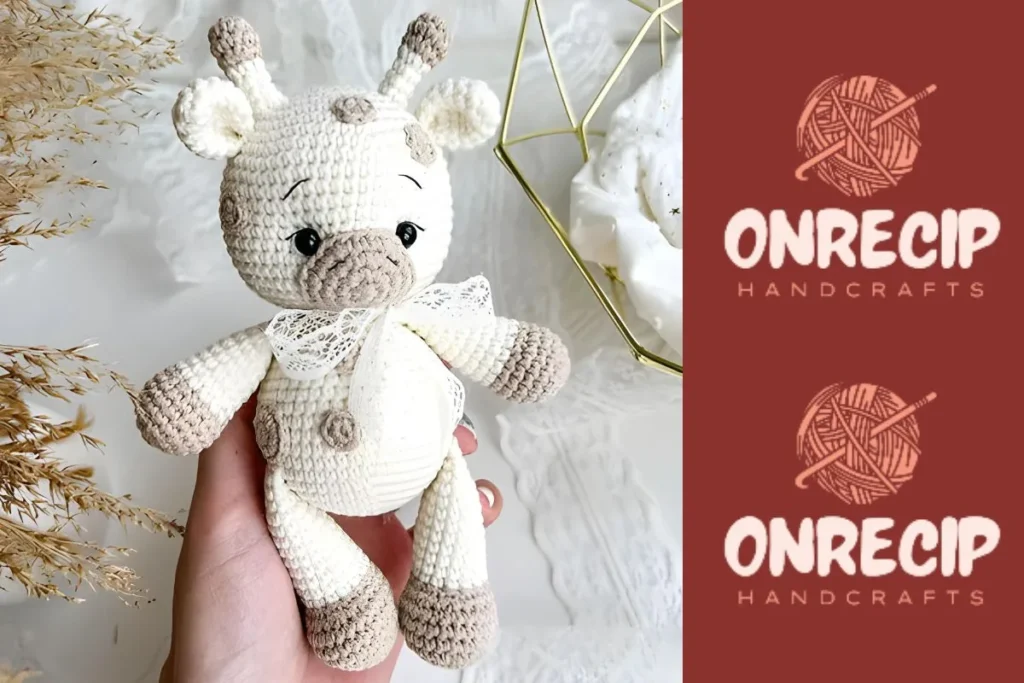
Baby giraffe amigurumi crochet pattern
How to crochet a baby giraffe amigurumi? Build head, muzzle, ears, horns, body, arms and legs, then join with safety
01 · The pieceWhat Baby giraffe amigurumi crochet pattern actually is
The build runs on eight separate part groups: one Head worked over 25 rounds, a 4-round Muzzle sewn onto the Head, two Ears at 7 rounds each, six Spots worked as a single round each, two Horns at 8 rounds each, one Body worked over 23 rounds, two Arms at 16 rounds each, and two Legs at 20 rounds each. Head carries the Muzzle sewn on between rows 15 and 16, plus embroidered facial detail. Every limb, horn, ear, and spot is made separately and attached after the fact — nothing is joined in the round as it is worked. The Body itself is assembled last, with Head sewn to it after all smaller parts are seated.
Tolerance is not even across the piece. Horn and Ear placement rows (4-6 for horns, row 8 for ears) are specified exactly, so drift there reads immediately on a small part. Muzzle position between rows 15-16 has more visual forgiveness since surrounding fiber and embroidery mask a stitch or two of shift. Leg and tail placement between rows 9-1, and handle placement at rows 21-22, tolerate similar minor variance — symmetry between the paired left/right placement matters more than exact row accuracy.
02 · The count run68 rounds across 8 parts, each with its count
US terms throughout. Every row below ends with the count that round finishes on.
| Part | Qty | Finishes on |
|---|---|---|
| Head | 1 | - |
| Muzzle | 1 | - |
| Ears (Make 2) | 1 | - |
| Spots (Make 6) | 1 | (6) |
| Horn (Make 2) | 1 | - |
| Body | 1 | - |
| Arms (Make 2) | 1 | - |
| Legs (Make 2) | 1 | - |
Yarn Art No: 03
| Round | Instruction | Count |
|---|---|---|
| Round 1 | 6 sc in MR (6) | - |
| Round 2 | 6 inc (12) | - |
| Round 3 | (1sc,inc)*6 (18) | - |
| Round 4 | (2sc,inc)*6 (24) | - |
| Round 5 | (3sc,inc)*6 (30) | - |
| Round 6 | (4sc,inc)*6 (36) | - |
| Round 7 | (5sc,inc)*6 (42) | - |
| Round 8 | (6sc,inc)*6 (48) | - |
| Round 9 | (7sc,inc)*6 (54) | - |
| Rounds 10–19 | 54 sc (10 rounds) | - |
| Round 20 | (7sc,dec)*6 (48) | - |
| Round 21 | (6sc,dec)*6 (42)We insert the eyes between 15 and 16 rows at a distance of 9 sc! | - |
We fill the part in the process of crocheting!
| Round | Instruction | Count |
|---|---|---|
| Round 22 | (5sc,dec)*6 (36) | - |
| Round 23 | (4sc,dec)*6 (30) | - |
| Round 24 | (3sc,dec)*6 (24) | - |
| Round 25 | (2sc,dec)*6 (18)Leave a long thread for sewing to the body! | - |
Yarn Art No: 87
| Round | Instruction | Count |
|---|---|---|
| Round 1 | 6 sc in MR (6) | - |
| Round 2 | 6 inc (12) | - |
| Round 3 | (1sc,inc)*6 (18) | - |
| Round 4 | (2sc,inc)*6 (24)Leave a long thread for sewing! | - |
Yarn Art No: 03
| Round | Instruction | Count |
|---|---|---|
| Round 1 | 6 sc in MR (6) | - |
| Round 2 | 6 inc (12) | - |
| Round 3 | 12 sc (12) | - |
| Round 4 | (3sc,inc)*3 (15) | - |
| Rounds 5–6 | 15 sc (15) | - |
| Round 7 | (3sc,dec)*3 (12)Fold the ear and crochet 6 sc for both walls. | - |
| Round | Instruction | Count |
|---|---|---|
| Round 1 | 6 sc in MR | (6) |
Yarn Art No: 87
| Round | Instruction | Count |
|---|---|---|
| Round 1 | 6 sc in MR (6) | - |
| Round 2 | (1sc,inc)*3 (9) | - |
| Round 3 | 9 sc (9) | - |
| Round 4 | (1sc,dec)*3 (6) | - |
We fill the part in the process of crocheting!
Change the thread color to No: 3
| Round | Instruction | Count |
|---|---|---|
| Rounds 5–8 | 6 sc (6)Leave the long end of the thread for sewing! | - |
We stuff it throughout the crochet process.
Yarn Art No: 03
| Round | Instruction | Count |
|---|---|---|
| Round 1 | 6 sc in MR (6) | - |
| Round 2 | 6 inc (12) | - |
| Round 3 | (1sc,inc)*6 (18) | - |
| Round 4 | (2sc,inc)*6 (24) | - |
| Round 5 | (3sc,inc)*6 (30) | - |
| Round 6 | (4sc,inc)*6 (36) | - |
| Round 7 | (5sc,inc)*6 (42) | - |
| Round 8 | (6sc,inc)*6 (48) | - |
| Rounds 9–14 | 48 sc (6 rounds) | - |
| Round 15 | (14sc,dec)*3 (45) | - |
| Round 16 | (13sc,dec)*3 (42) | - |
| Round 17 | (12sc,dec)*3 (39) | - |
| Round 18 | (11sc,dec)*3 (36) | - |
| Round 19 | (10sc,dec)*3 (33) | - |
| Round 20 | (9sc,dec)*3 (30) | - |
| Round 21 | (8sc,dec)*3 (27) | - |
| Round 22 | (7sc,dec)*3 (24) | - |
| Round 23 | (2sc,dec)*6 (18)Fasten and cut the thread. | - |
Yarn Art No: 87
| Round | Instruction | Count |
|---|---|---|
| Round 1 | 6 sc in MR (6) | - |
| Round 2 | 6 inc (12) | - |
| Round 3 | (1sc,inc)*6 (18) | - |
| Rounds 4–6 | 18 sc (3 rounds) | - |
| Round 7 | (4sc,dec)*3 (15)We fill the part in the process of crocheting! We change the threads color. | - |
| Rounds 8–14 | 15 sc (7 rounds) | - |
| Round 15 | (3sc,dec)*3 (12) | - |
| Round 16 | 12 sc (12)Additionally crochet 4 sc, fold and crochet 6 sc for both walls! | - |
Yarn Art No: 87
| Round | Instruction | Count |
|---|---|---|
| Round 1 | 6 sc in MR (6) | - |
| Round 2 | 6 inc (12) | - |
| Round 3 | (1sc,inc)*6 (18) | - |
| Round 4 | 1sc, inc, (2sc,inc)*5, 1 sc (24) | - |
| Rounds 5–7 | 24 sc (3 rounds) | - |
| Round 8 | 6sc, (1sc,dec)*4, 6 sc (20) | - |
| Round 9 | 5sc, 4dec, 6sc (16) | - |
We fill the part in the process of crocheting!
We change the thread color.
| Round | Instruction | Count |
|---|---|---|
| Rounds 10–18 | 16 sc (9 rounds) | - |
| Round 19 | (2sc,dec)*4 (12) | - |
| Round 20 | 12 sc (12)In addition, crochet 1 sc, fold and crochet 6 sc for both walls! | - |
Techniques on this build
- Magic ring
- Opens Head, Muzzle, Ears, Horns, Body, Arms, Legs, and Spots at Rnd 1 (6 sc in MR) — pull the tail snug before Rnd 2 or a gap shows at the crown of every part.
- Continuous stuffing
- Head and Body are stuffed throughout the crochet process rather than at the end — underfill early rounds and later rounds will overcompensate, distorting the muzzle line.
- Safety eye tightening
- Eyes are 8-10 mm on a secure mount, seated before final closure — position before committing to the muzzle sew-on, since the muzzle references rows 15-16 relative to eye placement.
Final fit-up
- Top off holofiber stuffing in the Head's and Body's final rounds and firmly in Legs and Arms, checking density matches between each pair.
- Close the last round of each Ear, Horn, Arm, and Leg with a snug cinch so no opening gaps remain at the attachment point.
- Attach in sequence: muzzle between rows 15-16 of the Head, eyes and facial embroidery, horns at rows 4-6, ears at row 8, head to body, then legs and tail at rows 9-1, and arms (handles) at rows 21-22, finishing with the sewn-on forehead and stomach spots.
How the parts fit
- Ears begin with the same 6 sc in MR opening as Head, Muzzle, and Horns, then shift to a flat increase pattern — (3sc, inc)*3 at Rnd 4 — meaning ear shaping flattens rather than continuing spherical increase, giving the disc profile needed before folding for attachment.
- Horn shaping increases only to Rnd 2 with (1sc, inc)*3 reaching 9, then decreases immediately at Rnd 4 with (1sc, dec)*3 back to 6 — a short rise-and-fall over just 8 rounds that produces the tapered cone rather than a rounded bump.
- The muzzle join sits precisely between rows 15 and 16 of the 25-round Head, meaning it lands close to the eye-insertion point — the join effectively becomes part of the Head's facial shaping rather than a separate applied piece.
Scaling the build
| Larger | Move up to Hook No: 3 or 4 with the same Yarn Art Jeans weight; stitches open up and the Head, Legs, Ears, and Horns all scale proportionally without altering the round counts. |
|---|---|
| Smaller | Drop to a hook one size below No: 2, or substitute a lighter-weight yarn at the same gauge tension; fabric tightens and the same round counts yield a more compact finished giraffe. |
| Longer legs | Repeat one of the straight sc rounds in the 20-round Legs sequence before starting the decrease rounds; this lengthens the leg without changing the stitch count at any given round. |
03 · Putting it togetherHow the pieces go together
- S1
Sew the muzzle to the head (the top of the muzzle between 15 and 16 rows).
- S2
Do eye tightening.
- S3
With a white thread we embroider the whites of the eyes, with a black thread we embroider the nose, cilia and eyebrows.
- S4
We sew the horns between 4 and 6 rows, ears – 8 rows.
- S5
Sew the head to the body.
- S6
We sew the legs and tail between the 9th and 1st rows, the handles – 21st and 22nd rows.
- S7
Sew spots on the forehead and stomach.
- S8
Designer: knit_lovers_ek
04 · Snag listWhat went wrong on the bench, and the fix
Snag 1
Stuffing Head only at the end
Add holofiber gradually as each stated stage calls for it. Waiting until closure leaves the lower rounds soft and the upper rounds overstuffed.
Snag 2
Horns mismatched between the pair
Work both Horns side by side round for round rather than finishing one fully first, so the Rnd 2 increase and Rnd 4 decrease land identically on both.
Snag 3
Eyes placed before checking muzzle spacing
Dry-fit the eye mount positions against where the muzzle will sit between rows 15-16 before tightening permanently — safety eyes cannot be repositioned once secured.
Snag 4
Ear flattening skipped or reversed
Confirm the (3sc, inc)*3 round is worked as an increase, not mistaken for a plain repeat — skipping it leaves ears domed instead of the intended flatter disc.
05 · QueriesQuestions logged against this build
Why is the Head stuffed while still crocheting instead of at the end?
Stuffing throughout the process keeps holofiber distributed evenly as the color changes between No: 87 and No: 03 progress. Filling only at closure tends to push fiber unevenly toward the last rounds, distorting the shape near the muzzle.
Do the Ears and Horns use the same starting round?
Yes, both open with 6 sc in MR at Rnd 1, but they diverge immediately after — Ears move toward a flatter increase pattern while Horns rise then taper back down by Rnd 4. The shared opening is the only point they have in common.
Where exactly do the spots go?
Spots are sewn onto the forehead and stomach as the final assembly step, after the Head, Legs, and tail are already attached. No row numbers are specified for spot placement, so position is left to visual balance rather than a fixed round.
06 · Made byWho counted this one

Who writes Amigurumi Addict, how a build gets its number, and why every round on the site carries a stitch count.
07 · Next off the benchThree builds that sit near this one

Animals
Crochet a bunny or frog from one amigurumi base
How do you crochet a bunny and a frog from one base? Share Legs, Body, and Head; swap ears or eyes.

Animals
Crochet giraffe amigurumi pattern with horns and ears
How do you crochet a giraffe amigurumi? Shape head, body, legs, ears and horns in worsted yarn.

Animals
Amigurumi cat crochet pattern with oval muzzle and bow
How do you crochet an amigurumi cat with a flat muzzle? Shape it separately, pinch it, then sew it on.
Join the build log
One message when a build is issued
A drawing and its parts list, when one leaves the bench.