| Shelf | Level | Time | Hook | Yarn |
|---|---|---|---|---|
| Animals | Intermediate | 4-6 hours | 4.00 mm | Worsted |
Crochet amigurumi unicorn with mane and jointed legs
How do you crochet an amigurumi unicorn? Build body, legs, arms and mane with basic sc rounds and a folded seam.
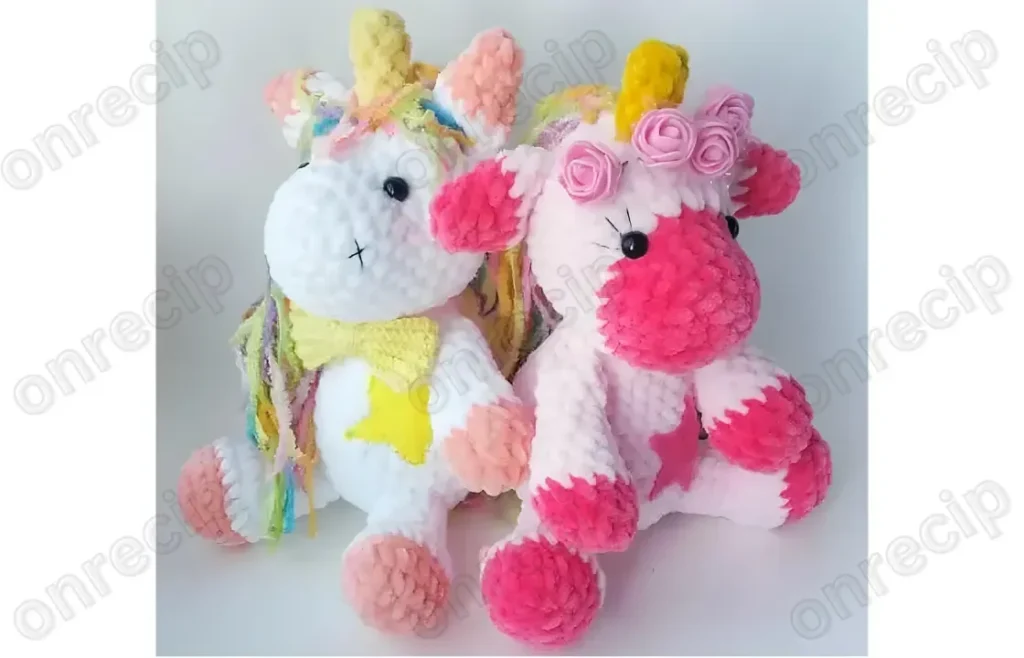
01 · The pieceWhat Crochet amigurumi unicorn with mane and jointed legs actually is
The unicorn breaks into four builds: Body, Arms, Legs, and a separate mane worked in Alize Baby Softy. Each limb is closed on its own before it meets the body, and the arm's top opening is folded flat and seamed with 3 sc through both layers rather than gathered shut. The body carries the bulk of the shaping load across its rounds, while limbs stay in flat 9-sc or 12-sc tubes once shaping ends. Safety eyes lock the head assembly before stuffing seals it.
Stitch counts in the increase rounds -- 14, 12, 9 -- need to land exactly, since a Round 2 short by one stitch throws off every round stacked on it afterward. The flat rows worked on the Arms (R8-11, 4 rows at 9 sc) are more forgiving: tension can drift slightly here because the seam at the top absorbs small irregularities. Mane placement in the softer Alize yarn is the other loose zone -- exact stitch counts matter less than even distribution along the neckline.
02 · The count run12 rounds across 18 parts, each with its count
US terms throughout. Every row below ends with the count that round finishes on.
| Part | Qty | Finishes on |
|---|---|---|
| R 2 | 1 | (14) |
| R 5 | 1 | (12) |
| R 7 | 1 | (9) |
| Legs (make 2) | 1 | (10) |
| R 2 | 1 | (22) |
| R 3 | 1 | (21) |
| R 4 | 1 | (28) |
| R 5 | 1 | (35) |
| R 10 | 1 | (30) |
| R 11 | 1 | - |
| Arms (make 2) | 1 | - |
| R 1 | 1 | - |
| R 3-4 | 1 | - |
| R 5 | 1 | - |
| R 6 | 1 | - |
| R 7-10 | 1 | - |
| Body | 1 | - |
| R 1 | 1 | - |
| Round | Instruction | Count |
|---|---|---|
| Round 1 | (inc) repeat 7 times [14] | (14) |
| Round | Instruction | Count |
|---|---|---|
| Round 1 | (5 sc, dec) repeat 2 times [12] | (12) |
| Round | Instruction | Count |
|---|---|---|
| Round 1 | (2 sc, dec) repeat 3 times [9] | (9) |
| Rounds 8–11 | 9 sc (4 rows) Stuff arm 1/2 full. Fold the top opening flat and 3 sc through both sides.Fasten off. | - |
With pink yarn: Make 5 ch.
| Round | Instruction | Count |
|---|---|---|
| Round 1 | from the 2nd ch from hook: 3 sc, 3 sc in last st, turn, on the other side: 2 sc, inc [10] | (10) |
| Round | Instruction | Count |
|---|---|---|
| Round 1 | inc, 2 sc, 3 inc, 2 sc, 2 inc [16] | (16) |
| Round 3 | 1 sc, inc, 2 sc, (1 sc, inc) repeat 3 times, 2 sc, (1 sc, inc) repeat 2 times [22]Switch to white yarn: | (22) |
| Round | Instruction | Count |
|---|---|---|
| Round 1 | (1 sc, inc) repeat 7 times [21] | (21) |
| Round | Instruction | Count |
|---|---|---|
| Round 1 | (2 sc, inc) repeat 7 times [28] | (28) |
| Round | Instruction | Count |
|---|---|---|
| Round 1 | (3 sc, inc) repeat 7 times [35] | (35) |
| Round | Instruction | Count |
|---|---|---|
| Round 1 | (5 sc, inc) repeat 5 times [30] | (30) |
| Round | Instruction | Count |
|---|---|---|
| Round 12 | (8 sc, dec) repeat 3 times [27] Ready to Learn More? Open the next page for Further Guidance! | - |
Pages: 1 2
With pink yarn:
2 ch, 7 sc in 2nd ch from hook [7]
14 sc (2 rows) Switch to white yarn:
3 sc, 8 dec, 3 sc [14]
4 sc, 3 dec, 4 sc [11]
11 sc (4 rows) Fasten off.
With white yarn:
2 ch, 7 sc in 2nd ch from hook [7]
Techniques on this build
- Magic ring or standard start into inc x7
- Opens Round 1 of several parts into the 14-stitch count seen in R2; a loose ring here shows as a gap at the center of the piece.
- Single crochet decrease (dec)
- Used repeatedly to taper the piece, as in R5 (5 sc, dec) and R7 (2 sc, dec); skipped decreases shift the final count away from the target.
- Flat rows on a closed tube
- R8-11 on the Arms works 9 sc straight for 4 rows without further shaping; watch for accidental increases where the hook catches two loops instead of one.
- Folded seam through both layers
- The Arm's top opening is folded flat and closed with 3 sc worked through both sides at once; align the fold before seaming or the arm sits crooked.
Final fit-up
- Weave in all tails from color changes between white and pink sections and from the mane yarn separately, since Alize Baby Softy behaves differently under tension than Himalaya Dolphin Baby.
- Stuff the Arms only half full as directed before folding and seaming the top opening; overstuffing here prevents the fold from lying flat.
- Close the folded Arm opening with the 3-sc seam through both sides, then fasten off and bury the tail inside the limb.
- Attach Legs, Arms, and the mane to the Body last, positioning the mane along the neckline before final placement of the 10 mm safety eyes if not already set during head assembly.
How the parts fit
- Round 2's (inc) repeat 7 times pattern spaces increases evenly around the starting ring, producing the 14-stitch base that later rounds taper down from.
- R7's (2 sc, dec) repeat 3 times reduces the piece from 12 to 9 stitches in one round, a sharper taper than R5's (5 sc, dec) step, marking a shift from shaping to a straight tube.
- R8-11 on the Arms is worked flat at a fixed 9 sc for 4 rows specifically because the opening is meant to be folded and seamed rather than closed with a standard decrease-to-close round.
Scaling the build
| Smaller | Drop to a finer baby yarn with a smaller hook than 4.00 mm; the same round counts produce a tighter, smaller finished piece. |
|---|---|
| Longer limbs | Repeat the flat 9-sc round used in R8-11 additional times before folding and seaming, adding length to the Arms without altering the stitch count. |
03 · Snag listWhat went wrong on the bench, and the fix
Snag 1
Miscounting the inc x7 start
Count stitches after Round 1 before moving on; 14 stitches confirms an even 7-repeat increase round.
Snag 2
Decrease rounds landing short or long
Mark the start of each dec repeat with a stitch marker so (5 sc, dec) or (2 sc, dec) segments stay aligned around the round.
Snag 3
Overstuffing the Arm before folding
Fill only to half as the pattern specifies; a fully stuffed arm resists folding flat and puckers at the seam.
Snag 4
Seaming the fold off-center
Line up the fold so the 3 sc pass through matching stitches on both sides, keeping the arm symmetrical when it hangs.
04 · QueriesQuestions logged against this build
Why is the Arm's top folded instead of closed with a decrease round?
The pattern keeps R8-11 flat at 9 sc so the opening stays wide enough to stuff, then closes it by folding flat and working 3 sc through both layers. This gives a flatter seam than a standard decrease-to-close top.
How full should the Arms be stuffed?
Only half full, as stated before the fold-and-seam step. Full stuffing prevents the top from folding flat for the seam.
05 · Made byWho counted this one

Who writes Amigurumi Addict, how a build gets its number, and why every round on the site carries a stitch count.
06 · Next off the benchThree builds that sit near this one

Animals
Crochet a bunny or frog from one amigurumi base
How do you crochet a bunny and a frog from one base? Share Legs, Body, and Head; swap ears or eyes.

Animals
Crochet giraffe amigurumi pattern with horns and ears
How do you crochet a giraffe amigurumi? Shape head, body, legs, ears and horns in worsted yarn.

Animals
Amigurumi cat crochet pattern with oval muzzle and bow
How do you crochet an amigurumi cat with a flat muzzle? Shape it separately, pinch it, then sew it on.
Join the build log
One message when a build is issued
A drawing and its parts list, when one leaves the bench.