| Shelf | Level | Time | Hook | Yarn |
|---|---|---|---|---|
| Animals | Intermediate | 4-6 Hours | 3.5 mm | Bulky |
Amigurumi Pickle Rick Crochet Pattern
Crochet an amigurumi Pickle Rick with bulky green yarn and a scowling DK-weight face. A fun sci-fi inspired pattern for confident amigurumi fans.
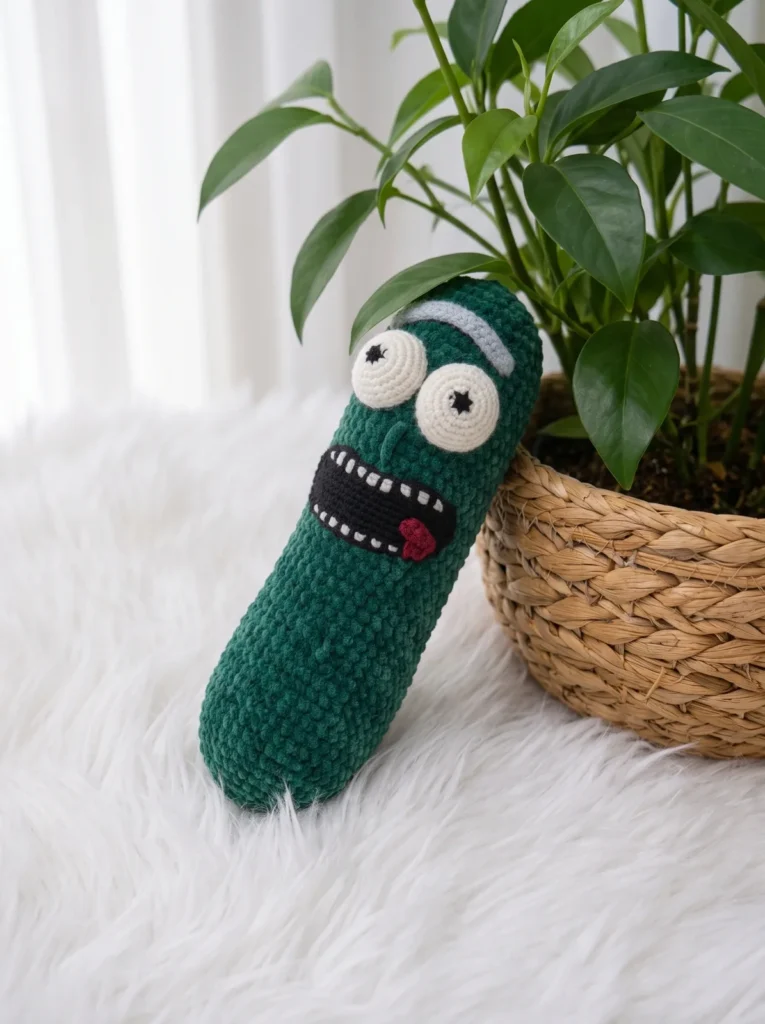
01 · The pieceWhat Amigurumi Pickle Rick Crochet Pattern actually is
This pattern turns a single skein of chunky green yarn into an unmistakably grumpy little pickle, complete with a scowling brow and a smirking mouth. It's a fun departure from the usual round-eyed amigurumi animals — the personality is built entirely through facial shaping and placement rather than color changes or fancy stitches. If you love pop-culture-inspired crochet or want a gift that will actually get a laugh out of someone, this pickle delivers.
The body works up in a continuous spiral using bulky yarn on a 3.5mm hook, with increase and decrease rounds at Rnds 26 and 31 sculpting the indented face panel that gives Pickle Rick his signature squished expression. The real technique shift happens with the face: mouth, eyes, eyebrows, and tongue are all worked separately in DK yarn on a smaller 2.5mm hook for crisp, dense stitches, then hand-sewn and embroidered on. Expect 4-6 hours total, split between quick bulky-yarn body rounds and more careful, detailed face assembly.
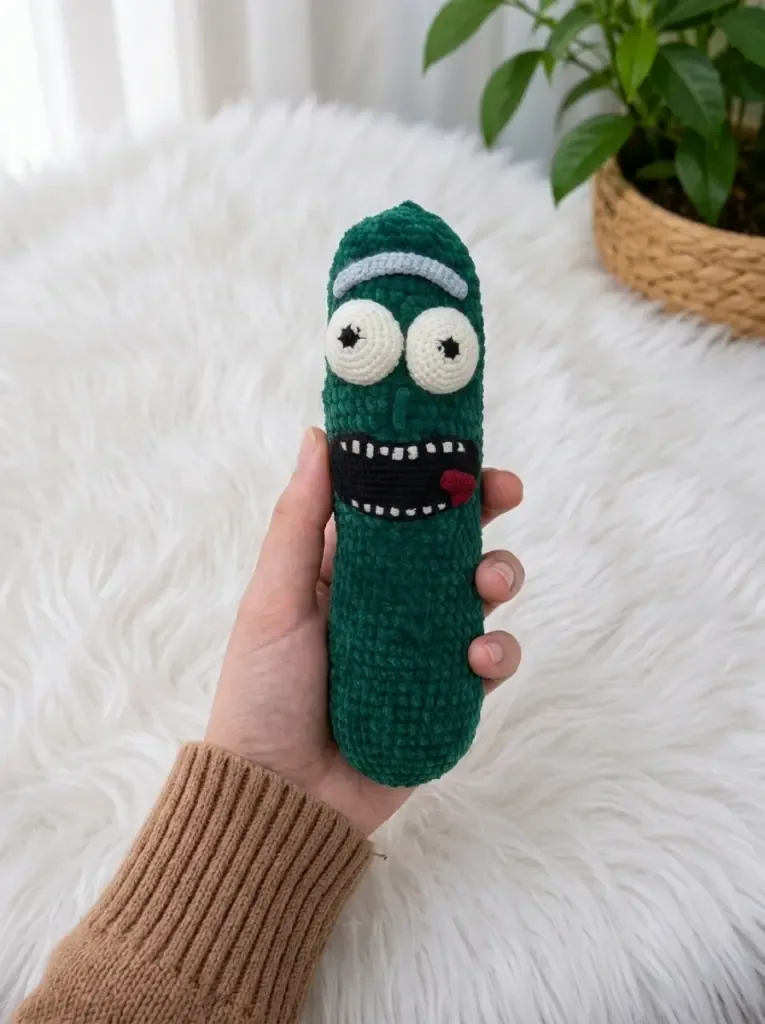
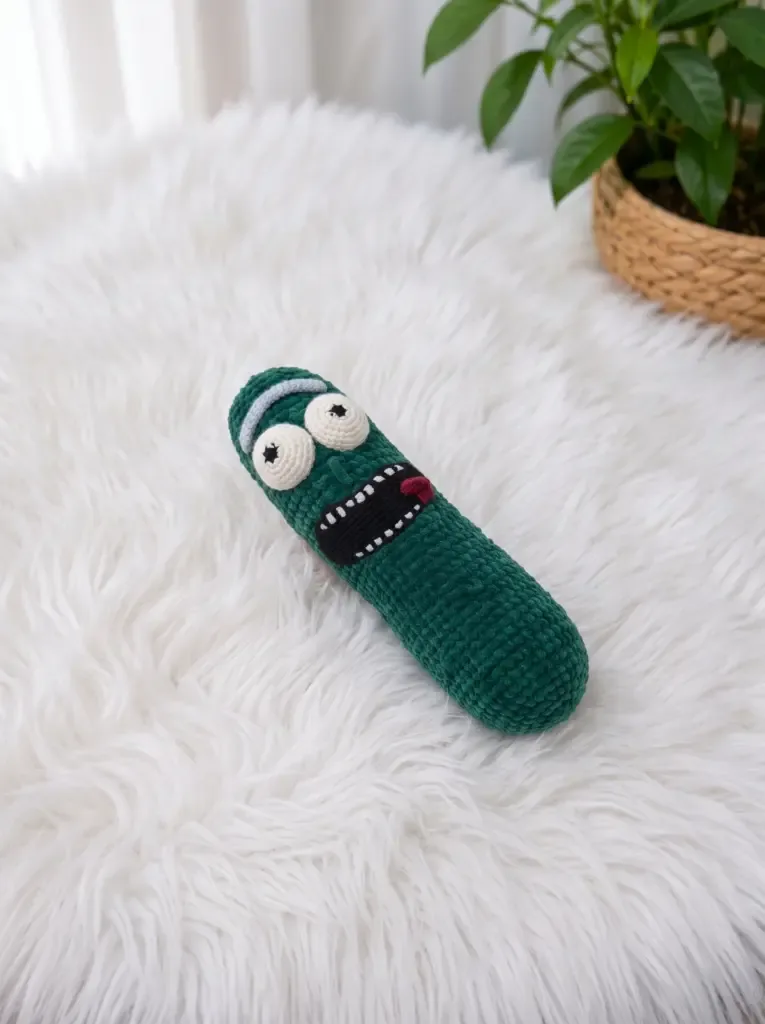
The finished pickle stands as a solid, huggable amigurumi with a dense, well-stuffed body and a flat, expressive face that reads clearly from across a room. The contrast between the fluffy bulky-yarn body and the neat, tight-gauge face pieces gives it a surprisingly polished, almost cartoon-quality finish. It makes a great desk companion, a novelty shelf piece, or a genuinely funny handmade gift for anyone who appreciates a good in-joke.
- Crochet the body in one continuous spiral using bulky yarn, tracking your rounds carefully with a stitch marker.
- Shape the facial panel naturally through the increase and decrease rounds worked partway through the body.
- Stuff the body firmly as you go, adding a bit more once the face pieces are attached.
- Embroider the teeth and attach the tongue while the mouth piece is still flat, before it's sewn anywhere.
- Pin the mouth centrally in the lower face panel, then whipstitch it securely onto the body.
- Pin and sew the eyes above the mouth, then add eyebrows angled inward for that classic scowl.
- Embroider a simple straight-stitch nose between the eyes and mouth, then weave in every loose yarn end.
02 · The count run32 rounds across 5 parts, each with its count
US terms throughout. Every row below ends with the count that round finishes on.
| Part | Qty | Finishes on |
|---|---|---|
| Body | 1 | - |
| Eyebrow (Make 2) | 1 | (6) |
| Eye (Make 2) | 1 | (30) |
| Tongue | 1 | - |
| Mouth | 1 | - |
Work with green bulky yarn and E-4 / 3.5 mm hook, in a continuous spiral.
| Round | Instruction | Count |
|---|---|---|
| Round 1 | 6 sc in MR. (6) | - |
| Round 2 | inc in each st around. (12) | - |
| Round 3 | sc, inc repeat 6 times around. (18) | - |
| Round 4 | 2 sc, inc repeat 6 times around. (24) | - |
| Round 5 | 3 sc, inc repeat 6 times around. (30) | - |
| Round 6 | 4 sc, inc repeat 6 times around. (36) | - |
| Round 7 | 5 sc, inc repeat 6 times around. (42) | - |
| Round 8-25 | sc in each st around. (42) Work 18 rounds even. | - |
| Round 26 | 3 inc, 15 sc, 3 dec, 18 sc. (42) | - |
| Round 27-30 | sc in each st around. (42) Work 4 rounds even. | - |
| Round 31 | 3 inc, 15 sc, 3 dec, 18 sc. (42) | - |
| Round 32-44 | sc in each st around. (42) Work 13 rounds even. | - |
| Round 45 | 5 sc, dec repeat 6 times around. (36) | - |
| Round 46 | 4 sc, dec repeat 6 times around. (30) | - |
| Round 47 | 3 sc, dec repeat 6 times around. (24) | - |
| Round 48 | 2 sc, dec repeat 6 times around. (18) | - |
| Round 49 | sc, dec repeat 6 times around. (12) | - |
| Round 50 | dec 6 times around. (6)Stuff the body firmly before closing. Fasten off and leave a yarn tail to close the opening. | - |
Work with light blue DK yarn and C-2 / 2.5 mm hook.
| Round | Instruction | Count |
|---|---|---|
| Round 1 | 6 sc in MR. (6) | - |
| Round 2-21 | sc in each st around. (6) Work 20 rounds even. | (6) |
Do not stuff — the eyebrow tube is left unstuffed so it lies flat with the slight droop that gives Rick his scowl. Fasten off, leaving a yarn tail for sewing.
Each eye is worked in two sections: a black pupil center and a white outer eye. Black section (pupil):
| Round | Instruction | Count |
|---|---|---|
| Round 1 | 6 sc in MR. (6)Fasten off black. Join white yarn. White section (sclera — worked continuously from the pupil): | - |
| Round 2 | inc in each st around. (12) | - |
| Round 3 | sc, inc repeat 6 times around. (18) | - |
| Round 4 | 2 sc, inc repeat 6 times around. (24) | - |
| Round 5 | 3 sc, inc repeat 6 times around. (30) | - |
| Round 6-8 | sc in each st around. (30) Work 3 rounds even.Stuff the eye. Fasten off, leaving a long yarn tail for sewing. | (30) |
Work with burgundy DK yarn and C-2 / 2.5 mm hook.
Foundation chain: ch 9.
| Round | Instruction | Count |
|---|---|---|
| Round 1 | Skip the first ch from hook, sc in each of the next 8 ch. (8) | - |
| Round 2 | Ch 1 (turning chain, not counted as a stitch), turn. Sc in the next 7 sts, 3 sc in the last st (the tip), then sc in each of the 8 sts along the opposite side of the foundation chain. (18)Fasten off, leaving a yarn tail for sewing. | - |
Work with black DK yarn and C-2 / 2.5 mm hook.
Foundation chain: ch 21.
| Round | Instruction | Count |
|---|---|---|
| Round 1 | Skip the first ch from hook, sc in each of the next 19 ch, 3 sc in the last ch (corner), then sc in each of the next 19 sts along the opposite side of the foundation chain, 3 sc in the last ch (corner). (44)Continue working in the round (oval shape) without joining: | - |
| Round 2 | 19 sc, inc, sc, inc, 19 sc, inc, sc, inc. (48) | - |
| Round 3 | 19 sc, inc, sc, inc, sc, inc, 19 sc, inc, sc, inc, sc, inc. (54) | - |
| Round 4 | hdc, dc, htr, tr, htr, dc, hdc, 5 sc, hdc, dc, htr, tr, htr, dc, hdc, inc, sc repeat 4 times, 2 sc, 4 hdc, 7 dc, 4 hdc, 2 sc, inc, sc repeat 4 times. (62)Fasten off, leaving a long yarn tail for sewing. | - |
03 · Before it goes to a childWhat has to be right, and what is allowed to drift
- 💡 This pattern is written in US crochet terminology.
- 💡 Use a stitch marker religiously throughout the body — since it's worked in a continuous spiral with no joining, it's easy to lose your place without one.
- 💡 Drop down to a 2.5mm hook for every face piece, even though DK yarn usually calls for a larger hook — the denser fabric holds its shape beautifully once sewn on.
- 💡 Do all mouth embroidery, including the teeth, and attach the tongue before the mouth ever touches the body — it's nearly impossible to maneuver a needle once it's sewn on.
- 💡 Identify your face panel first: the indentations from the increase/decrease rounds at Rnds 26 and 31 mark exactly where your mouth and eyes should sit.
- 💡 Keep the increases in Rnds 26 and 31 aligned — use a stitch marker to track where Rnd 26 begins and count carefully for Rnd 31, so the 3 increases and 3 decreases land in exactly the same positions in both rounds, creating clean, matching shaping bumps for the face panel.
- 💡 Keep the nose embroidery compact — about 3 rows tall with straight stitches — so it doesn't overwhelm the small space between the eyes and mouth.
- 💡 Save a little extra stuffing to add after the eyes are sewn on but before final closing, so the face stays firm and doesn't look sunken.
- 💡 Leave the eyebrow pieces unstuffed — a stuffed eyebrow sits rounded and puffy rather than lying flat with the slight droop that gives Rick his signature scowl. The eye pieces, by contrast, are stuffed before sewing on.
- 💡 Use invisible decreases throughout: insert your hook through the front loops only of the next two stitches, then complete the decrease as normal. This avoids the small holes a standard decrease leaves behind, especially visible in the closing rounds of the body.
- 💡 Yarn substitutions are absolutely welcome — use whatever yarn is comfortable for you, keeping the weight and relative hook sizes consistent.
04 · Snag listWhat went wrong on the bench, and the fix
Snag 1
Losing track of the round marker in
Move your stitch marker up into the first stitch of every new round without fail, and recount your stitches every few rounds against the pattern's expected counts.
Snag 2
Sewing the mouth onto the body before
Complete all embroidery and the tongue attachment while the mouth piece is still flat and free, then whipstitch the finished mouth onto the body last.
Snag 3
Placing the eyes, mouth, or eyebrows without pinning first.
Pin every face piece in place and step back to check symmetry and spacing before committing to any whipstitching, since the indented panel from Rnds 26 and 31 makes it easy to misjudge center.
Snag 4
Sewing eyebrows straight across instead of angled inward.
Angle each eyebrow slightly toward the nose as you sew it on to recreate Rick's signature scowl — a straight eyebrow placement reads as neutral rather than grumpy.
Snag 5
Under-stuffing the body before closing up the final rounds.
Check firmness before you close the last few rounds, and add a little extra fiberfill near the face panel if needed so the sewn-on features have a solid surface to sit against.
Snag 6
Stuffing the eyebrow pieces like the eyes.
Leave the eyebrow tubes unstuffed and flat — a stuffed eyebrow sits rounded and puffy instead of lying with the slight droop that gives Rick his characteristic scowl.
Snag 7
Using a standard decrease instead of an invisible decrease.
Work invisible decreases throughout by inserting your hook through the front loops only of the next two stitches, then completing the decrease as normal — this avoids the small holes a standard decrease leaves, especially visible in the body's closing rounds.
05 · VariantsOther ways to issue this one
Once you've got the base pickle shape down, there's a lot of room to play. Swap the green for a different vegetable altogether — try a bright orange for a carrot buddy or deep purple for an eggplant, using the same Himalaya Dolphin Baby bulky line so gauge stays consistent. For a pickle-jar theme, make three or four minis by working the body portion at a smaller scale and reducing the round count proportionally, keeping the face pieces the same size for an exaggerated, comical look. Want a softer, less spiky personality? Swap the light blue eyebrows for a warm brown or soft gray, and use a pink or coral tongue instead of burgundy for a friendlier expression. If you can't find YarnArt Jeans, any DK-weight cotton-acrylic blend works fine for the face pieces — just keep that snug 2.5mm hook so the details stay crisp against the bulkier body yarn. For a seasonal twist, add a tiny knitted or crocheted scarf or a felt hat band around the upper body without altering the round count. You could also experiment with safety eyes instead of the crocheted eye pieces for a quicker face, though you'll lose some of that dimensional, sculpted look the pattern is known for. Advanced crocheters might try adding tiny crocheted arms or a hat using the same DK yarn and 2.5mm hook, attaching them after the face is complete so you have full control of positioning. However you customize it, keep the tighter tension rule for any small add-on pieces — it's what gives this pattern its clean, professional finish.
06 · QueriesQuestions logged against this build
What size will the finished Pickle Rick be?
The exact finished size depends on your tension, but with an 18-round bulky-weight body worked on a 3.5mm hook, expect a solid, palm-to-forearm sized amigurumi. It's substantial enough to stand on its own as a shelf piece.
Do I need to know how to embroider to make this pattern?
Yes, but only simple straight stitches — the nose is worked with basic straight stitches about 3 rows tall, and the mouth teeth use similar simple embroidery. If you can thread a tapestry needle and make small, even stitches, you'll be fine.
Why is the mouth attached last instead of first?
The teeth and tongue need to be added to the mouth piece while it's still flat and easy to handle. Once it's whipstitched onto the body, there's very little room to maneuver a needle for detailed embroidery.
Can I substitute the yarn brands used for the face details?
Absolutely — any DK-weight yarn in similar colors will work fine as a substitute for YarnArt Jeans. Just keep using the smaller 2.5mm hook regardless of brand to maintain that tight, clean gauge on the small pieces.
Original pattern: https://amistitch.com/crochet-amigurumi-pickle-rick-pattern/
07 · Made byWho counted this one

Who writes Amigurumi Addict, how a build gets its number, and why every round on the site carries a stitch count.
08 · Next off the benchThree builds that sit near this one

Animals
Crochet a bunny or frog from one amigurumi base
How do you crochet a bunny and a frog from one base? Share Legs, Body, and Head; swap ears or eyes.

Animals
Crochet giraffe amigurumi pattern with horns and ears
How do you crochet a giraffe amigurumi? Shape head, body, legs, ears and horns in worsted yarn.

Animals
Amigurumi cat crochet pattern with oval muzzle and bow
How do you crochet an amigurumi cat with a flat muzzle? Shape it separately, pinch it, then sew it on.
Join the build log
One message when a build is issued
A drawing and its parts list, when one leaves the bench.