| Shelf | Level | Time | Hook | Yarn |
|---|---|---|---|---|
| Animals | Intermediate | 4-6 Hours | 12 mm | Worsted |
Amigurumi Mouse Free Crochet Pattern – Soft Plush Mouse
Make an adorable 20cm amigurumi mouse with this free crochet pattern featuring plush yarn, safety eyes, and a sweet embroidered nose in 3 easy parts.
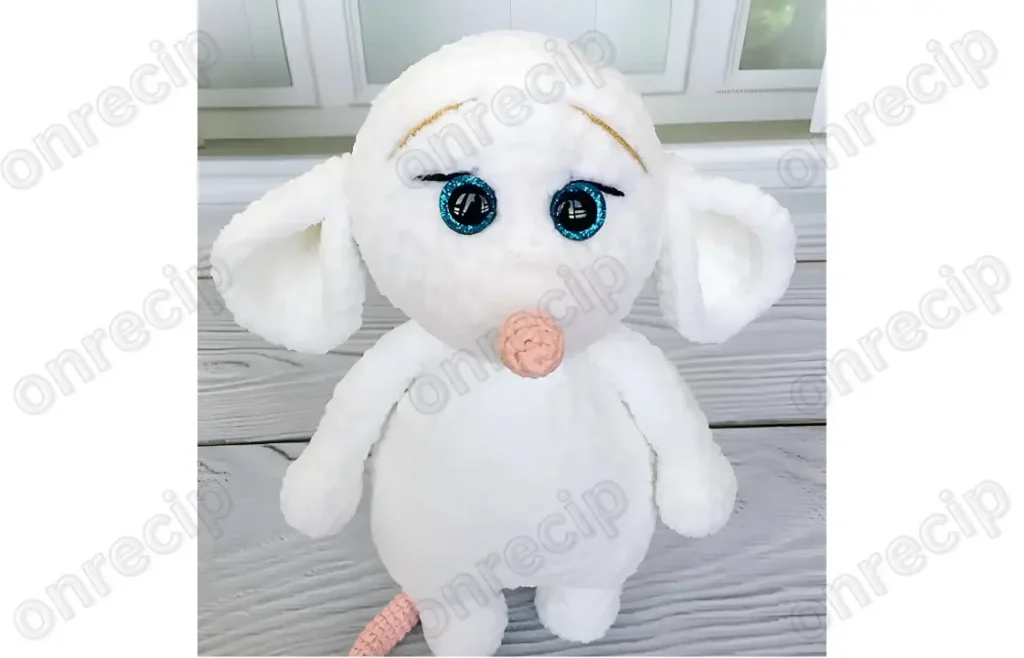
01 · The pieceWhat Amigurumi Mouse Free Crochet Pattern – Soft Plush Mouse actually is
This amigurumi mouse pattern brings to life one of the coziest little critters you can crochet — a soft, round-bodied mouse with a pink nose, dainty eyelashes, and the kind of huggable proportions that make amigurumi so addictive to create. Working up in plush yarn gives this design an irresistibly velvety finish, and it's perfect for crocheters who love toys with real personality. Whether you're building a nursery collection or just want a new project that photographs beautifully, this little mouse delivers.
The finished mouse measures approximately 20cm, with a rounded plush body, a contrasting pink nose and tail, subtle black eyelash embroidery, and glossy 12mm safety eyes that give it real charm. The plush yarn gives it a soft, almost velvety hand-feel that's wonderfully tactile — the kind of toy people can't resist picking up. It makes a beautiful handmade gift for a baby shower, a birthday, or simply a treat-yourself project to add to your own amigurumi shelf.
- Begin with the pink nose worked on the smaller 2.00mm hook to keep the details crisp and tight.
- Work Part 2, shaping additional body or head sections that build off the initial plush foundation.
- Complete Part 3, the longest section, adding definition and shape through its eight rounds.
- Insert the 12mm safety eyes once you can check spacing and expression against the shaped head.
- Stuff each piece firmly in small sections as you go to keep the plush yarn smooth and rounded.
- Embroider the black eyelashes with a large eye stitching needle for the finishing facial detail.
- Attach the pink tail and any remaining pieces, weaving in all yarn ends securely to finish the mouse.
02 · The count run18 rounds across 3 parts, each with its count
US terms throughout. Every row below ends with the count that round finishes on.
| Part | Qty | Finishes on |
|---|---|---|
| Main Pattern | 1 | - |
| Part 2 | 1 | - |
| Part 3 | 1 | - |
| Round | Instruction | Count |
|---|---|---|
| Round 1 | 2 ch, in the 2nd loop from the hook we crochet 6 sc | - |
| Round 2 | 6 inc – 12 sc | - |
| Round 3 | (sc, inc)*6 – 18 sc | - |
| Round 4 | (2 sc, inc)*6 – 24 sc | - |
| Round 5 | (3 sc, inc)*6 – 30 sc Handles (2 parts), plush yarn, hook No 3.00 | - |
| Round | Instruction | Count |
|---|---|---|
| Round 1 | 2 ch, in the 2nd loop from the hook we crochet 6 sc | - |
| Round 2 | 6 inc – 12 sc | - |
| Round 3-4 | 12 sc | - |
| Round 5 | 6 dec – 6 sc | - |
| Round 6-14 | 6 sc (rnds) Fold in half and crochet together ponytail, pink yarn, hook No. 2.00 | - |
| Round | Instruction | Count |
|---|---|---|
| Round 1 | 6 sc in MR | - |
| Round 2-13 | 6 sc (12 rnds) | - |
| Round 14 | 2 inc, 6 sc – 8 sc | - |
| Round 15-22 | 8 sc (8 rnds) | - |
| Round 23 | inc, 7 sc – 9 sc | - |
| Round 24-31 | 9 sc (8 rnds) | - |
| Round 32 | inc, 8 sc – 10 sc | - |
| Round 33-44 | 10 sc (12 rnds) Fold in half and crochet together. Ready to Learn More? Open the next page for Further Guidance! | - |
Pages: 1 2
03 · Before it goes to a childWhat has to be right, and what is allowed to drift
- 💡 Plush yarns like Himalaya Dolphin Baby can obscure your stitches, so work under bright, direct light or use a stitch marker in every round to avoid losing your place.
- 💡 Stuff the mouse gradually in small tufts rather than all at once, especially in the body, so the plush yarn keeps a smooth, rounded silhouette without lumps.
- 💡 Before attaching the 12mm safety eyes permanently, lay the pieces flat and step back to check symmetry — small adjustments now save frustration later.
- 💡 When working the black eyelash embroidery, use a large eye stitching needle and keep your tension gentle so the delicate lines lay flat against the plush surface.
- 💡 Weave in yarn ends from each color change (pink, beige, black) securely but not too tightly, since plush yarn can pucker if pulled too firm during finishing.
04 · Snag listWhat went wrong on the bench, and the fix
Snag 1
Losing track of the magic ring center hole
After completing your first round, gently tug the yarn tail to close the magic ring fully closed before continuing, otherwise you'll end up with a visible gap at the very center of your nose or body.
Snag 2
Uneven single crochet increases causing a lopsided shape
Use a stitch marker to mark the first stitch of each round so you always know where increases should be evenly spaced, keeping your rounds symmetrical as the piece grows.
Snag 3
Placing safety eyes before confirming spacing
Insert the 12mm eyes but don't lock the backing washers yet — hold the head up and check the spacing and angle from multiple sides, since eye placement makes or breaks the mouse's expression.
Snag 4
Under-stuffing the plush body, causing a saggy shape
Stuff firmly in small pieces as you go rather than one large clump at the end, especially in the rounded plush yarn sections where extra fiberfill helps the fabric hold its shape.
05 · VariantsOther ways to issue this one
One of my favorite things about this mouse pattern is how easy it is to make it your own. Swap the classic white plush body for a soft gray, dove, or even a pale lavender Himalaya Dolphin Baby shade for a completely different personality — a gray mouse reads more realistic, while pastels lean whimsical and nursery-ready. For the nose and tail, try a coral or dusty rose YarnArt Jeans instead of the classic pink for a subtler, more sophisticated palette, or go bold with a bright red for a cheeky, storybook feel. If you want a chunkier, huggable mouse, size up to a worsted weight yarn with a 4.00mm hook, adding roughly 2-4 stitches per round increase to keep the shape proportional; for a miniature keychain-sized version, drop to a fingering weight with a 2.00mm hook throughout and expect a mouse closer to 8-10cm. Seasonal variations are fun too — add a tiny crocheted scarf in autumn tones for fall, a knit-look sweater in red and white for winter gifting, or a floral crown made from scrap yarn for a spring version. You could also experiment with eye color and size; smaller 9mm eyes give a sleepier, sweeter expression, while larger 15mm eyes create a wide-eyed, cartoonish look. For yarn substitutions, any baby-weight plush or velvet yarn works beautifully in place of Himalaya Dolphin Baby — Baby Soft or Bernat Baby Velvet are great alternatives if you can't source the original brand. Finally, consider embroidering tiny freckles or a heart-shaped nose patch for a personalized, one-of-a-kind mouse that feels truly yours.
There's something so satisfying about working with plush yarn like Himalaya Dolphin Baby — it feels luxurious in your hands from the very first magic ring, and watching that soft white body take shape round by round is genuinely relaxing. I love how this pattern layers in personality through small color details: the pink YarnArt Jeans nose and tail, the beige firewood accents, and those tiny black eyelash stitches that give the mouse such an expressive little face. Starting with the nose on a smaller 2.00mm hook while the body uses a 3.00mm hook is a clever touch that keeps every feature perfectly proportioned. Working through the three pattern parts feels like assembling a little puzzle — each piece has its own personality before it all comes together into one cohesive, huggable mouse. The 12mm safety eyes are the moment this project really comes alive; suddenly you're not just crocheting rounds, you're looking at a face. If you love amigurumi for the way it turns simple stitches into something with soul, this pattern will scratch that itch perfectly.
06 · QueriesQuestions logged against this build
Why does the pattern use two different hook sizes?
The smaller 2.00mm hook is used for the pink nose to keep those tiny stitches tight and well-defined, while the larger 3.00mm hook works the plush body for a softer, fuller fabric. Using the correct hook for each section keeps proportions balanced.
Can I use a different yarn brand instead of Himalaya Dolphin Baby?
Yes, any soft baby or plush-weight yarn will work well as a substitute, such as Bernat Baby Velvet or Baby Soft. Just make sure your gauge stays consistent so your finished mouse still measures close to 20cm.
How much yarn do I need for each color?
Since the pattern uses small amounts of pink, beige, and black yarn for details versus a larger amount of white plush yarn for the body, one skein of each color is typically more than enough for a single mouse. Leftover yarn works great for a second mouse in a different colorway.
What size eyes should I use if I don't have 12mm safety eyes?
You can size down to 9mm for a sweeter, sleepier look or size up to 15mm for a wider, more cartoonish expression. Just be sure the eye backing fits snugly through your stitches without stretching the plush yarn too much.
Is this pattern good for a first amigurumi project?
It's better suited for someone who has already made at least one or two simpler amigurumi pieces, since it involves color changes, two hook sizes, and detailed finishing work. That said, an ambitious beginner with patience will likely succeed with a bit of extra care.
Original pattern: https://onrecip.com/amigurumi-mouse-free-crochet-pattern/
07 · Made byWho counted this one

Who writes Amigurumi Addict, how a build gets its number, and why every round on the site carries a stitch count.
08 · Next off the benchThree builds that sit near this one

Animals
Crochet a bunny or frog from one amigurumi base
How do you crochet a bunny and a frog from one base? Share Legs, Body, and Head; swap ears or eyes.

Animals
Crochet giraffe amigurumi pattern with horns and ears
How do you crochet a giraffe amigurumi? Shape head, body, legs, ears and horns in worsted yarn.

Animals
Amigurumi cat crochet pattern with oval muzzle and bow
How do you crochet an amigurumi cat with a flat muzzle? Shape it separately, pinch it, then sew it on.
Join the build log
One message when a build is issued
A drawing and its parts list, when one leaves the bench.