| Shelf | Level | Time | Hook | Yarn |
|---|---|---|---|---|
| Animals | Intermediate | 2-3 Hours | 10 mm | Sport/DK |
Amigurumi Horse Pen Topper Crochet Pattern (Free)
Crochet an adorable amigurumi horse pen topper with this free pattern featuring a fuzzy yarn mane, sparkly safety eyes, and a quick weekend-sized build.
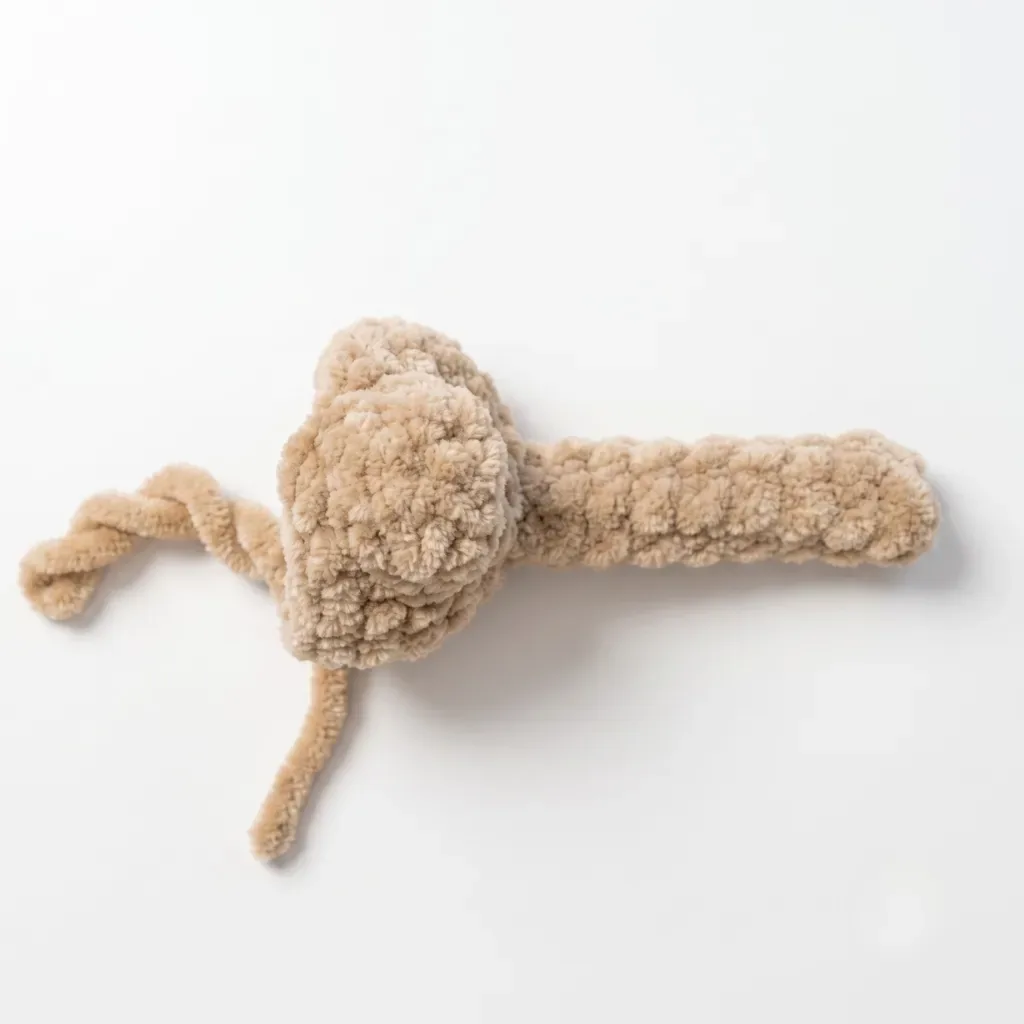
01 · The pieceWhat Amigurumi Horse Pen Topper Crochet Pattern (Free) actually is
This Amigurumi Horse Pen Topper is a tiny, spirited little horse head built to slip right onto a pen, turning an everyday desk tool into something you'll actually want to pick up. With its sparkly trapezoid safety eyes and a wild little yarn mane, it captures all the personality of a full-size amigurumi horse in a fraction of the yarn and time. It's perfect for crocheters who love collecting small amigurumi characters, teachers wanting classroom-ready gifts, or anyone who wants a fast, charming project between bigger makes.
You'll work through just three compact pieces — the neck, the muzzle, and the head — using continuous spiral rounds, magic rings, and invisible decreases to shape that classic gentle horse profile. The mane locks worked in Wolans FOX yarn add a fun textural technique that's different from standard amigurumi stitching, while thread sculpting with a long doll needle helps define the nose and gives the face real expression. Expect this project to take roughly two to three focused hours, making it very approachable even if you're newer to shaping amigurumi heads.
The finished horse topper comes out petite and huggable-looking despite its small scale, with a soft rounded muzzle, an alert little face, and a mane that gives it real movement and charm. It sits neatly atop a standard pen, making it an adorable, functional accessory for a planner, a gift bag, or a teacher's desk. Because it's quick to stitch up in Himalaya Dolphin Baby yarn, it also makes a lovely last-minute handmade gift for horse lovers of any age.
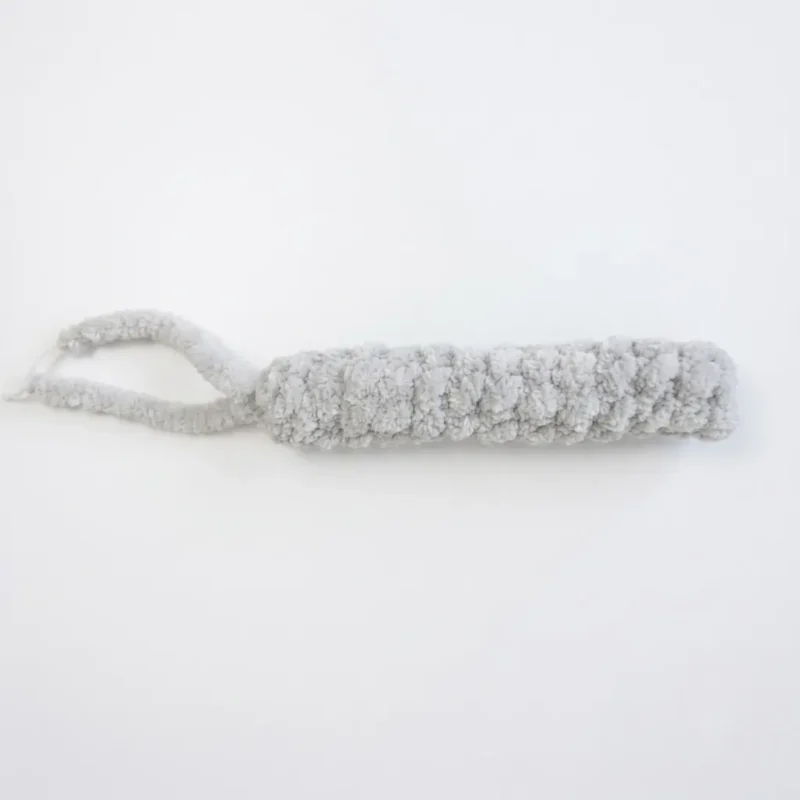
- Start by crocheting the neck in a tight continuous spiral, building the base that will support the head.
- Move on to the small muzzle piece, shaping it in just two rounds for a compact, rounded snout.
- Crochet the head separately over nine rounds, shaping it from a magic ring up to its fullest point.
- Insert the sparkly trapezoid safety eyes into the head at the point noted in the pattern before closing up.
- Stuff each piece firmly in small amounts as you go so the shapes stay dense and hold their form.
- Use thread sculpting with a doll needle to gently define the nose and give the muzzle expression.
- Assemble the neck, muzzle, and head together, aligning them carefully before stitching the seams closed.
- Attach individual mane locks in Wolans FOX yarn along the head and neck to finish the look.
02 · The count run15 rounds across 3 parts, each with its count
US terms throughout. Every row below ends with the count that round finishes on.
| Part | Qty | Finishes on |
|---|---|---|
| Neck | 1 | - |
| Muzzle | 1 | - |
| Head | 1 | - |
| Round | Instruction | Count |
|---|---|---|
| Round 1 | 6 sc in MR. (6) | - |
| Round 2 | BLO: sc in each st around. (6) | - |
| Round 3-12 | sc in each st around. (6) — repeat for 10 rounds total | - |
| Round 13 | 5 sc, sl st. (6)Leave a long tail after Rnd 13. Weave it back up through the tube to the starting ring, then tie it to the starting tail to close the seam invisibly. | - |
Ch 4.
| Round | Instruction | Count |
|---|---|---|
| Round 1 | Beginning in the 2nd ch from hook: 2 sc, 3 sc in next st, then along the opposite side of the foundation chain: 3 sc, working the final sc into the last chain under one loop only. (8) | - |
| Round 2 | (3 sc, inc) twice around. (10)Leave a short tail, weave it in, and secure it inside the muzzle. Mark the 3rd stitch of Rnd 2 with your stitch marker — this is where the muzzle will meet the head. | - |
Do not tighten your slip stitches in Rnd 1 below — the neck opening needs to stay wide.
| Round | Instruction | Count |
|---|---|---|
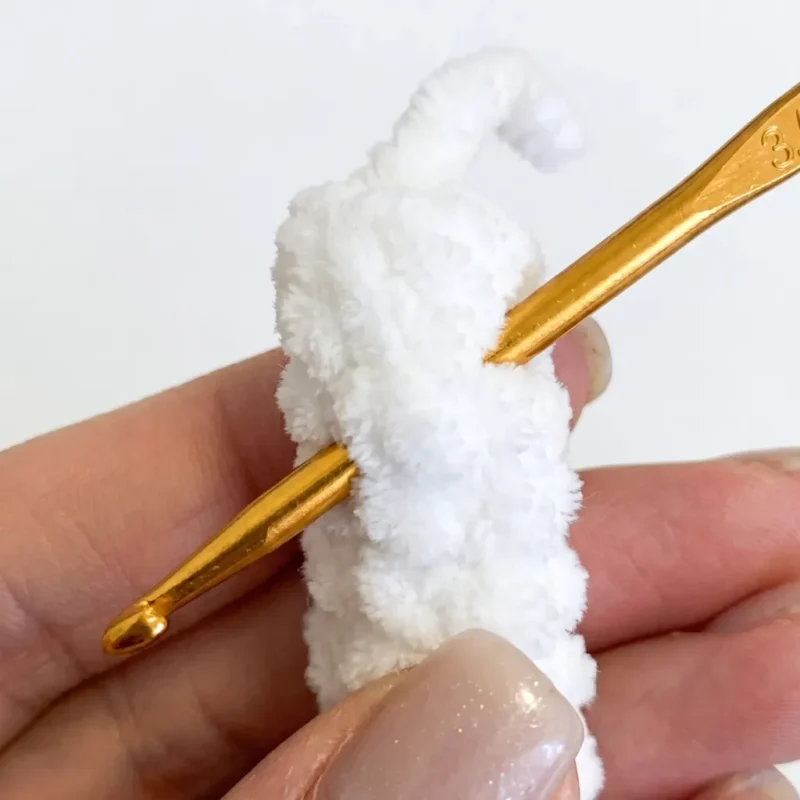
| Round 1 | With new yarn, insert your hook diagonally under one stitch of Rnd 4 of the neck and pull up a loop. Yarn over and work a slip stitch. Continue left, working between Rnds 4 and 5 of the neck, for 5 more sl st. (6) | - |
| Round 2 | FLO: sc, (3 sc in one st, inc) twice, 3 sc in one st. (14) | - |
| Round 3 | (2 sc, inc) twice, join the muzzle here with 3 sc worked through both the head and muzzle stitches together, inc, 2 sc, inc, sc. (18) | - |
| Round 4-5 | 8 sc, pull-through stitch, 3 sc, pull-through stitch, 7 sc. (18) — 2 rounds | - |
| Round 6 | dec, 6 sc, sc with extra pick-up, inc, sc with extra pick-up, 7 sc. (18) | - |
| Round 7-8 | sc in each st around. (18) — 2 rounds Insert the safety eyes now, between Rnds 6 and 7, spacing the posts 4 stitches apart. | - |
| Round 9 | 2 sc, (dec, 4 sc) twice, dec, 2 sc. (15) | - |
Slide the piece onto your pen. Stuff the head firmly but not rock-hard, packing extra fiberfill around the top of the neck so the shape holds through thread sculpting.
| Round | Instruction | Count |
|---|---|---|
| Round 10 | (dec, sc) five times around. (10)Add a bit more stuffing here. | - |
| Round 11 | 5 dec. (5)Leave a tail for closing the opening later — do not close it yet. You’ll need it open for thread sculpting first. | - |
03 · Putting it togetherHow the pieces go together
- S1
With your long doll needle and strong thread, work the thread sculpting through the Head to define the muzzle bridge and set the facial contours before doing anything else.
- S2
Crochet a pair of ears separately and set them aside — keep the piece on the pen while you work.
- S3
Tie off and bury all remaining face-shaping tails inside the Head.
- S4
With white yarn, outline the outer edge of each eye.
- S5
With black yarn, outline the upper edge of each eye, then embroider the brows on Rnd 8 of the Head and the nostrils on Rnd 1 of the Muzzle.
- S6
Close the opening at the top of the Head by working through the front loops of the remaining 5 stitches and pulling the tail tight.
- S7
For the mane, cut strands of Wolans FOX twice your desired lock length and fold each one in half. Insert your hook into the closed opening at the top of the Head and bring it out one round back, toward the back of the head. Catch the folded center of a lock, pull it through as a loop, then feed both yarn ends through that loop and tighten — this is the same technique used for adding fringe. Repeat one lock per round for the next two rounds.
- S8
Weave in every remaining yarn end, and glue the ears in place if you haven’t already attached them with yarn.
04 · Before it goes to a childWhat has to be right, and what is allowed to drift
- 💡 Use a US E-4 (3.5mm) hook and keep your tension snug — with only 10g of main color yarn, tight stitches matter more than usual to keep tiny fiberfill wisps from peeking through.
- 💡 Work all three pieces (neck, muzzle, head) in continuous spiral rounds without joining or turning, and keep a stitch marker moving with you every round so you never lose count.
- 💡 Since the pattern uses Sport/DK weight yarn on a fairly small hook, expect a dense, firm fabric — this is exactly what you want for a piece meant to sit securely on a pen.
- 💡 Insert your 10mm trapezoid safety eyes at the round specified in the pattern notes, and always test position before snapping the backs on since amigurumi faces are very sensitive to eye placement.
- 💡 Keep your Wolans FOX mane yarn separate and pre-cut into consistent lengths before you start attaching locks, so your mane build-up stays even and doesn't eat into your working time.
- 💡 A dab of instant-drying craft glue at the base of each mane lock and at the final assembly seams adds long-term durability, especially since this piece will be handled often as a pen topper.
- 💡 This pattern is written in US crochet terminology, and stitch counts appear at the end of each round in parentheses, like this: (6).
- 💡 Two special techniques appear in the Head: a pull-through stitch that anchors the muzzle seam without adding to your stitch count, and an sc with extra pick-up — an elongated single crochet worked at the muzzle bridge for smooth shaping.
- 💡 The finished topper measures roughly 4–5 inches (10–13 cm) with the yarn listed in Materials, though your exact size will shift slightly depending on your tension. Gauge isn't critical here — just keep your stitches tight enough that stuffing doesn't peek through.
- 💡 When working the invisible decreases in Rnds 9–11 of the Head, insert your hook under only the front loops of the next two stitches before pulling through — this keeps the decrease flat instead of leaving a visible ridge across the top of the head.
05 · Snag listWhat went wrong on the bench, and the fix
Snag 1
Losing track of the spiral rounds since
Place a stitch marker in the first stitch of every round and move it up each time you complete a round — this keeps your round count accurate across all three pieces.
Snag 2
Stuffing too loosely, which causes
Stuff firmly in small pinches as you go rather than adding it all at the end, especially in the muzzle and head, so the shape stays rounded and dense enough to hide hardware.
Snag 3
Attaching the safety eyes before
Insert the eye posts but don't push the backs on yet — hold the piece at arm's length, check symmetry from the front, and adjust the position between the indicated rounds before locking them in permanently.
Snag 4
Rushing the mane locks so they end up
Cut Wolans FOX strands to consistent lengths before attaching, secure each lock with a firm knot or a few stitches through the head fabric, and dab a bit of instant-drying craft glue at the base for extra hold.
Snag 5
Skipping or rushing the thread
Use a long doll needle and strong thread to pull small indents at the nostril points, checking both sides for symmetry as you tighten, and knot off securely inside the stuffing so it doesn't loosen with handling.
Snag 6
Joining the neck, muzzle, and head
Dry-fit all three pieces together first, pin or hold them in place, and stitch slowly around the seam checking alignment every few stitches before you commit to the final whipstitch.
06 · VariantsOther ways to issue this one
This pattern is a fantastic canvas for color and texture experiments since it uses so little yarn. Try a palette swap: a chestnut brown body with a black mane using Wolans FOX in black, or a dappled gray look by alternating light and dark gray Himalaya Dolphin Baby yarn every other round on the head for a mottled effect. For a fantasy twist, work the body in soft lavender or mint with a rainbow mane made by cutting short locks from several yarn colors and knotting them in one after another — instant unicorn-inspired charm without changing a single stitch count. If you want a slightly bigger topper to fit a chunkier pen or a pencil, size up your hook to a 4.0mm and use a light worsted weight yarn instead of sport/DK; expect the finished piece to grow proportionally since the stitch counts stay the same but each stitch is larger. Conversely, for a truly miniature charm-sized version, drop to a 2.5mm hook with fingering weight yarn and the same round counts. Yarn substitutions work beautifully here too — Scheepjes Catona or Paintbox Simply DK are lovely worsted-weight-adjacent swaps for the main color, while any faux-fur or eyelash-style yarn like Wolans FOX can stand in for the mane if you want extra fluff. Seasonal fans could add a tiny embroidered flower crown for spring, a knit-look scarf loop for winter, or swap the black/white embroidery floss for pastel tones to make a softer, storybook-style pony. You could even make a small herd in different colorways as a matching set of pen toppers for a desk organizer gift.
I adore how much personality this little horse packs into just 15 rounds! Shaping the neck, muzzle, and head separately before joining them lets you really control that sweet, gentle horse expression — and adding the sparkly trapezoid safety eyes is such a satisfying moment where the piece suddenly comes to life. The mane is my favorite part: working individual locks in Wolans FOX yarn gives you a fuzzy, textured effect that feels totally different from typical amigurumi stitching, and it's so fun to fluff and trim into shape. Thread sculpting the nose with a doll needle is a technique I think every amigurumi maker should practice, and this pattern is a perfect low-stakes way to try it since the piece is so small. Because everything works up in continuous spiral rounds with no turning, the rhythm is calming and quick. I also love that this isn't just a shelf-sitter — it's a functional pen topper, so you get to actually use what you made every single day at your desk.
07 · QueriesQuestions logged against this build
What size pen does this topper fit?
The topper is designed to slide onto a standard-diameter pen barrel, similar to a ballpoint or gel pen. Because the neck tube is worked at 6 stitches per round, it will grip most standard pens snugly without glue, though you can add a dab of glue inside the neck for extra security.
Can I make this pattern without safety eyes?
Yes, you can substitute embroidered eyes using black yarn if you prefer, or if the topper is intended for a young child. Simply skip the safety eye insertion step between Rounds 6 and 7 and embroider satin-stitch eyes in the same location once the head is finished and stuffed.
Why does my head look lopsided after joining the muzzle?
This usually happens when the sc worked through both the head and muzzle stitches in Round 3 isn't caught evenly on both layers. Slow down on that stitch, make sure your hook passes through a stitch from each piece, and check that the muzzle is centered before continuing to the next round.
What yarn works as a substitute for the mane?
Any yarn with texture or a slight halo, such as a fun-fur or eyelash yarn similar to Wolans FOX, will give the mane movement and softness. If you'd rather use a smooth yarn, choose one in a contrasting color and cut slightly longer strands so the mane still reads clearly against the head.
Original pattern: https://amigurumicorner.com/amigurumi-horse-pen-topper-pattern/
08 · Made byWho counted this one

Who writes Amigurumi Addict, how a build gets its number, and why every round on the site carries a stitch count.
09 · Next off the benchThree builds that sit near this one

Animals
Crochet a bunny or frog from one amigurumi base
How do you crochet a bunny and a frog from one base? Share Legs, Body, and Head; swap ears or eyes.

Animals
Crochet giraffe amigurumi pattern with horns and ears
How do you crochet a giraffe amigurumi? Shape head, body, legs, ears and horns in worsted yarn.

Animals
Amigurumi cat crochet pattern with oval muzzle and bow
How do you crochet an amigurumi cat with a flat muzzle? Shape it separately, pinch it, then sew it on.
Join the build log
One message when a build is issued
A drawing and its parts list, when one leaves the bench.