| Shelf | Level | Time | Hook | Yarn |
|---|---|---|---|---|
| Animals | Intermediate | 4-6 hours | 4 mm | Fingering |
Amigurumi bunny crochet pattern with shaped face and ears
How do you crochet an amigurumi bunny? Build the body, ears and arms in rounds, then gather-shape the face.
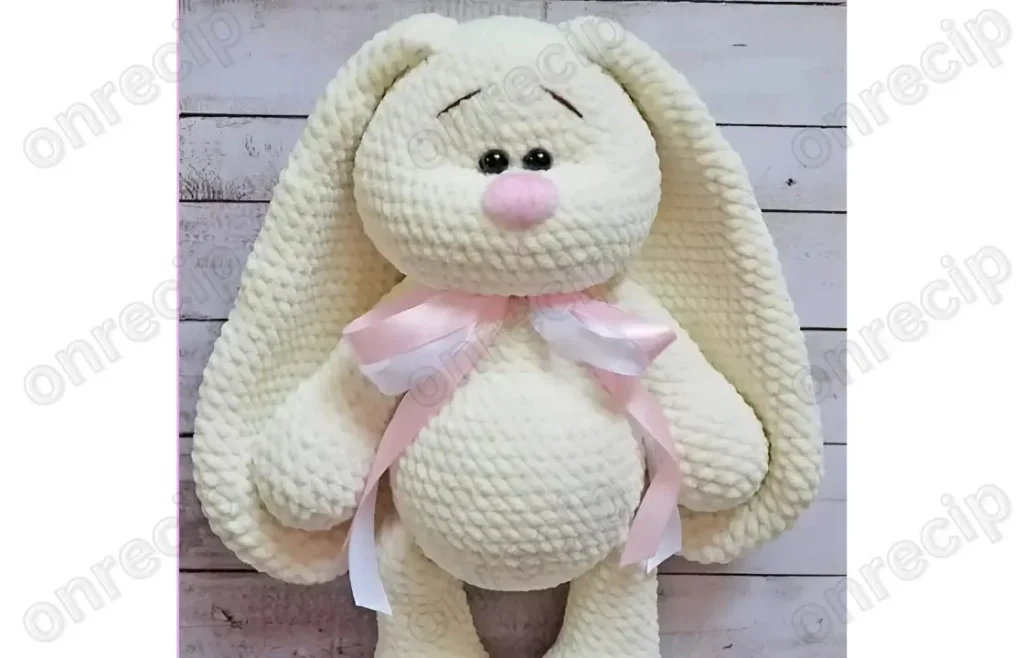
01 · The pieceWhat Amigurumi bunny crochet pattern with shaped face and ears actually is
The build has five named parts: Main Pattern for the body, For the Head continuing the same piece, Upper Arms, Ears, and Lower Legs. Main Pattern begins at a 6-stitch magic ring, increases up to 48 sc, then decreases down to 12 sc, carrying the body shaping in one continuous piece before the head rounds continue the taper. Upper Arms start flat -- a chain-4 base worked 2 sc, 3 sc into the last stitch, turned, 4 sc -- before joining into rounds. Ears build outward from a 6-stitch magic ring through six increase rounds, then continue for several more rounds, including further decrease shaping, before closing. Bead eyes, sewn nose, ears, and arms all attach to the finished Main Pattern afterward, nothing joins as-you-go.
Precision matters at the face: eyes go in between rounds 40-41 with only 2-3 stitches between them, and the gather stitches worked between rounds 26-27 and round 40 decide whether the muzzle sits centered or skewed. It matters less in the padding rounds -- rounds 5-9 on the Upper Arms and rounds 20-23 on Main Pattern are worked at a flat stitch count with no shaping, so a stitch miscounted there costs length, not symmetry. Ears tolerate the same slack once past their six increase rounds.
Finished bunny stands about 32 cm tall. The body and head are worked in Himalaya Dolphin Baby yarn (approximately 2.5 skeins) on a 4 mm hook, while the nose alone uses YarnArt BABY yarn on a 2 mm hook and is brushed afterward for a fluffy texture.
02 · The count run12 rounds across 5 parts, each with its count
US terms throughout. Every row below ends with the count that round finishes on.
| Part | Qty | Finishes on |
|---|---|---|
| Upper Arms | 1 | - |
| Ears | 1 | - |
| Main Pattern | 1 | - |
| Lower Legs | 1 | - |
| For the head | 1 | - |
Chain 4
Starting from the second chain from the hook: 2 sc, 3 sc into the last stitch, turn, crochet on the other side: 1 sc, inc (8) inc, 1 sc, inc * 3, 1 sc, inc * 2 (14)
1 sc, inc, 3 sc, inc, (1 sc, inc) * 2, 3 sc, inc (19)
| Round | Instruction | Count |
|---|---|---|
| Rounds 5–9 | 19 sc (5 rounds) 7 sc, dec, 1 sc, dec, 7 sc (17)4 sc, dec * 2, 1 sc, dec * 2, 4 sc (13) | - |
| Rounds 12–21 | 13 sc (10 rounds) 2 sc, do not finish the round. Fold the edges together, and crochet sc through both sides to close. Secure the yarn, cut it, and hide the tail. | - |
6 sc into a magic ring (6) inc * 6 (12)
(1 sc, inc) * 6 (18)
(2 sc, inc) * 6 (24)
(3 sc, inc) * 6 (30)
(4 sc, inc) * 6 (36)
(5 sc, inc) * 6 (42)
| Round | Instruction | Count |
|---|---|---|
| Rounds 8–12 | 42 sc (5 rounds) (5 sc, dec) * 6 (36) | - |
| Rounds 14–18 | 36 sc (5 rounds) (4 sc, dec) * 6 (30) | - |
| Rounds 20–24 | 30 sc (5 rounds) (3 sc, dec) * 6 (24) | - |
| Rounds 26–30 | 24 sc (5 rounds) (2 sc, dec) * 6 (18) | - |
| Rounds 32–36 | 18 sc (5 rounds) (1 sc, dec) * 6 (12) | - |
| Rounds 38–42 | 12 sc (5 rounds) Do not stuff the ears. Fold the edges together, and crochet sc through both sides to close. Secure the yarn, cut it, and hide the tail. | - |
6 sc into a magic ring (6)
inc * 6 (12)
(1 sc, inc) * 6 (18)
(2 sc, inc) * 6 (24)
(3 sc, inc) * 6 (30)
(4 sc, inc) * 6 (36)
36 sc (36)
(5 sc, inc) * 6 (42)
(6 sc, inc) * 6 (48)
| Round | Instruction | Count |
|---|---|---|
| Rounds 10–16 | 48 sc (7 rounds) (6 sc, dec) * 6 (42)(5 sc, dec) * 6 (36) | - |
| Rounds 20–23 | 30 sc (4 rounds) (3 sc, dec) * 6 (24)24 sc (24) dec * 12 (12) | - |
6 sc into a magic ring
Starting from the second chain from the hook: 5 sc, 3 sc into the last stitch, turn, crochet on the other side: 4 sc, inc (14) inc, 4 sc, inc * 3, 4 sc, inc * 2 (20)
1 sc, inc, 5 sc, inc, 3 sc, inc, 5 sc, inc, 2 sc (24)
2 sc, inc, (5 sc, inc) * 3, 3 sc (30)
(1 sc, inc) * 2, 5 sc, inc, 1 sc, inc, 3 sc, inc, 1 sc, inc, 5 sc, inc, 1 sc, inc, 2 sc (36)
36 sc in the back loops (36)
8-9. 36 sc (2 rounds)
9 sc, dec, (1 sc, dec) * 5, 8 sc, dec (29)
8 sc, dec * 2, 3 sc, dec * 2, 8 sc, dec (24)
8 sc, dec * 4, 8 sc (20)
6 sc, dec, 4 sc, dec, 6 sc (18)
7 sc, dec * 2, 7 sc (16)
| Round | Instruction | Count |
|---|---|---|
| Rounds 15–24 | 16 sc (10 rounds) 2 sc, do not finish the round. Fold the edges together, and crochet sc through both sides to close. Secure the yarn, cut it, and hide the tail. | - |
inc * 12 (24)
(1 sc, inc) * 12 (36)
(5 sc, inc) * 6 (42)
(6 sc, inc) * 6 (48)
(7 sc, inc) * 6 (54)
(8 sc, inc) * 6 (60)
| Round | Instruction | Count |
|---|---|---|
| Rounds 33–37 | 60 sc (5 rounds) (8 sc, dec) * 6 (54)(7 sc, dec) * 6 (48) | - |
Techniques on this build
- Continuous spiral rounds
- Main Pattern runs without a join from round to round; use a stitch marker or you will lose track of where round 40 actually starts.
- Magic ring start
- Ears begin with 6 sc into a magic ring; pull the tail firm before the first increase round or the center stays open.
- Gather-stitch face shaping
- Worked by hand between rounds 26-27 and round 40 on the head, after stuffing; go slow, this is what gives the face its contour.
Final fit-up
- Weave in the magic ring tail on the Ears and any turn-row ends from the Upper Arms before either part goes near stuffing.
- Stuff Main Pattern firmly through the neck taper (rounds 20-23 down to the dec*12 close); stuff Upper Arms and Lower Legs lightly so they stay poseable.
- Close the top of the head by cinching the stitches left after the dec*12 round and knotting off on the inside.
- Attach Ears around round 44, Upper Arms around round 24 of the body, and set the bead eyes between rounds 40-41 with 2-3 stitches of clearance between them.
How the parts fit
- Main Pattern is widest at rounds 10-16 (held at 48 sc for 7 rounds) and decreases in two stages -- 48 to 30 at the neck, then 30 to 12 at the crown -- so the taper is not a single smooth curve but two distinct shaping zones.
- The belly round (3 sc, dec*6, 21 sc) decreases on only part of the round instead of evenly around it, shifting the taper to one side of the body rather than shrinking it concentrically.
Scaling the build
| Smaller | Use a finer yarn with a smaller hook than the listed 4 mm; Main Pattern and Ears shrink together at the same ratio. |
|---|---|
| Longer limbs or body | Repeat the flat rounds an extra time -- rounds 5-9 (19 sc) on the Upper Arms or rounds 20-23 (30 sc) on Main Pattern -- to add length without changing any stitch count. |
03 · Putting it togetherHow the pieces go together
- S1
Attach the eyes between rounds 40-41, leaving 2-3 stitches between them.
- S2
Shape the face by inserting the needle between rounds 26 and 27 (where you made the 12 increases and 12 decreases). Then, find round 40 with the eyes. Make several stitches to pull the fabric tight. Once you’re satisfied with the result, tie a knot and hide the tail.
- S3
Sew the nose between rounds 34-37 of the head.
- S4
Attach the ears around round 44 of the head.
- S5
Attach the upper arms around round 24 of the body.
- S6
Attach the lower legs around round 8 of the body.
- S7
Embroider the eyebrows.
- S8
Your bunny is ready!
04 · Snag listWhat went wrong on the bench, and the fix
Snag 1
Drifting count through Ears increases
Mark the start of each (n sc, inc) repeat and recount at the end of every round from 6 up to 36.
Snag 2
Uneven chain-4 base on Upper Arms
Keep the first stitch snug and count 5 sc down the working side before turning, so the oval sole stays symmetric.
Snag 3
Bead eyes set unevenly
Pin both eyes between rounds 40-41 first and check the 2-3 stitch gap with a ruler before sewing either one down.
Snag 4
Over-cinching the face gather
Pull the gather thread between rounds 26-27 and round 40 gradually, checking symmetry from the front before you knot off.
05 · QueriesQuestions logged against this build
What yarn and hook does this bunny call for?
The body is worked in Himalaya Dolphin Baby yarn (about 2.5 skeins) on a 4 mm hook. The nose alone uses YarnArt BABY yarn on a 2 mm hook, brushed afterward for a fluffy texture.
Why gather the face instead of just decreasing the head shut?
The gather worked between rounds 26-27 and round 40 sculpts the muzzle after stuffing, pulling flat rounds into contour. A plain decrease closes the round but leaves the face flat.
How do I line up the nose with the eyes?
Sew the nose between rounds 34-37, then set the eyes between rounds 40-41 with 2-3 stitches between them. Placing the nose first gives you a fixed point to center the eyes against.
06 · Made byWho counted this one

Who writes Amigurumi Addict, how a build gets its number, and why every round on the site carries a stitch count.
07 · Next off the benchThree builds that sit near this one

Animals
Crochet a bunny or frog from one amigurumi base
How do you crochet a bunny and a frog from one base? Share Legs, Body, and Head; swap ears or eyes.

Animals
Crochet giraffe amigurumi pattern with horns and ears
How do you crochet a giraffe amigurumi? Shape head, body, legs, ears and horns in worsted yarn.

Animals
Amigurumi cat crochet pattern with oval muzzle and bow
How do you crochet an amigurumi cat with a flat muzzle? Shape it separately, pinch it, then sew it on.
Join the build log
One message when a build is issued
A drawing and its parts list, when one leaves the bench.