| Shelf | Level | Time | Hook | Yarn |
|---|---|---|---|---|
| Animals | Intermediate | 4-6 Hours | 4.0 mm | Worsted |
Amigurumi Bear Free Crochet Pattern
Make this adorable amigurumi bear with a free crochet pattern featuring textured legs, arms, and a sweet muzzle for a huggable handmade friend.
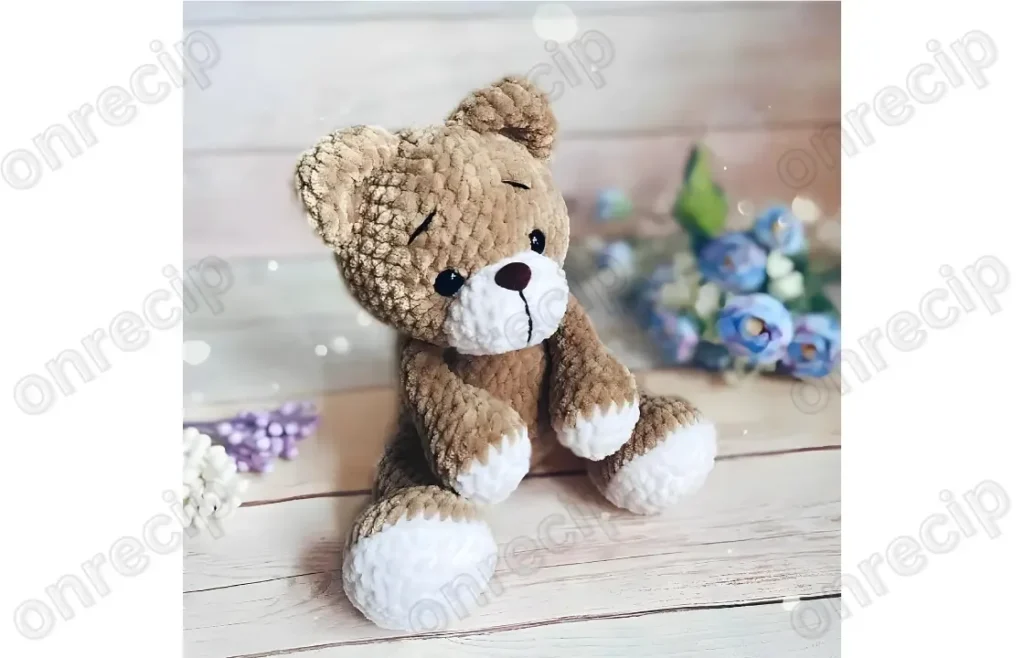
01 · The pieceWhat Amigurumi Bear Free Crochet Pattern actually is
This amigurumi bear is the kind of pattern that makes you fall back in love with crochet — soft, round, and endlessly huggable. Worked up in a warm beige body with a contrasting white muzzle and black details, it has that classic teddy bear charm that never goes out of style. It's perfect for crocheters who want to make a nursery decoration, a baby shower gift, or just a sweet little friend to keep on the shelf.
You'll be working with Himalaya Dolphin Baby yarn for that plush, velvety texture combined with YarnArt Jeans for crisp black accents, all on a small 3.5-4.0mm hook that keeps stitches nice and tight for stuffing. The pattern includes shaped legs worked over 13 rounds and arms over 9 rounds, giving you plenty of practice with amigurumi shaping techniques like increases and decreases. This is a great project for confident beginners or intermediate crocheters ready to tackle a multi-piece build.
The finished bear comes out plush, dense, and perfectly proportioned, with a soft muzzle that gives it real personality and safety eyes that bring it to life. It's the kind of amigurumi that photographs beautifully sitting on a shelf or tucked into a gift box. Whether you're making it for a baby's room, a birthday, or just for yourself, this little bear is guaranteed to become a treasured keepsake.
- Begin with the legs, working each one from a small starting round up through 13 rounds of shaping and stuffing.
- Repeat the same careful shaping and stuffing process for the second leg so both match in size.
- Move on to the arms, crocheting each one over 9 rounds with lighter stuffing for softer, more flexible limbs.
- Make a second matching arm, keeping tension consistent with the first so the bear looks balanced.
- Crochet the small muzzle piece separately in white to add contrast and shape to the bear's face.
- Position the safety eyes and nose on the head and muzzle before locking anything into place permanently.
- Sew the muzzle securely onto the head using a tapestry needle for a clean, seamless finish.
- Attach the finished legs and arms to the body, checking placement and symmetry as you stitch each one on.
02 · The count run22 rounds across 2 parts, each with its count
US terms throughout. Every row below ends with the count that round finishes on.
| Part | Qty | Finishes on |
|---|---|---|
| Legs (make 2) | 1 | - |
| Arms (make 2) | 1 | - |
With white yarn:
| Round | Instruction | Count |
|---|---|---|
| Round 1 | 6 sc in mc (6) | - |
| Round 2 | (inc) x 6 (12) | - |
| Round 3 | (1 sc, inc) x 6 (18) | - |
| Round 4 | 1 sc, inc, (2 sc, inc) х 5, 1 sc (24) | - |
| Round 5 | (3 sc, inc) x 6 (30)Change to beige yarn: | - |
| Round 6 | BLO 30 sc | - |
| Round 7 | 30 sc | - |
| Round 8 | 3 sc, 6 dec, 3 sc (24) | - |
| Round 9 | 7 sc, 5 dec, 7 sc (19) | - |
| Round 10 | 6 sc, 3 dec, 7 sc (16)Stuff with fiberfill. | - |
| Round 11-14 | 16 sc (4 rows) | - |
| Round 15 | (6 sc, dec) х 2 (14) | - |
| Round 16-17 | 14 sc (2 rows) Crochet additional 2 sc. Fold top of leg flat and 7 sc through both sides across. | - |
F.o.
With white yarn:
| Round | Instruction | Count |
|---|---|---|
| Round 1 | 6 sc in mc (6) | - |
| Round 2 | (inc) x 6 (12) | - |
| Round 3 | (2 sc, inc) x 4 (16)Change to beige yarn: | - |
| Round 4 | BLO 16 sc | - |
| Round 5 | 16 sc | - |
| Round 6 | 5 sc, 3 dec, 5 sc (13) | - |
| Round 7 | 13 sc | - |
| Round 8 | 4 sc, 3 dec, 3 sc (10) | - |
| Round 9-15 | 10 sc (7 rows) Crochet additional 2 sc. Fold top of arm flat and 5 sc through both sides across. | - |
F.o.
03 · Before it goes to a childWhat has to be right, and what is allowed to drift
- 💡 Keep your 3.5-4.0mm hook consistent throughout the legs and arms so all the pieces match up in size and tension when it's time to assemble.
- 💡 Stuff the legs and arms firmly but evenly before closing the final rounds — this is what gives the bear its sturdy, huggable shape instead of a saggy one.
- 💡 Use a stitch marker (a scrap of yarn or a locking marker) in the first stitch of every round on the 13-round legs so you never lose your place.
- 💡 Position the 12mm safety eyes and 12-13mm safety nose before doing any final closing seams — they're much easier to adjust while the piece is still open.
- 💡 Weave in all yarn tails through several stitches and back through the stuffing rather than just trimming close, so they don't work loose after handling.
- 💡 The finished amigurumi bear measures about 25 cm (9.8″) tall, so plan your yarn and fiberfill quantities with that finished size in mind.
04 · Snag listWhat went wrong on the bench, and the fix
Snag 1
Using a hook that's too large
Stick to the recommended 3.5-4.0mm hook and check your gauge on a test round — if you can see fiberfill through the stitches, size down.
Snag 2
Losing track of stitch counts
Place a stitch marker in the first stitch of every round and count your total stitches before moving on, especially after any increase or decrease round.
Snag 3
Understuffing the legs and arms
Stuff firmly in small amounts as you go rather than all at once at the end, pushing fiberfill into the toes and rounded tips first before filling the rest.
Snag 4
Attaching the safety eyes and nose
Insert the eye and nose posts but don't lock the safety backings yet — hold the muzzle in place and step back to check symmetry before securing everything permanently.
Snag 5
Leaving yarn tails too short
Leave at least 6 inches of tail on every color change so you have enough length to weave in securely without the color change unraveling.
Snag 6
Sewing the legs and arms on
Use a tapestry needle to whip stitch the pieces on slowly, checking alignment every few stitches, and weave in the starting and ending tails on the inside of the body.
05 · VariantsOther ways to issue this one
One of the best things about this bear pattern is how easily it adapts to your yarn stash and personal style. Try swapping the beige Himalaya Dolphin Baby for a soft gray or caramel brown to create a totally different bear personality — Vanna's Choice or Soft in similar shades work beautifully as substitutes if Himalaya isn't available near you. For a nostalgic vintage teddy look, use a heathered oatmeal yarn with a cream muzzle instead of white. Want a smaller or larger bear? Since the legs are worked over 13 rounds and the arms over 9, you can shorten each limb by 2-3 rounds before the final decrease rounds to make a petite version perfect for a keychain or ornament, or add 2-3 extra rounds in the straight sections of the legs and arms for a bigger, cuddlier bear that's better suited as a floor pillow companion. Just remember to size your stuffing amount and safety eye placement to match. For themed variations, consider a pastel pink or lavender body with a white muzzle for a springtime nursery gift, or a deep chocolate brown with a tan muzzle for a woodland-inspired look. You could also experiment with a fuzzy yarn like Bernat Baby Blanket for an ultra-soft alternative to the smooth Himalaya Dolphin Baby texture — just size down your hook slightly to keep stitches tight enough to hide the fiberfill. Adding a small crocheted bow, scarf, or vest is another easy way to personalize each bear you make.
I adore this bear because every piece — the legs, the arms, the muzzle — comes together like a little puzzle that builds into something genuinely charming. There's something so satisfying about watching the beige Himalaya Dolphin Baby yarn transform into rounded, plush limbs while the YarnArt Jeans black adds just the right amount of contrast for the nose and details. Working the legs over 13 rounds gives you time to really dial in your tension, and by the time you get to the 9-round arms, your hands already know the rhythm. I love how the small 3.5-4.0mm hook keeps every stitch snug, so no stuffing peeks through — that's the secret to a bear that looks professionally made. The muzzle is my favorite part; it's such a small piece, but it's the one that gives the whole face its warmth and expression once the safety eyes and nose go in. This pattern is proof that amigurumi doesn't need to be complicated to be adorable — it just needs thoughtful shaping and a little patience.
06 · QueriesQuestions logged against this build
What yarn weight works best for this amigurumi bear pattern?
This pattern uses Himalaya Dolphin Baby, a soft worsted-weight yarn, alongside YarnArt Jeans for the black details. Any worsted-weight yarn with similar softness will work as a substitute, just be sure to match your hook size to your gauge.
Can I make this bear without safety eyes if I'm giving it to a baby?
Yes, for safety around infants you can embroider the eyes with black yarn instead of using the 12mm plastic safety eyes. This makes the bear safer for very young children while keeping the same adorable look.
How much fiberfill will I need for the legs and arms?
The exact amount depends on your tension, but plan for a small handful per leg and slightly less per arm since the legs are worked over more rounds. Stuff firmly in stages as you crochet each piece rather than adding it all at the end.
What's the purpose of the muzzle piece, and how does it attach?
The muzzle is a small separate piece worked in white that adds dimension and a classic teddy bear look to the face. It's sewn onto the head using a tapestry needle before the safety nose and eyes are added to bring the face together.
Original pattern: https://onrecip.com/amigurumi-bear-free-pattern/
07 · Made byWho counted this one

Who writes Amigurumi Addict, how a build gets its number, and why every round on the site carries a stitch count.
08 · Next off the benchThree builds that sit near this one

Animals
Crochet a bunny or frog from one amigurumi base
How do you crochet a bunny and a frog from one base? Share Legs, Body, and Head; swap ears or eyes.

Animals
Crochet giraffe amigurumi pattern with horns and ears
How do you crochet a giraffe amigurumi? Shape head, body, legs, ears and horns in worsted yarn.

Animals
Amigurumi cat crochet pattern with oval muzzle and bow
How do you crochet an amigurumi cat with a flat muzzle? Shape it separately, pinch it, then sew it on.
Join the build log
One message when a build is issued
A drawing and its parts list, when one leaves the bench.