| Shelf | Level | Time | Yarn |
|---|---|---|---|
| Odds and ends | Intermediate | 10-14 hours | Worsted |
How to crochet a top-down raglan sweater or dress
How do you crochet a top-down raglan outfit? Build the collar, yoke, and sleeves from one stitch count.
01 · The pieceWhat How to crochet a top-down raglan sweater or dress actually is
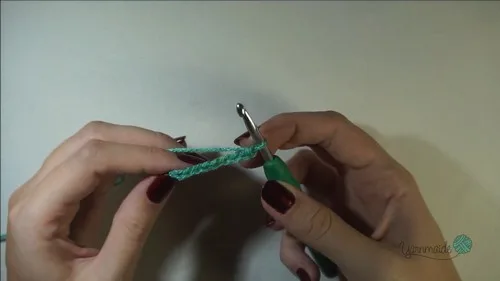
The Collar starts as a flat strip, turned row by row until it reaches 78 rows, then joined into a ring through the back loops. From that ring, the Raglan Yoke works outward in rounds, its four corner increases splitting the fabric into two body panels and two sleeve panels. At the underarms, the Body swaps each sleeve panel for a chain-8 bridge, and the Sleeves pick up their own panel stitches later to run downward as separate tubes.
The 78-stitch count set by the Collar is the one figure that has to hold exactly, since Raglan Yoke round 1 works directly off that edge. The four corner increases need to land in the same spot every round, but beyond that, the yoke depth, body length, and sleeve length are all open calls — stop each one when the piece reaches the fit you want, not at a fixed round.
02 · The count run17 rounds across 5 parts, each with its count
US terms throughout. Every row below ends with the count that round finishes on.
| Part | Qty | Finishes on |
|---|---|---|
| Collar | 1 | - |
| Raglan Yoke | 1 | - |
| Body | 1 | - |
| Bottom Border | 1 | - |
| Sleeves | 2 | - |
| Round | Instruction | Count |
|---|---|---|
| Round 1 | Make a slip knot and chain 9 for the collar. | - |
| Round 2 | Work SC in the second chain from the hook and across. | - |
| Round 3 | Chain 1, turn, and work SC in the back loop only; continue repeating until you have 78 rows.Slip stitch the two ends together through the back loops and turn inside out to join the collar into a ring. | - |
| Round | Instruction | Count |
|---|---|---|
| Round 1 | Chain 1 and work 78 SC around the collar edge and slip stitch to join. (78 sc) | - |
| Round 2 | Chain 3, chain 1, and DC in the same stitch to form the first corner; DC in the next 24 stitches for the first front or back panel; work DC, chain 1, DC in the next stitch for the second corner; DC in the next 13 stitches for the first sleeve panel; work DC, chain 1, DC in the next stitch for the third corner; DC in the next 24 stitches for the second front or back panel; work DC, chain 1, DC in the next stitch for the fourth corner; DC in the next 13 stitches for the second sleeve panel; slip stitch to the second chain of the starting chain 3 and slip stitch into the corner space. | - |
| Round 3 | Chain 3, chain 1, and DC in the same corner space; work DC in every stitch across each panel; work DC, chain 1, DC into each corner space as you reach it; continue repeating these rounds until the four corners reach under the armpits when laid flat; stop after about 23 rounds or your preferred yoke depth. | - |
| Round | Instruction | Count |
|---|---|---|
| Round 1 | Chain 2 and DC in the first stitch; chain 8 to create the first armhole bridge; skip all stitches of the first sleeve panel; DC into the first stitch of the next body panel; work DC across to the next corner; chain 8 to create the second armhole bridge; skip the entire second sleeve panel; DC into the first stitch of the last body panel; DC across to finish the round and slip stitch to join. | - |
| Round 2 | DC in the first stitch and continue DC in every stitch around; work one DC into each chain on the armhole bridges. | - |
| Round 3 | Repeat DC rounds until you reach your desired dress or sweater length. | - |
| Round 4 | Work one HDC in the first stitch, then one SC in the next stitch; work SC in every stitch for the rest of the round and slip stitch to join. | - |
| Round | Instruction | Count |
|---|---|---|
| Round 1 | Chain 5 for a thin ribbon; work SC in the second chain from hook and across for four SC; slip stitch into the next two stitches on the garment edge; turn and work SC in the back loop only across the ribbon; chain 1, turn, and work SC in the back loop only to go back down; slip stitch into the next two stitches on the garment edge; repeat this around the entire bottom edge; slip stitch the two ribbon ends together through the back loops. | - |
| Round | Instruction | Count |
|---|---|---|
| Round 1 | Attach yarn to one of the chains under the arm; chain 3 and DC in every stitch around the armhole, including one DC in each chain of the underarm bridge; slip stitch to join the round. | - |
| Round 2 | Chain 1, DC in the same stitch, and continue DC rounds until the sleeve reaches your preferred length. | - |
| Round 3 | Work one HDC in the first stitch and then one SC in the next stitch; work SC in all stitches to finish the round. | - |
| Round 4 | Work SC two together all around for the first reduction. | - |
| Round 5 | Work one SC, then SC two together all around for a second reduction, and slip stitch to join. | - |
| Round 6 | Chain 16 for a thicker cuff; work SC in the second chain from the hook and down; slip stitch into the next two stitches on the cuff edge; repeat the ribbon process by working SC in the back loop only and attaching with slip stitches; continue around the cuff and slip stitch the ends together through back loops. | - |
Techniques on this build
- Working flat then joining into a ring
- Used for the Collar: turned rows build to 78, then a back-loop slip stitch closes the ring — check the loop choice or the seam shows.
- Corner increases (DC, ch1, DC)
- Drives the Raglan Yoke shaping at four fixed points each round; losing track of a corner space throws off both adjoining panels.
- Back loop only single crochet
- Collar round 3 — working only the back loop builds the ridged line that has to stay unbroken once the collar is joined.
- Armhole bridge with skipped panel
- Body round 1 — chain 8 replaces each sleeve panel; skip the full panel width or the bridge count won't line up on both sides.
Final fit-up
- Weave in the Collar join tail and the Raglan Yoke starting tail before beginning the Body, so they don't get caught in the DC rounds.
- When working the Sleeves, pick up evenly across the 13 sleeve-panel stitches and the armhole bridge stitches so the round closes without a gap at the underarm.
- Weave in the tails from both Sleeves and from the Bottom Border, catching several plies of each stitch with the tapestry needle.
- Block the finished piece flat, pinning the four Raglan Yoke corners square before wear to set the increase lines.
How the parts fit
- The four corner increases (DC, ch1, DC) fall at the same four points every Raglan Yoke round, splitting the piece into two 24-stitch body panels and two 13-stitch sleeve panels — the standard raglan diagonal.
- The Collar is worked flat, turning row by row to 78, rather than in the round, because turning lets the back-loop-only single crochet build a ridged texture across every row; it's joined into a ring only after the ridge pattern is complete.
- Body round 1 replaces each sleeve panel with a chain-8 bridge, converting the yoke's two sleeve openings into a single continuous body round while keeping the stitch relationship set by the 78-stitch collar join.
Scaling the build
| Larger | Move up to a heavier yarn weight and a larger hook. Every round scales up together, enlarging the Collar, Raglan Yoke, Body, and Sleeves proportionally without changing any stitch count. |
|---|---|
| Longer or shorter body | Repeat the Body round 3 DC rounds more or fewer times before working the Bottom Border. This changes overall length only, leaving the yoke and sleeve fit untouched. |
| Deeper or shallower yoke | Repeat Raglan Yoke round 3 more or fewer times before starting the Body. This shifts where the armhole sits and adjusts chest and sleeve depth, independent of body length. |
03 · Putting it togetherHow the pieces go together
- S1
Repeat all sleeve construction steps to make the second sleeve to match the first.
04 · Snag listWhat went wrong on the bench, and the fix
Snag 1
Miscounting the 78 turned rows
Place a stitch marker every 10 rows while working Collar round 3, and recount before joining — Raglan Yoke round 1 depends on that exact figure.
Snag 2
Losing track of the corner spaces
Mark each of the four corner chain-1 spaces after Raglan Yoke round 2 so the DC, ch1, DC lands correctly on every following round.
Snag 3
Joining the collar through both loops
Slip stitch through the back loops only, as stated, or the ridge from round 3 breaks where the ring closes.
Snag 4
Uneven sleeve panel skip in Body round 1
Count out the full 13-stitch sleeve panel before skipping it, and chain exactly 8 for each bridge so both armholes match.
05 · QueriesQuestions logged against this build
How do I know when to stop the Raglan Yoke rounds?
Keep repeating Raglan Yoke round 3 until the four corners reach under the armpits when the piece is laid flat. That typically lands around round 23, but stop earlier or later for your preferred depth.
Can the sleeves be made longer than the sample?
Yes. The Sleeves sample runs 6 rounds per sleeve; continue repeating the sleeve's DC rounds past that point until the length is right, then finish the cuff as instructed.
Why is the collar worked flat before it's joined?
Working the Collar flat lets the back-loop-only single crochet build a ridged texture across each row. Joining afterward with a back-loop slip stitch keeps that ridge unbroken once the strip becomes a ring.
06 · Made byWho counted this one

Who writes Amigurumi Addict, how a build gets its number, and why every round on the site carries a stitch count.
07 · Next off the benchThree builds that sit near this one

Odds and ends
Crochet a phone bag with strap, flap, and ring closure
How to crochet a phone bag? Join rounds from a 30-chain base, add a strap, flap, and ring.

Odds and ends
Crochet worsted weight socks with a turned heel
How do you crochet socks for winter? Build toe-up in worsted weight with a folded heel and ribbed leg.

Odds and ends
Toe-Up Woodland Walker Crochet Socks With Colorwork Cuff
How do you crochet toe-up socks with a colorwork cuff? Build the Toe, Heel, and stranded Cuff in order.
Join the build log
One message when a build is issued
A drawing and its parts list, when one leaves the bench.