| Shelf | Level | Time | Yarn |
|---|---|---|---|
| Odds and ends | Intermediate | 4-6 hours | Worsted |
Crochet worsted weight socks with a turned heel
How do you crochet socks for winter? Build toe-up in worsted weight with a folded heel and ribbed leg.
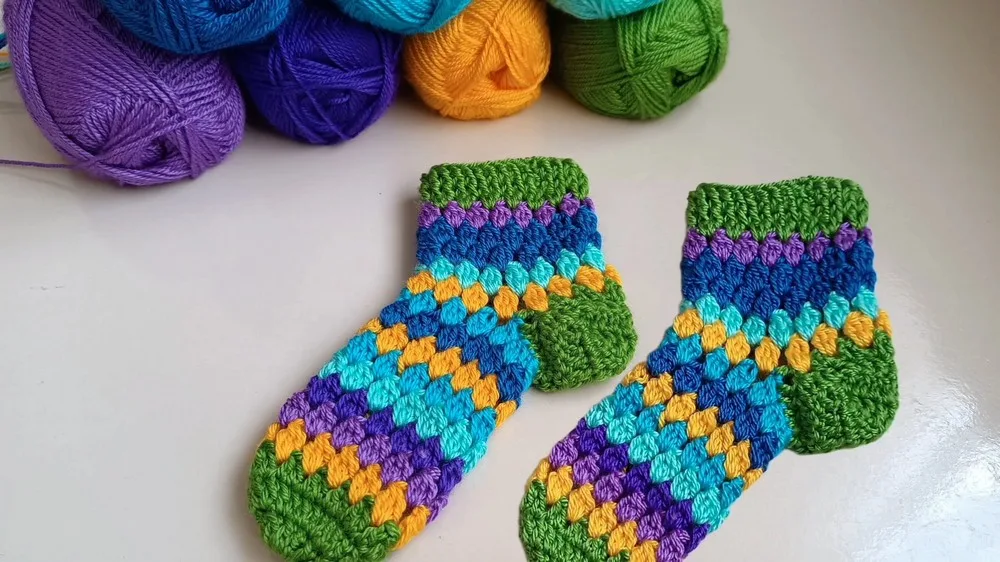
01 · The pieceWhat Crochet worsted weight socks with a turned heel actually is
The sock builds in three parts: Toe, Heel, and Leg, each worked as its own unit before the last joins the whole into a wearable tube. The Toe starts as a ch-6 ring and doubles outward until it reaches 24 sts, the Heel is worked flat and then folded, and the Leg picks up from the Toe's stitch count to run the length of the foot and cuff. Nothing here is stuffed or seamed with a separate panel — the join is the heel fold itself, closed from both sides.
Stitch count matters at two checkpoints: 12 sts after Round 3 of the Toe and 24 sts after Round 5, since the Leg depends on that base. Row length in the Heel is more forgiving — hdc counts across its 2 rounds can drift a stitch without ruining fit, since the fold absorbs small variance. Leg length and cuff height are open-ended by design; rounds repeat until the piece reaches the foot and the top of the sock, so precision there is about your foot, not the pattern.
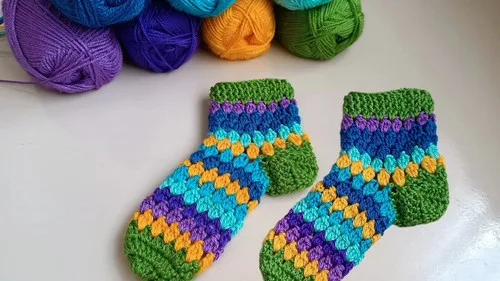
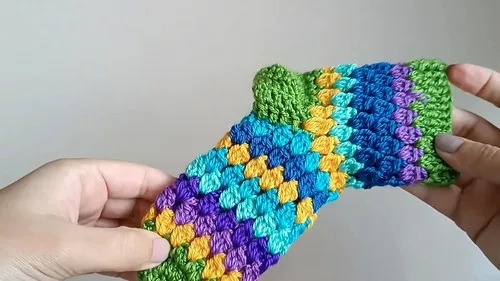
02 · The count run12 rounds across 3 parts, each with its count
US terms throughout. Every row below ends with the count that round finishes on.
| Part | Qty | Finishes on |
|---|---|---|
| Toe | 1 | - |
| Heel | 1 | - |
| Leg | 1 | - |
| Round | Instruction | Count |
|---|---|---|
| Round 1 | Make a slip knot and ch 6; sl st in the first ch to form a ring. | - |
| Round 2 | Ch 1, hdc in the same st, 2hdc in each st around. | - |
| Round 3 | Rep the last row until you have a total of 12 sts in the first row. (12) | - |
| Round 4 | Sl st in the first st, ch 1, hdc in the same st, 2hdc in each st around. | - |
| Round 5 | Rep the last row until you have a total of 24 sts in the second row. (24) | - |
If you want to make larger socks, crochet more rows until you reach the desired size.
| Round | Instruction | Count |
|---|---|---|
| Round 1 | Ch 3, 11hdc in the first st, hdc in the next st, hdc in the following st. | - |
| Round 2 | Rep the last row 4 more times.Fold the heel part and join together from both sides. | - |
| Round | Instruction | Count |
|---|---|---|
| Round 1 | Ch 3, 1hdc in the first st, sk 2 sts, 1hdc in the next st, 1hdc in each st around. | - |
| Round 2 | Rep the last row until you reach the desired length for the leg. | - |
| Round 3 | Ch 3, hdc in the first st, 2hdc in each st around. | - |
| Round 4 | Sl st in the first st, ch 2, hdc in each st around. | - |
| Round 5 | Rep the last row until you reach the top of the sock. | - |
Techniques on this build
- Working in the round from a chain ring
- Used to start the Toe at Round 1 — keep the ring snug or the first hdc round will gap at the center.
- Even increasing (2hdc in each st)
- Drives Toe Rounds 2 and 4 from the starting ring up to 24 sts — miscounting here throws off every round after.
- Working flat rows for a folded heel
- The Heel's 2 rounds are worked back and forth rather than in the round, since the piece needs a flat flap to fold and join.
- Skip-stitch shaping for gusset decrease
- Leg Round 1 skips 2 sts before the next hdc — this is where the foot narrows into the ankle, so count skips carefully.
Final fit-up
- Weave in any loose ends left from the Toe ring and the Heel joins.
- Fold the Heel flap and join both sides together as the pattern's own instruction states, closing the flap into the heel cup.
- Thread yarn through the last row of Leg stitches and pull tight to close the cuff opening.
- Cut the tail to about 6 inches, thread it through the last stitch, pull tight, and trim close to the stitch.
How the parts fit
- All Toe increases are even (2hdc in each st across the round), which is why the Toe grows from a small ring to 24 sts in just two increase rounds rather than shaping gradually.
- The Heel is worked in flat rows, not joined rounds, because the piece needs two open edges to fold together — a round would leave no seam to close the heel cup.
- The Leg's Round 1 skip (sk 2 sts) sits directly above the Heel join, narrowing the stitch count into the ankle before the Leg continues straight up.
Scaling the build
| Smaller | Drop to a finer worsted-adjacent yarn with a smaller hook to tighten gauge across the same rounds. |
|---|---|
| Longer leg or foot | Repeat the open-ended Leg rounds or extra Toe increase rounds as the pattern allows, adding length without altering the Heel. |
03 · Putting it togetherHow the pieces go together
- S1
Weave in any loose ends.
- S2
Attach a yarn needle to the end of a piece of yarn.
- S3
Thread the yarn through the last row of stitches.
- S4
Pull the yarn tight to close the opening.
- S5
Cut the yarn, leaving a tail of about 6 inches.
- S6
Thread the tail through the last stitch and pull it tight.
- S7
Cut the tail close to the stitch.
- S8
Your socks are finished!
04 · Snag listWhat went wrong on the bench, and the fix
Snag 1
Losing count during Toe increase rounds
Place a stitch marker every few stitches while working 2hdc in each st, then recount at 12 and again at 24 before moving to the Heel.
Snag 2
Joining the Heel flap with a twist
Lay the flap flat and match the two open edges before sl st or seaming through both layers — check the fold from the right side before closing it fully.
Snag 3
Skipping the wrong stitch in the Leg gusset
Mark the 2 skipped stitches in Leg Round 1 before working them, since an extra or missed skip changes how the ankle sits against the Heel.
Snag 4
Closing the cuff opening too loosely
Pull the woven yarn through the last row firmly before knotting off, then check the opening lies flat with no visible gap.
05 · QueriesQuestions logged against this build
Why is the Heel worked flat instead of in the round?
The Heel needs two open edges that fold together to form the heel cup. Working it flat over 2 rounds creates that flap; joining both sides afterward closes it into shape.
What yarn weight works best for this sock?
The pattern calls for worsted weight yarn, matched to a hook size chosen for that yarn. Heavier or lighter worsted-adjacent yarns will shift the finished size, so swatch first if warmth or fit is critical.
Can the sock be made taller for winter wear?
Yes — the Leg's rounds are repeated until you reach the desired length and again until you reach the top of the sock, so the cuff height is open by design, not fixed by a stitch count.
06 · Made byWho counted this one

Who writes Amigurumi Addict, how a build gets its number, and why every round on the site carries a stitch count.
07 · Next off the benchThree builds that sit near this one

Odds and ends
Crochet a phone bag with strap, flap, and ring closure
How to crochet a phone bag? Join rounds from a 30-chain base, add a strap, flap, and ring.

Odds and ends
Toe-Up Woodland Walker Crochet Socks With Colorwork Cuff
How do you crochet toe-up socks with a colorwork cuff? Build the Toe, Heel, and stranded Cuff in order.
Odds and ends
How to crochet a mini basket for keepsakes
How do you crochet a mini basket? Work single crochet increases in a spiral from a chain ring, no seams needed.
Join the build log
One message when a build is issued
A drawing and its parts list, when one leaves the bench.