| Shelf | Level | Time | Hook | Yarn |
|---|---|---|---|---|
| Odds and ends | Intermediate | 4-6 hours | 4 mm | Bulky |
How to crochet a mini basket for keepsakes
How do you crochet a mini basket? Work single crochet increases in a spiral from a chain ring, no seams needed.
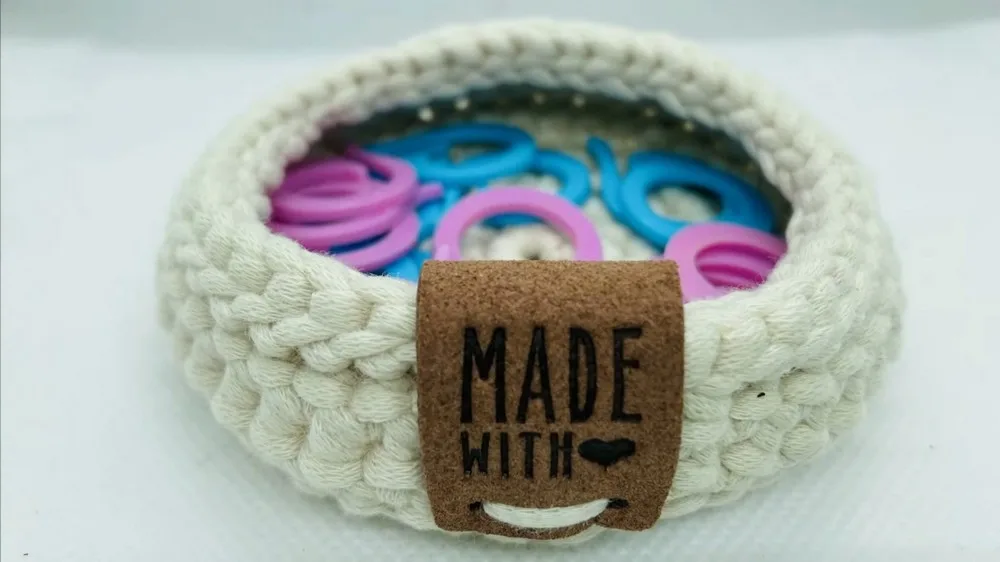
01 · The pieceWhat How to crochet a mini basket for keepsakes actually is
The basket is a single continuous build: one chain-4 ring, worked in an unbroken spiral through the Starting Loop's 6 rounds, with no side panel added and no seam joining base to wall. Row 1 sets 5 sc into the ring; Row 2 and Row 3 double the stitch count (10, then 20 sc) to flare the base flat before the remaining rounds turn the work upright. Finishing Touches closes the piece with a cut, a pulled-tight loop, and woven ends — no gathering, no second piece to attach.
Tension at the ring matters most: a loose chain-4 leaves a visible hole at the base center that no later round corrects. Even placement of the 2-sc increases in Rows 2 and 3 matters almost as much, since a lopsided increase cups or ruffles the base before the walls even start. Past that, tolerances loosen — bulky yarn and a 4 mm hook forgive minor stitch-height drift in the straight rounds, and the fastened-off rim needs no exact stitch count to sit flat.
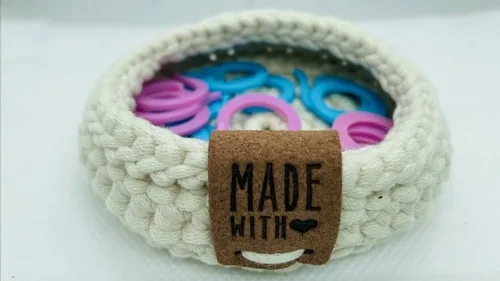
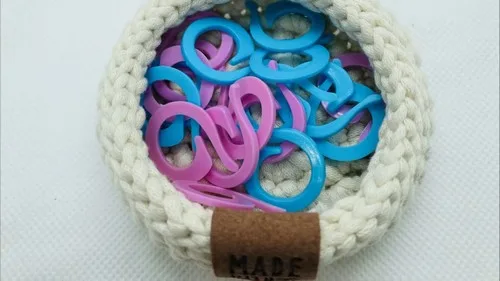
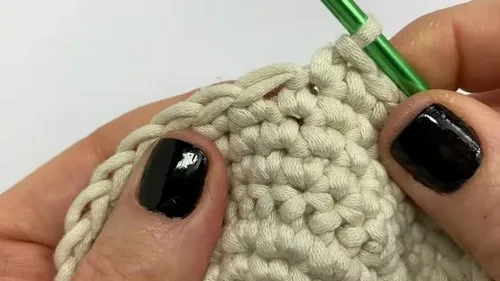
02 · The count run6 rounds across 2 parts, each with its count
US terms throughout. Every row below ends with the count that round finishes on.
| Part | Qty | Finishes on |
|---|---|---|
| Starting Loop | 1 | (40) |
| Finishing Touches | 1 | - |
Create a slip knot.
Chain 4 stitches.
Slip stitch into the first chain to form a ring.
| Round | Instruction | Count |
|---|---|---|
| Round 1 | Work 5 single crochets (sc) into the ring. | - |
| Round 2 | Work 2 sc in each stitch around (10 sc total). For Row 3: Repeat the pattern from Row 2, working 2 sc in each stitch around (20 sc total). | (20) |
| Round 4 | Work 1 sc in each stitch around (20 sc total). | (20) |
| Round 5 | Work 2 sc in each stitch around (40 sc total). In Row 6: Work a special stitch called the "yarn over slip stitch" in the front loops only, all around (40 stitches). | (40) |
| Round 7 | to 9: Work 1 sc in each stitch around for three rows, keeping stitch count at 40. | - |
| Round 10 | Close the project using a slip stitch variation worked in back loops only. This creates a decorative edge and finishes the rim of the basket.Remove the stitch marker and join the last stitch with a slip stitch for a seamless finish. | - |
Cut the yarn, leaving a small tail.
Pull the tail through the last loop on your hook and pull tight to secure.
Weave in the ends using the darning needle, hiding the tail within the stitches.
Techniques on this build
- Working into a chain ring
- Chain 4 and slip stitch to close before Row 1; keep the ring snug or the base center gaps open.
- Single crochet increase (2 sc per st)
- Used through Rows 2 and 3 to take the base from 5 to 20 sc; space increases evenly around the round.
- Continuous spiral rounds
- Runs the full length of the Starting Loop with no slip-stitch join between rounds; place a stitch marker in the first stitch of each round to track the start.
- Weaving in ends
- Finishing Touches only — thread the tail on the darning needle and run it through several stitches on the inside wall to lock it invisibly.
Final fit-up
- Cut the yarn, leaving a tail long enough to thread onto the darning needle.
- Pull the tail through the last loop on the hook and draw tight to lock off the final stitch.
- Thread the tail onto the darning needle and weave it through several stitches on the inside of the wall, reversing direction once to anchor it.
- Press the base flat against a hard surface by hand so the rounds sit level before the basket goes into use.
How the parts fit
- Rows 2 and 3 each place 2 sc in every stitch, doubling the count from 5 to 10 to 20 sc — this is what forces the piece flat rather than tubular for those first three rounds.
- All 6 rounds of the Starting Loop are worked as one continuous spiral, so the transition from flat base to upright wall happens by simply dropping the increase rate after Row 3 rather than by any join or turn.
- The Finishing Touches part carries 0 rounds and no decrease shaping — the rim is fastened off at whatever stitch count the last worked round reached, so the wall's final round sets the opening size directly.
Scaling the build
| Larger | Move up to a heavier bulky yarn while keeping the 4 mm hook or sizing up to match; stitches grow taller and wider, enlarging the whole basket. |
|---|---|
| Smaller | Drop to a smaller hook than 4 mm with the same yarn; stitches tighten and the finished base and wall both shrink. |
| Taller | Repeat one of the non-increase rounds from the wall section an extra time before starting Finishing Touches; this adds wall height without changing the base diameter. |
03 · Putting it togetherHow the pieces go together
- S1
Cut the yarn, leaving a small tail.
- S2
Pull the tail through the last loop on your hook and pull tight to secure.
- S3
Weave in the ends using the darning needle, hiding the tail within the stitches.
04 · Snag listWhat went wrong on the bench, and the fix
Snag 1
Loose starting ring
Pull the chain-4 ring snug before Row 1's first 5 sc; a slack ring leaves a hole no later round will close.
Snag 2
Uneven increases in Rows 2-3
Space the 2-sc increases evenly around each round, using a stitch marker to mark quarters if needed, or the base will cup instead of lying flat.
Snag 3
Losing the round start in the spiral
Move a stitch marker into the first stitch of every new round; without it the spiral drifts and the increase rounds land unevenly.
Snag 4
Fastening off without weaving in fully
Run the tail through at least a few stitches on the inside wall and reverse once, since bulky yarn can work itself loose from a short pass.
05 · QueriesQuestions logged against this build
Why does the base of the basket lie flat instead of curling?
Rows 2 and 3 double the stitch count with 2 sc in every stitch, which spreads the fabric outward evenly. That doubling is what keeps the base flat before the increase rate drops for the wall rounds.
Does this basket need stuffing like a standard amigurumi piece?
No — the Finishing Touches part has no stuffing step. It is a single wall of single crochet closed only by weaving in the tail, so it stays open like any basket.
How do I keep the sides of the basket straight instead of flared?
Stop increasing once Row 3 reaches its 2-sc-per-stitch count and work the remaining rounds even, with one stitch in each stitch around. Using a stitch marker at the round start helps catch any accidental increase early.
06 · Made byWho counted this one

Who writes Amigurumi Addict, how a build gets its number, and why every round on the site carries a stitch count.
07 · Next off the benchThree builds that sit near this one

Odds and ends
Crochet a phone bag with strap, flap, and ring closure
How to crochet a phone bag? Join rounds from a 30-chain base, add a strap, flap, and ring.

Odds and ends
Crochet worsted weight socks with a turned heel
How do you crochet socks for winter? Build toe-up in worsted weight with a folded heel and ribbed leg.

Odds and ends
Toe-Up Woodland Walker Crochet Socks With Colorwork Cuff
How do you crochet toe-up socks with a colorwork cuff? Build the Toe, Heel, and stranded Cuff in order.
Join the build log
One message when a build is issued
A drawing and its parts list, when one leaves the bench.