| Shelf | Level | Time | Hook | Yarn |
|---|---|---|---|---|
| Odds and ends | Intermediate | 10-14 Hours | 3.5 mm | Fingering |
Sage Green Botanical Lace Maxi Skirt Free Crochet Pattern
Crochet a flowing sage green lace maxi skirt with a gradient yarn effect, half double crochet gauge, and a comfy elastic waistband for everyday wear.
01 · The pieceWhat Sage Green Botanical Lace Maxi Skirt Free Crochet Pattern actually is
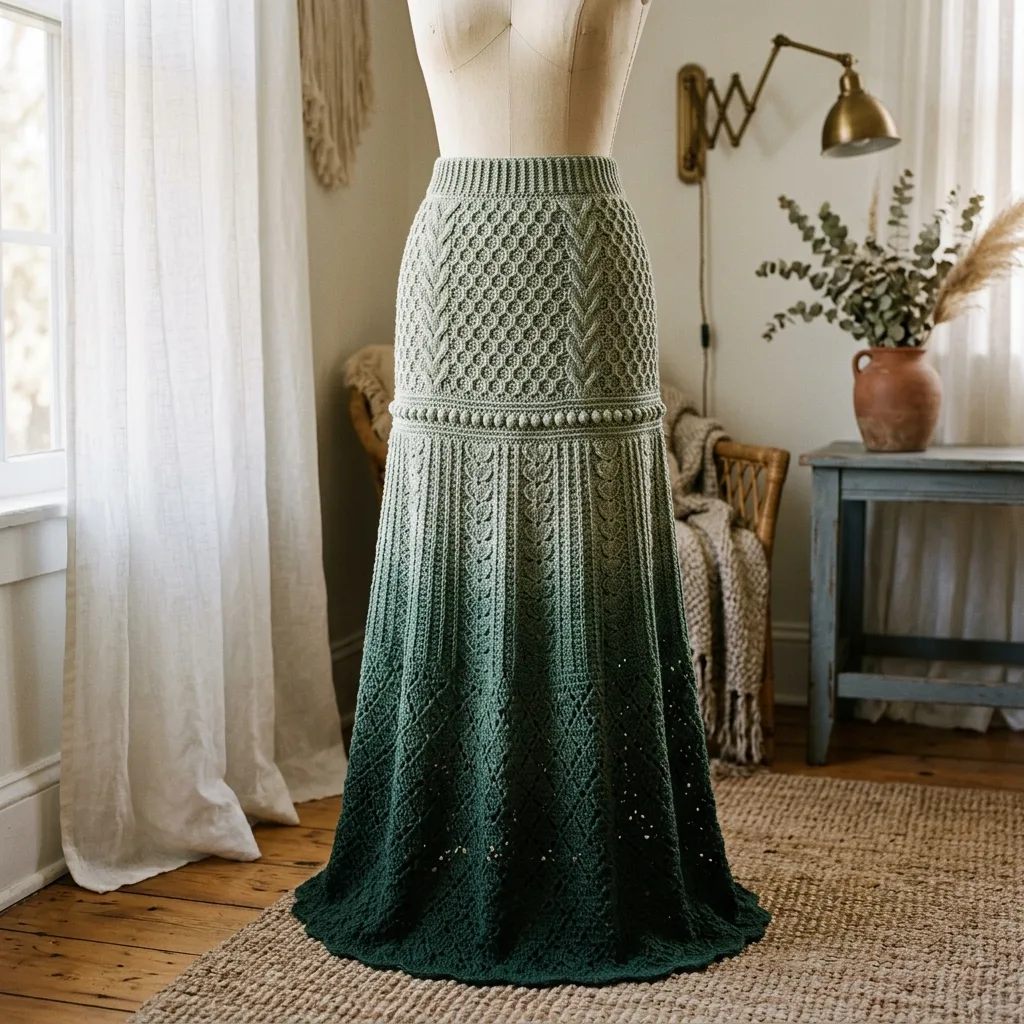
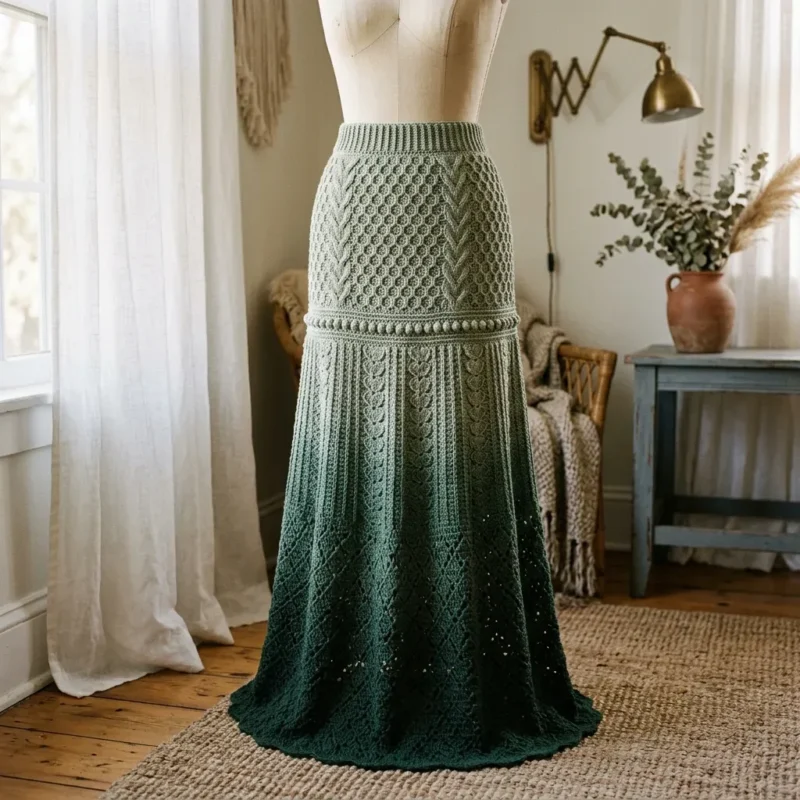
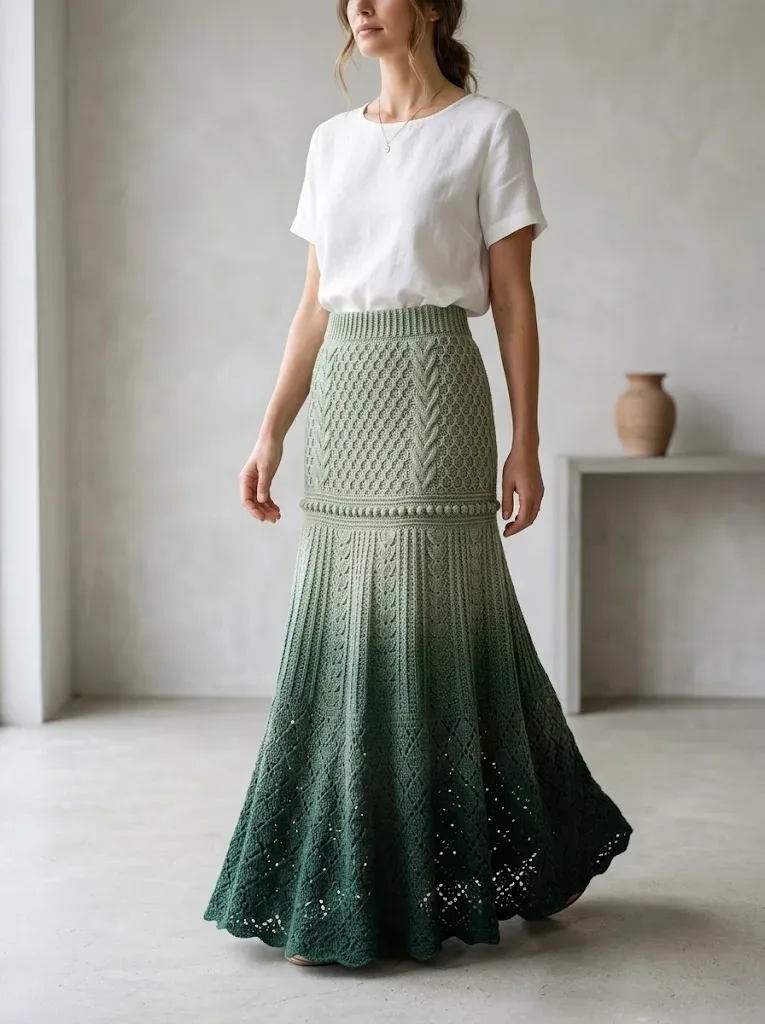
This Sage Green Botanical Lace Maxi Skirt is a flowing, wearable piece that lets a gradient cake yarn do all the visual heavy lifting, shifting gently from soft sage green at the waist to a rich deep forest green at the hem. It's designed for crocheters who want to wear their craft, not just display it, and it's perfect for anyone drawn to nature-inspired color stories and garments that feel special without feeling fussy. If you've been eyeing your yarn stash for something more grown-up than another amigurumi, this is it.
The finished skirt is a true maxi length garment with a soft, drapey hand thanks to the superwash merino and nylon blend, giving it movement without sacrificing structure. The skirt has negative ease at the waist for a snug fit and positive ease at the hip and hem for beautiful drape and movement, and the gradient effect means no two skirts look quite identical. It's a lovely handmade gift for a fellow fiber lover, or a well-earned treat to sew, er, crochet for yourself.
- Swatch first with the larger E/4 hook to confirm you're hitting the half double crochet gauge before casting on.
- Work the upper hip section, alternating chevron panels and honeycomb texture over 24 rounds, placing stitch markers at every panel boundary.
- Crochet the bobble divider row to transition from the fitted hip into the flared lower skirt.
- Work the lower skirt's leaf motif panels, increasing every 6th round for gradual flare while letting the gradient cake yarn transition from sage to forest green.
- Finish with the open diamond lace section for lightness and movement at the hem.
- Measure your waist, subtract 2 inches, and cut your 1 inch elastic to that length before threading it through the finished waistband.
- Secure the elastic ends and weave in any remaining tails with a tapestry needle for a clean, comfortable finish.
02 · The count run29 rounds across 9 parts, each with its count
US terms throughout. Every row below ends with the count that round finishes on.
| Part | Qty | Finishes on |
|---|---|---|
| Honeycomb Stitch Pattern (multiple of 6 + 2) | 1 | - |
| Chevron Panel (worked over 15 stitches) | 1 | - |
| Leaf Motif Panel (worked over 11 stitches) | 1 | - |
| Waistband | 1 | - |
| Transition Round | 1 | (144) |
| Upper Hip Section: Honeycomb with Chevron Panels | 1 | - |
| Bobble Divider Row | 1 | - |
| Lower Skirt: Flared Panels with Leaf Motifs | 1 | - |
| Diamond Lace Section | 1 | - |
This creates the beautiful textured panels at the hip section.
| Round | Instruction | Count |
|---|---|---|
| Round 1 | *FPdc around next st, dc in next 2 sts, FPdc around next st, dc in next 2 sts* repeat around | - |
| Round 2 | *BPdc around FPdc, dc in next 2 sts* repeat around | - |
| Rounds 3-4 | Repeat rounds 1-2 | - |
| Round 5 | Dc in first st, *FPdc around next st, dc in next 2 sts* repeat, ending with dc in last st | - |
| Round 6 | Dc in first st, *BPdc around FPdc, dc in next 2 sts* repeat around | - |
This shifts the cable columns to create the honeycomb effect.
| Round | Instruction | Count |
|---|---|---|
| Row 1 | Dc in next 7 sts, 3 dc in next st (center point), dc in next 7 sts | - |
| Row 2 | FPdc around first dc, dc in next 5 sts, FPdc around next dc, 3 FPdc in center st, FPdc around next dc, dc in next 5 sts, FPdc around last dcContinue this pattern, alternating between dc and FPdc to create the raised V shape. | - |
This is the gorgeous botanical element that runs down the lower skirt.
| Round | Instruction | Count |
|---|---|---|
| Rounds 1-2 | Dc across all 11 sts | - |
| Round 3 | Dc in 4 sts, FPdc in next 3 sts (leaf spine), dc in 4 sts | - |
| Round 4 | Dc in 3 sts, FPdc in next st, dc in next 3 sts (leaf center), FPdc in next st, dc in 3 sts | - |
| Round 5 | Dc in 2 sts, FPdc in next st, dc in next 5 sts, FPdc in next st, dc in 2 stsContinue building outward for 6 more rounds, then decrease back to spine for the next leaf. | - |
Using smaller hook, ch 8.
| Round | Instruction | Count |
|---|---|---|
| Row 1 | Sc in 2nd ch from hook and each ch across. (7 sc) | - |
| Row 2 | Ch 1, turn. Working in back loops only (BLO), sc in each st across. (7 sc)Repeat Row 2 until waistband measures your waist measurement minus 1 inch. The ribbing has stretch. Join short ends with sl st to form a circle. Do not cut yarn. | - |
Switch to larger hook.
| Round | Instruction | Count |
|---|---|---|
| Round 1 | Ch 1, work 1 sc evenly along the long edge of the waistband, placing approximately 3 sc for every 4 rows. Join with sl st. Place marker for beginning of round. | - |
You should have a stitch count divisible by 6. For size small, aim for 144 stitches. Adjust by adding or skipping stitches evenly as needed.
| Round | Instruction | Count |
|---|---|---|
| Round 2 | Ch 2 (counts as hdc here and throughout), hdc in each st around. Join. (144 sts for size S) | (144) |
| Rounds 3-4 | Repeat Round 2. | - |
Now we begin the beautiful textured section. Take a deep breath. We will break this down.
| Round | Instruction | Count |
|---|---|---|
| Setup Round | Ch 2, *hdc in next 15 sts (chevron panel area), place marker, hdc in next 57 sts (honeycomb area), place marker* repeat once more. Join. (144 sts) | - |
This divides your skirt into 4 sections: 2 chevron panels at center front and center back, 2 honeycomb sections at the sides.
| Round | Instruction | Count |
|---|---|---|
| Round 1 | *Chevron section:* Work Row 1 of Chevron Panel over 15 sts *Honeycomb section:* Work Round 1 of Honeycomb Pattern over 57 sts. Repeat for second chevron and honeycomb section. Join.Continue working both patterns simultaneously for 24 rounds. The honeycomb will complete 6 full repeats while the chevron builds 4 complete V shapes. | - |
This creates the beautiful textured band between the fitted hip and the flared lower section.
| Round | Instruction | Count |
|---|---|---|
| Round 1 | Ch 2, *hdc in next 2 sts, bob in next st* repeat around, ending with hdc in any remaining sts. Join. | - |
| Round 2 | Ch 2, hdc in each st and bobble around. (This round sits behind the bobbles and evens the fabric) | - |
| Rounds 3-4 | Ch 2, hdc around. Join. | - |
Here is where we add gradual increases for the beautiful flare and introduce the leaf motif panels.
| Round | Instruction | Count |
|---|---|---|
| Setup Round | Ch 2, *hdc in next 11 sts (leaf panel), place marker, inc in next st, hdc in next 22 sts, inc in next st, place marker* repeat around. Join. (152 sts)We added 8 stitches. These increase rounds happen every 6th round to create gradual flare. | - |
| Rounds 1-6 | Work leaf motif Round 1-6 over each 11-st panel, hdc in all stitches between panels. | - |
| Round 7 | (Increase Round): Work leaf motif pattern over panels. *Inc in first st after marker, hdc to 1 st before next marker, inc in that st* repeat around. (160 sts) | - |
| Rounds 8-12 | Continue leaf motif pattern, hdc between panels. | - |
| Round 13 | (Increase Round): Repeat increase placement. (168 sts)Continue in this manner, working increases every 6th round and progressing through the leaf motif pattern (each leaf takes approximately 14 rounds to complete). | - |
The lower portion transitions to an open diamond mesh that adds lightness and movement.
| Round | Instruction | Count |
|---|---|---|
| Round 1 | Ch 3 (counts as dc), *dc in next st, ch 1, sk 1 st* repeat around. Join to top of ch 3. | - |
| Round 2 | Ch 3, dc in ch-1 space, *ch 1, dc in next ch-1 space* repeat around. Join. | - |
| Rounds 3-12 | Repeat Round 2, creating an offset mesh pattern. | - |
03 · Before it goes to a childWhat has to be right, and what is allowed to drift
- 💡 Swatch with the E/4 hook first since the whole skirt's fit depends on hitting 22 stitches and 26 rows per 4 inches in half double crochet.
- 💡 Keep your D/3 hook handy from the start of the project, not just at the end, so you're not scrambling to find it when you reach the waistband.
- 💡 Place your 8+ stitch markers at even intervals around the setup round and move them up every single round without exception.
- 💡 Measure the 1-inch elastic against your actual waist and subtract 2 inches before cutting, then overlap and stitch the ends securely before threading it through the casing.
- 💡 Use a row counter from round one; fingering weight lace rounds look deceptively similar and it's easy to lose your place over a long project.
- 💡 If using a gradient cake, pull a small length from each end to preview the color order before committing, since starting from the wrong end reverses your intended sage-to-forest transition.
- 📏 Finished measurements — Small: 26in waist, 36in hip, 42in length. Medium: 30in waist, 40in hip, 42in length. Large: 34in waist, 44in hip, 43in length. XL: 38in waist, 48in hip, 43in length.
- 💡 The skirt has negative ease at the waist for a snug fit and positive ease at the hip and hem for beautiful drape and movement — please check your gauge, since this is a fitted garment and ten minutes spent swatching saves hours of frustration later.
04 · Snag listWhat went wrong on the bench, and the fix
Snag 1
Skipping the gauge swatch because it's 'just a skirt'
22 stitches and 26 rows per 4 inches, even a small gauge discrepancy compounds over dozens of rounds and can throw off the entire fit. Always swatch in half double crochet with your actual E/4 hook and yarn before casting on the setup round.
Snag 2
Losing track of rounds in the long fingering weight body
hundreds of rows ahead of you, it's easy to lose count without a system. Use a row counter religiously and place stitch markers at the start of each round, moving them up every time, so a phone call or bathroom break doesn't cost you your place.
Snag 3
Not placing enough stitch markers around the setup round
The pattern recommends at least 8 stitch markers, and skimping on these makes it hard to keep your stitch count even across a wide round. Mark consistent intervals (every quarter or eighth of the round) so you can quickly spot if you've drifted off count.
Snag 4
Cutting the elastic to a generic length
The pattern specifies measuring your actual waist and subtracting 2 inches for a snug, comfortable fit. Using a standard or guessed length often results in a waistband that's too loose or uncomfortably tight.
Snag 5
Ignoring the gradient cake's put-up
Since the color shift depends on where you start pulling yarn from the cake, unwinding from the wrong end can throw off your intended sage-to-forest progression. Check the label or pull a bit from both ends before starting to confirm which end gives you the color order you want.
05 · QueriesQuestions logged against this build
Can I use a different yarn weight instead of fingering weight?
You can, but you'll need to recalculate your stitch and round counts significantly since this pattern is built around a specific gauge (22 stitches and 26 rows per 4 inches). A heavier yarn will use less yardage but require a much larger hook and a full re-swatch.
Why does the pattern use two different hook sizes?
The E/4 hook creates the drapey, lace-like body of the skirt, while the smaller D/3 hook tightens up the gauge for the waistband so it can securely hold the elastic. This two-hook approach keeps the skirt flowy while still fitting snugly at the waist.
How much yarn do I actually need?
The pattern calls for 1200 to 1600 yards of fingering weight yarn depending on your finished size. It's a good idea to buy on the higher end of that range if you're making a larger size or want extra length.
Do I need a gradient yarn, or can I use solid colors?
A gradient cake gives you that seamless sage-to-forest transition, but you can absolutely recreate the look using four coordinating solid fingering weight yarns. Just plan your color changes evenly across your total round count for a smooth-looking shift.
What size elastic should I buy for the waistband?
The pattern specifies 1 inch wide elastic, measured to your waist minus 2 inches for a snug, comfortable fit. Always double check your measurement before cutting since it's easier to trim more than to add length later.
Original pattern: https://bunnypatterns.com/sage-green-botanical-lace-maxi-skirt-free-crochet-pattern/
06 · Made byWho counted this one

Who writes Amigurumi Addict, how a build gets its number, and why every round on the site carries a stitch count.
07 · Next off the benchThree builds that sit near this one

Odds and ends
Crochet a phone bag with strap, flap, and ring closure
How to crochet a phone bag? Join rounds from a 30-chain base, add a strap, flap, and ring.

Odds and ends
Crochet worsted weight socks with a turned heel
How do you crochet socks for winter? Build toe-up in worsted weight with a folded heel and ribbed leg.

Odds and ends
Toe-Up Woodland Walker Crochet Socks With Colorwork Cuff
How do you crochet toe-up socks with a colorwork cuff? Build the Toe, Heel, and stranded Cuff in order.
Join the build log
One message when a build is issued
A drawing and its parts list, when one leaves the bench.