| Shelf | Level | Time | Hook | Yarn |
|---|---|---|---|---|
| Odds and ends | Intermediate | 4-6 Hours | 4.0 mm | Worsted |
Sage Green Botanical Lace Bucket Bag Crochet Pattern
Make a stunning Sage Green Botanical Lace Bucket Bag with this detailed crochet pattern featuring lace overlay panels, a sturdy base, and twisted handle.
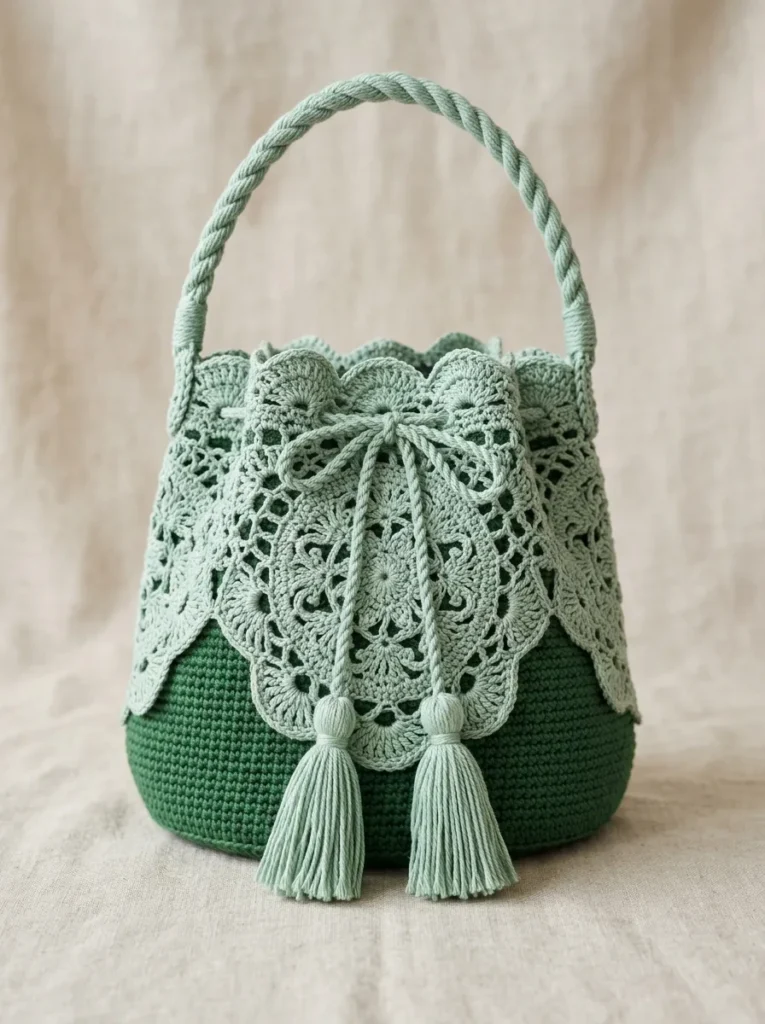
01 · The pieceWhat Sage Green Botanical Lace Bucket Bag Crochet Pattern actually is
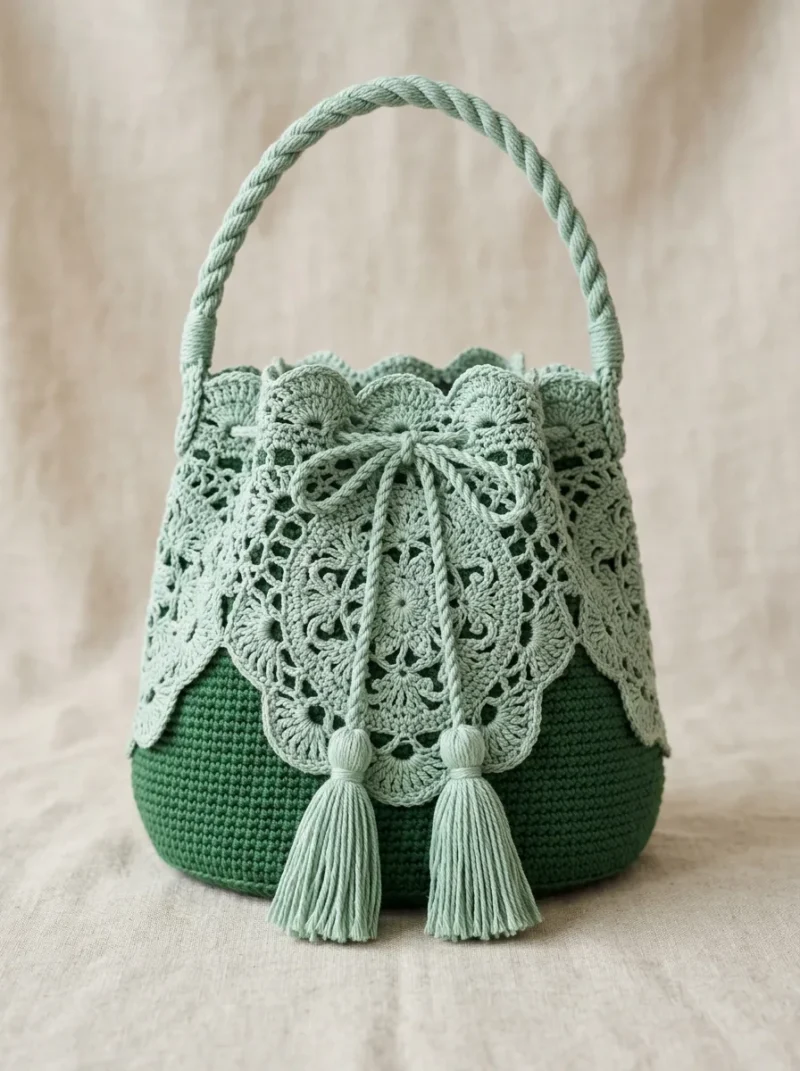
This Sage Green Botanical Lace Bucket Bag is a stunning fusion of sturdy structure and delicate detail. It pairs a solid, worsted weight cotton base with dreamy sport weight lace overlay panels that wrap around the top third of the bag like climbing vines. It's perfect for crocheters who want to level up from basic totes into something that looks genuinely boutique, and for anyone craving a project that feels both practical and artistic in equal measure.
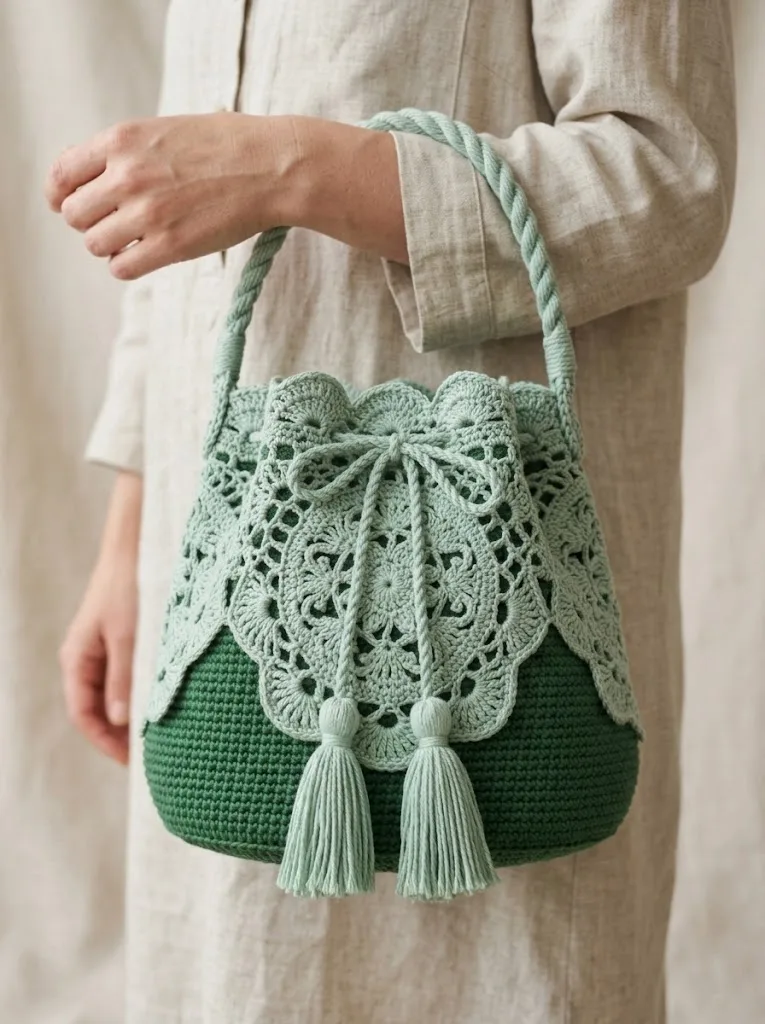
The finished bag stands about 9 inches tall and 7 inches wide at the opening, roomy enough for a wallet, phone, sunglasses, and keys. The contrast between the dense forest green body and the airy pale sage lace gives it a textured, botanical elegance that photographs beautifully. It makes a gorgeous market bag for yourself or a thoughtful, high-end feeling handmade gift for the plant lover or minimalist in your life.
- Crochet the solid bucket base first using a smaller hook for a dense, sturdy bottom.
- Set the body aside and separately crochet each lace overlay motif using the thinner contrast yarn and hook.
- Check tension across all lace motifs so they match in size before joining them together.
- Attach the joined lace overlay panels around the top third of the bucket body.
- Twist strands of yarn together to create a sturdy rope handle and attach it securely.
- Make a coordinating drawstring and tassels from the reserved contrast yarn.
- Weave in all ends, insert the optional liner or cardboard base, and thread the drawstring through the top.
02 · The count run20 rounds across 5 parts, each with its count
US terms throughout. Every row below ends with the count that round finishes on.
| Part | Qty | Finishes on |
|---|---|---|
| Part 1: Crocheting the Bucket Base | 1 | - |
| Part 3: Creating the Lace Overlay Panels | 1 | (8) |
| Part 2: Building the Bucket Sides | 1 | - |
| Part 5: The Twisted Rope Handle | 1 | - |
| Part 6: Creating the Drawstring and Tassels | 1 | - |
The base uses a magic ring and increases in a spiral. Place a stitch marker at the start of each round and move it up as you go.
With MC and 4.0mm hook:
| Round | Instruction | Count |
|---|---|---|
| Round 1 | Make a magic ring. Ch 1, work 6 sc into the ring. Pull ring closed. (6 sts) | - |
| Round 2 | Work 2 sc in each st around. (12 sts) | - |
| Round 3 | *Sc in next st, 2 sc in next st* repeat around. (18 sts) | - |
| Round 4 | *Sc in next 2 sts, 2 sc in next st* repeat around. (24 sts) | - |
| Round 5 | *Sc in next 3 sts, 2 sc in next st* repeat around. (30 sts) | - |
| Round 6 | *Sc in next 4 sts, 2 sc in next st* repeat around. (36 sts) | - |
| Round 7 | *Sc in next 5 sts, 2 sc in next st* repeat around. (42 sts) | - |
| Round 8 | *Sc in next 6 sts, 2 sc in next st* repeat around. (48 sts) | - |
| Round 9 | *Sc in next 7 sts, 2 sc in next st* repeat around. (54 sts) | - |
| Round 10 | *Sc in next 8 sts, 2 sc in next st* repeat around. (60 sts) Your base should measure approximately 5 inches across. Lay it flat to check. If it ruffles, your tension is too loose. If it cups, go up a hook size. | - |
Here is where this crochet pattern becomes truly beautiful. You will make 6 identical flower motifs that join together to form the decorative overlay.
With CC and 3.5mm hook: Motif Center:
| Round | Instruction | Count |
|---|---|---|
| Round 1 | Magic ring. Ch 3 (counts as first dc), work 11 dc into ring. Sl st to top of ch-3 to join. (12 dc) | - |
| Round 2 | Ch 4 (counts as dc + ch 1), *dc in next st, ch 1* repeat around. Sl st to 3rd ch of starting ch-4. (12 dc, 12 ch-1 spaces) | - |
| Round 3 | Sl st into first ch-sp. Ch 3, 2 dc in same sp, ch 2, *3 dc in next ch-sp, ch 2* repeat around. Sl st to top of ch-3. (12 clusters of 3 dc) | - |
| Round 4 | Ch 1, sc in same st, sc in next 2 dc, *3 sc in ch-2 sp, sc in next 3 dc* repeat around, ending with 3 sc in final ch-sp. Sl st to first sc. (48 sc) | - |
Creating the Petal Points:
| Round | Instruction | Count |
|---|---|---|
| Round 5 | Ch 1, sc in same st, *sk 2 sts, 5 dc in next st (shell made), sk 2 sts, sc in next st* repeat around. Sl st to first sc. (8 shells) | (8) |
| Round 6 | Sl st to center dc of first shell. Ch 4, *tr in center dc of next shell, ch 3* repeat around. Sl st to top of ch-4. | - |
| Round 7 | *Work (2 dc, ch 2, 2 dc) in ch-3 sp* repeat around. Sl st to first dc. This creates the scalloped edge visible in the finished bag.Fasten off, leaving a 12-inch tail for joining. | - |
This is where the magic happens. One simple change creates vertical walls instead of a flat circle.
| Round | Instruction | Count |
|---|---|---|
| Round 11 | Working in BLO only, sc in each st around. Do not increase. (60 sts) This BLO round creates a crisp edge where the base meets the sides. From here, work in both loops normally. | - |
| Round 12 | through 40: Sc in each st around. (60 sts per round) Continue for 29 rounds total of straight sides. This creates approximately 6.5 inches of bucket height. The fabric should be dense with no visible holes. | - |
Tip: Count every few rounds to ensure you maintain 60 stitches. It is easy to accidentally skip stitches along the way.
| Round | Instruction | Count |
|---|---|---|
| Round 41 | Sl st to first st. Fasten off MC. Weave in ends. | - |
This handle uses a simple chain twisted technique.
With CC and 4.0mm hook: Ch 150. Fasten off, leaving long tails at both ends.
Cut two more lengths of CC yarn, each 60 inches long. Hold all three strands together (the chain plus two plain strands) and twist tightly in one direction. Fold in half, allowing the twist to coil back on itself naturally. Secure both ends with tight wrapping.
Attach handle ends securely inside the bag at opposite sides using yarn needle and MC.
Drawstring: Chain 100 with CC. Twist as with handle or leave as simple chain cord. Weave through the lace openings around the bag top.
Tassels (make 2): Wrap CC around a 3-inch cardboard 25 times. Tie at top, cut bottom loops. Wrap yarn around tassel 1 inch below top to create head. Trim ends evenly. Attach to drawstring ends.
03 · Putting it togetherHow the pieces go together
- S1
Weave in all remaining ends. Steam block the lace sections gently to open up the stitch definition. Do not press flat.
- S2
Optional: Cut a fabric circle to fit the base interior. This prevents stretching and adds polish.
- S3
Optional: Insert a thin cardboard circle wrapped in fabric at the very bottom for extra structure.
04 · Before it goes to a childWhat has to be right, and what is allowed to drift
- 💡 Keep your three hooks (4.0mm, 3.5mm, and 3.25mm) labeled or organized nearby, since this pattern moves between them for the base, sides, and lace panels.
- 💡 Work each lace motif in Part 3 separately and lay them side by side before joining, so you can catch any size inconsistencies early.
- 💡 Use stitch markers to mark the start of each round in the bucket sides, since it's easy to lose your place when transitioning from the denser base.
- 💡 If your hands feel fatigued, cotton yarn's lack of stretch is the reason, so take breaks especially during the 10 rounds of the base.
- 💡 Save at least 30 yards of CC exclusively for the tassels and drawstring in Part 6, separate from what you use in the lace panels.
- 💡 Consider inserting the optional cardboard circle and fabric liner after the base is complete but before attaching the sides for the cleanest structural finish.
05 · Snag listWhat went wrong on the bench, and the fix
Snag 1
Inconsistent tension between individual lace motifs, causing them to be noticeably different sizes when it's time to join them.
Measure each finished motif against the first one you made before moving on, and rip back and redo any that don't match, since consistency is critical for a clean join.
Snag 2
Forcing cotton yarn to stretch like acrylic during tight stitches, leading to hand fatigue and uneven tension over the 10 base rounds.
Take frequent breaks, especially during Part 1, and remind your hands that cotton has less give, working at a slightly relaxed tension rather than pulling stitches tight.
Snag 3
Losing track of stitch markers while transitioning between the bucket base and sides, causing rounds to shift out of alignment.
Place all 4 stitch markers at consistent intervals right at the base-to-side transition and check them every couple of rounds to make sure your round count stays accurate.
Snag 4
Attaching the twisted rope handle or drawstring before the lace panels are fully secured, making the final assembly feel unstable.
Follow the assembly order: complete and attach the lace overlay panels first, then move on to the handle and drawstring in Parts 5 and 6 so everything has a stable foundation.
06 · VariantsOther ways to issue this one
Once you've made the sage version, this pattern is begging for color experiments. Try a monochrome look using two shades of the same color family, like a deep terracotta MC with a blush CC lace overlay, or go bold with a navy MC and a crisp white CC for nautical vibes. For a fall-ready bag, swap in a mustard or rust MC with a cream CC using 24/7 Cotton in 'Gold' and 'Ecru.' Yarn substitutions work well too. If you want more drape, try Scheepjes Catona for the lace panels since its mercerized sheen makes the botanical motifs pop even more, while Lily Sugar'n Cream keeps the base budget-friendly and sturdy. For a plush, non-cotton alternative, a worsted acrylic-cotton blend can work for the MC, though you'll lose some structural stiffness, so consider adding the optional cardboard base circle to compensate. Sizing is flexible too. For a mini version perfect for a phone and cards, reduce the base rounds and work only 5-6 rounds of the bucket sides instead of the full amount, using the same lace panel count for a proportionally bigger decorative impact. For an oversized market tote, add 2-3 extra rounds to both the base and sides, and consider doubling the lace panels around the top for a fuller ruffled effect. Seasonal twists are fun too, a pastel lavender and mint combo for spring, or deep burgundy with dusty rose lace for a romantic, vintage-inspired bag. You could even alternate MC and CC every other lace motif for a two-tone scalloped effect around the top edge.
07 · QueriesQuestions logged against this build
Can I use only one yarn weight instead of two?
You could, but the contrast between the sturdy worsted MC and the delicate sport/DK CC is what gives the lace panels their airy, botanical look. Using only worsted weight throughout will make the lace overlay feel bulkier and less lace-like.
Why do I need three different hook sizes?
The 4.0mm hook creates the sturdy bucket body, the 3.5mm hook is sized for the finer CC yarn in the lace panels, and the optional 3.25mm hook tightens the base to prevent items from poking through. Each size serves a specific structural purpose.
How do I keep my lace motifs the same size?
Check your tension after completing your first motif and measure it before starting the rest. Consistent tension across all motifs in Part 3 is essential since they get joined together around the top of the bag.
Is a fabric liner necessary?
It's optional but recommended, especially since cotton yarn has less stretch and structure than fabric. A liner helps keep the bag's shape and prevents smaller items from snagging on the lace panels.
How much does this bag hold?
roughly 9 inches tall and 7 inches wide at the opening, it comfortably fits a wallet, phone, sunglasses, and keys. It's designed as an everyday accessory bag rather than an oversized tote.
Original pattern: https://crochetwithmia.com/sage-green-botanical-lace-bucket-bag-free-crochet-pattern/
08 · Made byWho counted this one

Who writes Amigurumi Addict, how a build gets its number, and why every round on the site carries a stitch count.
09 · Next off the benchThree builds that sit near this one

Odds and ends
Crochet a phone bag with strap, flap, and ring closure
How to crochet a phone bag? Join rounds from a 30-chain base, add a strap, flap, and ring.

Odds and ends
Crochet worsted weight socks with a turned heel
How do you crochet socks for winter? Build toe-up in worsted weight with a folded heel and ribbed leg.

Odds and ends
Toe-Up Woodland Walker Crochet Socks With Colorwork Cuff
How do you crochet toe-up socks with a colorwork cuff? Build the Toe, Heel, and stranded Cuff in order.
Join the build log
One message when a build is issued
A drawing and its parts list, when one leaves the bench.