| Shelf | Level | Time | Hook | Yarn |
|---|---|---|---|---|
| Odds and ends | Intermediate | 4-6 hours | 10 mm | Worsted |
Giant crochet strawberry pillow pattern for beginners
How do you crochet a giant strawberry pillow? Work a spiral base, close the top, then add stem and leaves.
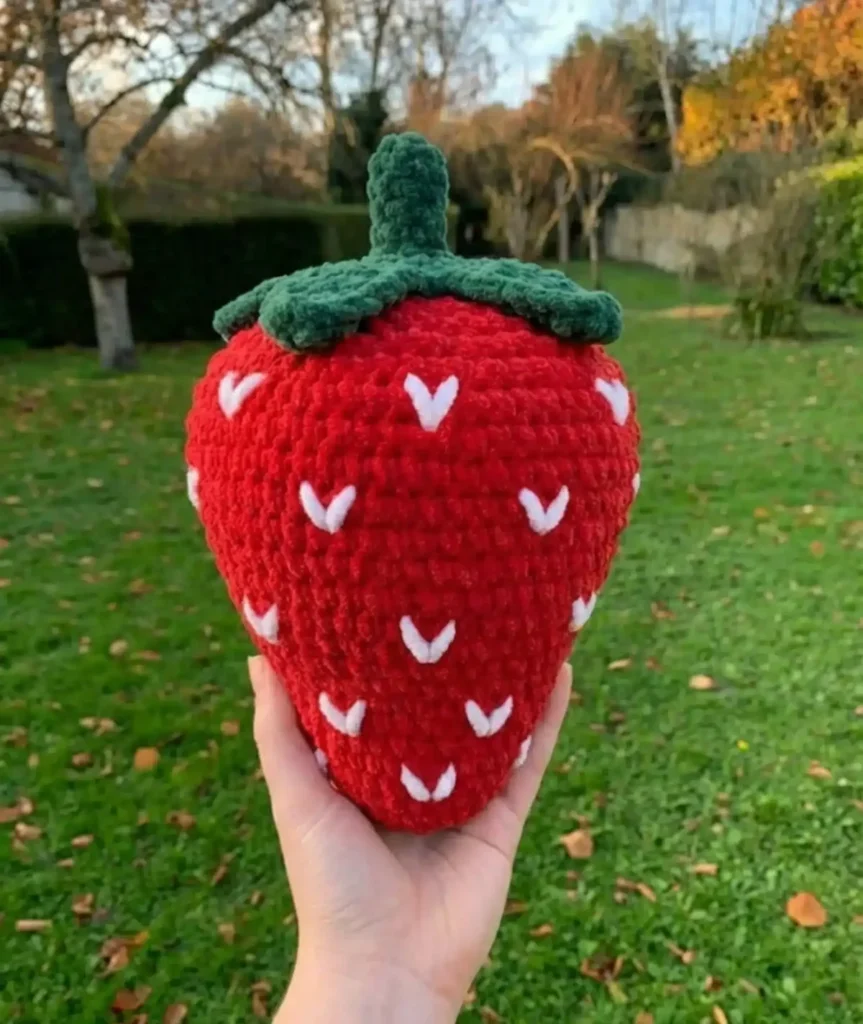
01 · The pieceWhat Giant crochet strawberry pillow pattern for beginners actually is
The Strawberry Base is a continuous-round shell that increases from 4 sc to 8, 12, and 16 before running out to 22 rounds total, forming the body that takes the stuffing. The Leafy Top is decreased back down over rows 26 through 29 to close that opening. Six separate Leaves and one Stem are worked apart and joined afterward, and seeds are added directly to the closed surface. Tails from every piece do the joining; nothing here is seamed with a separate length of yarn.
The first four rounds of the Strawberry Base set the tolerance for the whole piece: miss the 4-8-12-16 increase and the sphere skews. Past that, plateau rounds are forgiving since a stitch or two off will not show under stuffing. The Leaf row 3 shaping (hdc, dc, tc pairs tapering to a ch-2 tip) needs an exact stitch count to keep the point symmetrical. Seed placement and stuffing density carry no tolerance at all -- both are eyeballed.
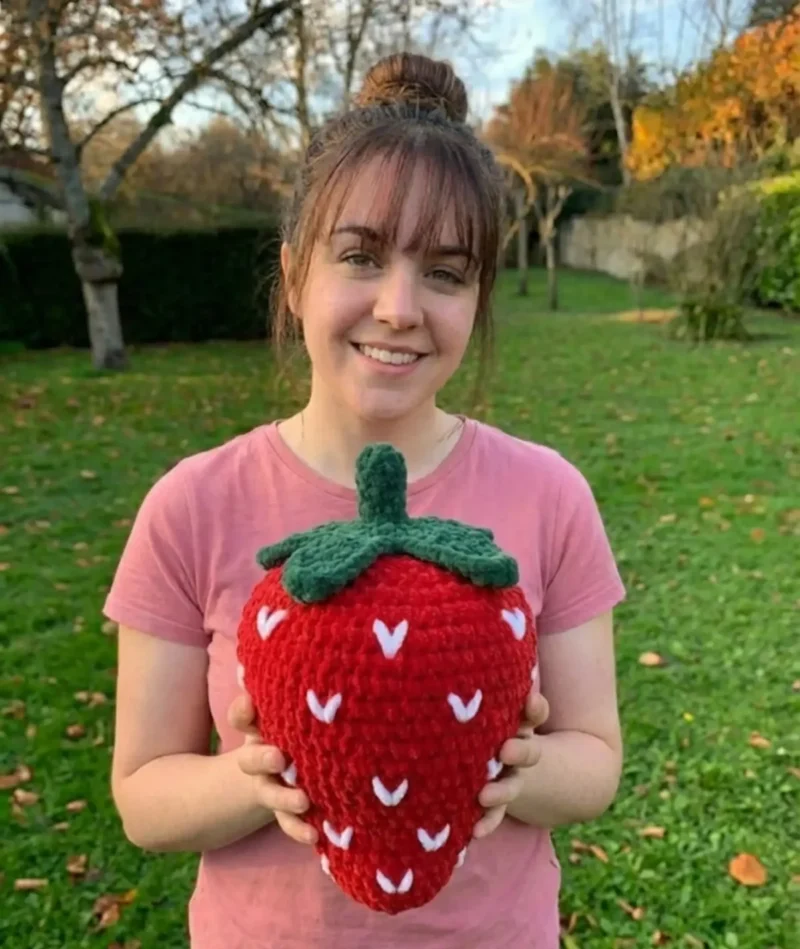
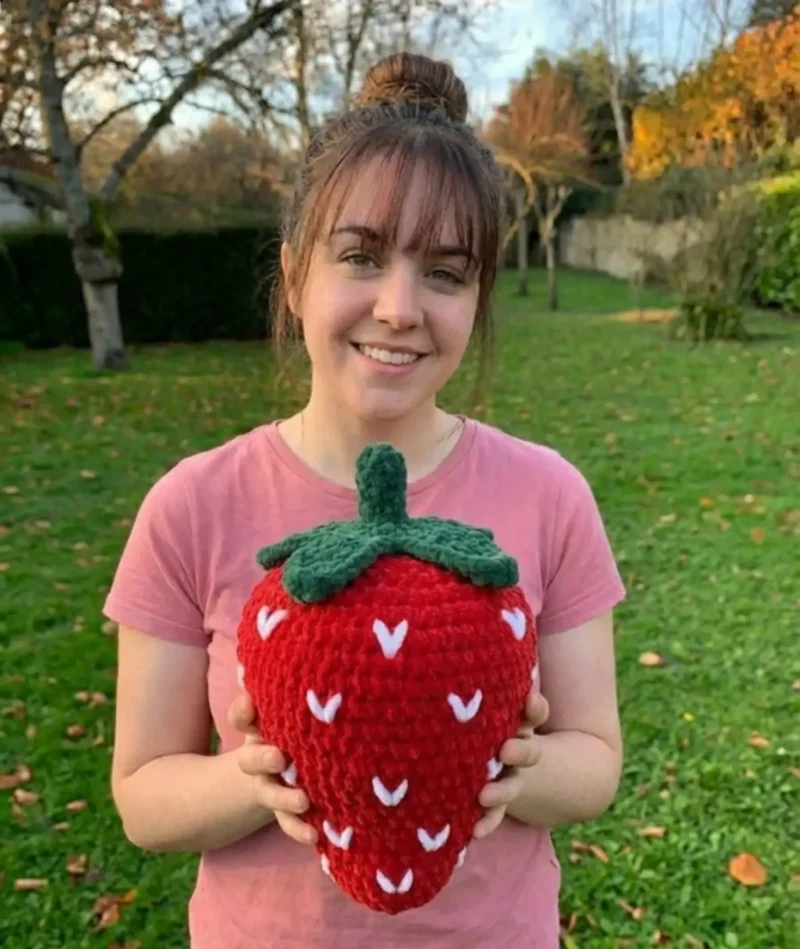
02 · The count run31 rounds across 8 parts, each with its count
US terms throughout. Every row below ends with the count that round finishes on.
| Part | Qty | Finishes on |
|---|---|---|
| Strawberry Base | 1 | (56) |
| Stuffing the Pillow | 1 | - |
| Creating the Leafy Top | 1 | - |
| Stem | 1 | - |
| Adding Strawberry Seeds | 1 | - |
| Closing Off the Top | 1 | - |
| Making the Leaves (Create 6) | 1 | - |
| Attaching the Leaves | 1 | - |
Start with your main strawberry color of yarn.
| Round | Instruction | Count |
|---|---|---|
| Round 1 | MC, 4 sc (4) | - |
| Round 2 | Inc in each st (8) | - |
| Round 3 | 1 sc, inc, rpt 3 times (12) | - |
| Round 4 | 2 sc, inc, rpt 3 times (16) | - |
| Round 5 | 3 sc, inc, rpt 3 times (20) | - |
| Round 6 | Sc in each sts (20) | - |
| Round 7 | 4 sc, inc, rpt 3 times (24) | - |
| Round 8 | Sc in each sts (24) | - |
| Round 9 | 5 sc, inc, rpt 3 times (30) | - |
| Round 10 | Sc in each sts (30) | - |
| Round 11 | 6 sc, inc, rpt 3 times (36) | - |
| Round 12 | Sc in each sts (36) | - |
| Round 13 | 4 sc, inc, 4 sc, rpt 3 times (40) | - |
| Round 14 | 9 sc, inc, rpt 3 times (44) | - |
| Round 15 | 5 sc, inc, 5 sc, rpt 3 times (48) | - |
| Round 16 | 6 sc, inc, rpt 7 times (56)This should go past your original start point. Insert stitch marker here. This is your new end of row. | - |
| Rounds 17–20 | Sc in each sts (56) (4 rounds) | (56) |
| Round 21 | 6 sc, dec, rpt 6 times (49) | - |
| Round 22 | 5 sc, dec, rpt 6 times (42) | - |
| Round 23 | 4 sc, dec, rpt 6 times (35) | - |
| Round 24 | 3 sc, dec, rpt 6 times (28) | - |
| Round 25 | 2 sc, dec, rpt 6 times (21) | - |
Stuff the pillow at this point. Due to the unique strawberry shape, stuffing requires some attention. Work slowly and ensure the stuffing is evenly distributed throughout the strawberry body as you progress. Pack it firmly enough to maintain the shape but not so tight that it distorts the stitches.
Change to your leaf color yarn.
| Round | Instruction | Count |
|---|---|---|
| Round 26 | Sc in each sts (21) | - |
| Round 27 | 1 sc, dec, rpt 6 times (14) | - |
| Round 28 | Sc in each sts (14) | - |
| Round 29 | 7 Dec (7) | - |
| Round 30 | Sc, 2 dec, Sc (5)Do not fasten off! | - |
| Round | Instruction | Count |
|---|---|---|
| Round 31 | Ch 5, 4 sc on the back side of the ch. FO. Leave a tail to sew the top together. | - |
Before closing off completely, consider adding any leftover yarn scraps or extra stuffing from making the seeds. This helps use up materials and ensures the pillow is fully stuffed.
The seed details bring your strawberry to life! While this step can be somewhat tedious, the results are absolutely worth it. Using your seed color and yarn needle, you'll create surface stitches that mimic real strawberry seeds.
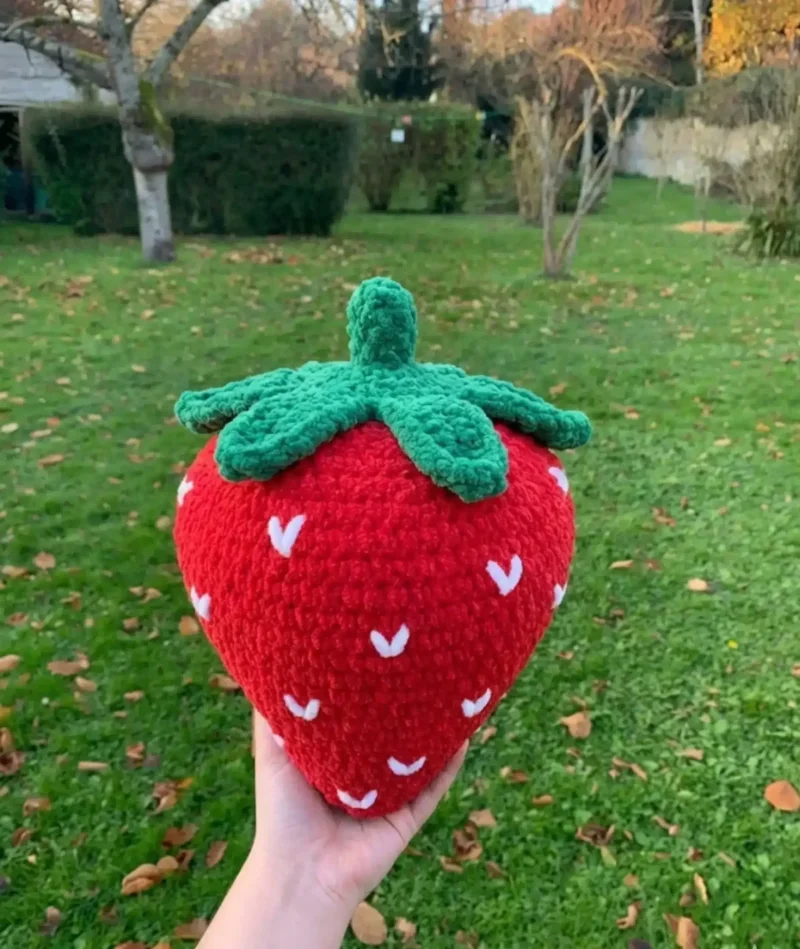
Step by step: Start placing seeds on Row 3 of your strawberry base. Your first row should contain 3 seed stitches. As you work down the length of the strawberry, maintain even spacing between seeds. Here's the key to natural-looking seed placement: if you notice a larger gap between two seeds, place 2 seeds in the row directly below that gap; if seeds appear too close together, skip placing a seed between them in the next row. Each seed stitch should be approximately 1 sc in length. Space seeds about 2 rows apart vertically. Take your time with this step and refer to photos of real strawberries if needed. The irregular yet balanced placement of seeds creates that authentic strawberry appearance.
Complete the stuffing process, ensuring your strawberry is nicely plump. Using the tail left from the stem, stitch across the opening from its attachment point. Work back and forth through the stem into the remaining open stitches. This technique not only closes the opening securely but also helps the stem stand upright naturally. Weave in all ends neatly.
Using your leaf color yarn:
| Round | Instruction | Count |
|---|---|---|
| Round 1 | Ch 11 (11) | - |
| Round 2 | 2nd ch from the hook, Sc in each st (10) | - |
| Round 3 | Ch 1, Sc into opposite side of the ch, hdc, dc, tc 2, dc 2, hdc 2, sc, ch 2, sc in same st, sc, hdc 2, dc 2, tc 2, dc, hdc, sc, sl st | - |
FO. Leave a tail for sewing.
Repeat this process to create a total of 6 leaves.
To attach each leaf to your strawberry crown, use the following method:
Step by step: Using the tail from the leaf, stitch down 4-5 stitches along each side of the leaf to the strawberry. Pull the remaining tail through to the underside of the leaf. Locate the other tail (it should be under the strawberry) and pull it through the same hole under the leaf. Tie both tails together securely. Weave in and hide the ends.
Space the 6 leaves evenly around the top of the strawberry for a balanced, attractive appearance.
Techniques on this build
- Continuous spiral single crochet
- Runs through all 22 rounds of the Strawberry Base; place a stitch marker at round start or the increase count drifts.
- Working into the opposite side of a starting chain
- Used in Leaf row 3 to turn the Ch 11 foundation into a two-sided flat leaf; keep the chain untwisted before working back along it.
- Graduated decrease shaping
- Rows 27 and 29 of Creating the Leafy Top pull 21 sts down to 7; work these snugly since they form the closing edge.
- Surface embroidery for seeds
- Applied after the Strawberry Base is complete; keep tension loose enough that the seeds don't dent the stuffed surface.
Final fit-up
- Weave in tails from the Strawberry Base start, the Stem, and all six Leaves before assembly.
- Stuff the pillow firmly before the final decrease rounds of the Leafy Top are worked -- once row 29 pulls the opening to 7 sts, there's no way back in.
- Close off the top by cinching the last decrease round and securing with a few backstitches through the remaining stitches.
- Attach the Stem and the six Leaves to the closed top using their sewing tails, spacing the leaves evenly around the Stem base.
How the parts fit
- The Strawberry Base increases by 4 sts every round for its first four rounds (4, 8, 12, 16), the standard doubling curve that gives a sphere its rounded shoulder rather than a flat disc.
- Creating the Leafy Top is worked as a direct continuation of the base's stitch count, decreasing from 21 down to 7 over rows 26 to 29 -- it closes the same opening the base built up, rather than being a separate cap sewn on after.
- The Leaves are worked flat from a Ch 11 foundation and turned to work back along the opposite side of that same chain in row 3, which produces a symmetrical pointed leaf from a single piece with no side seam.
Scaling the build
| Larger | Move to a heavier yarn weight and a larger hook; the same round counts produce a bigger diameter without altering the 4-8-12-16 increase pattern. |
|---|---|
| Larger or rounder | Repeat a plateau round of the Strawberry Base (one where the stitch count stays flat) an extra time or two before starting the decreases, adding height to the body. |
| Smaller | Drop to a lighter yarn weight with a smaller hook; the pillow shrinks proportionally while the Leaf and Stem counts stay the same relative to the base. For a smaller pillow, try worsted weight yarn with a 5mm hook -- just remember thinner yarn requires more rows and takes longer to complete. |
03 · Snag listWhat went wrong on the bench, and the fix
Snag 1
Losing the round in the spiral base
Drop a stitch marker into the first stitch of each round of the Strawberry Base and move it up as you go; without it the 4-8-12-16 increase is easy to miscount.
Snag 2
Miscounting the leaf tip stitches
Count the hdc, dc, and tc pairs before working the ch-2 at the tip in Leaf row 3 -- an off-count there skews the point to one side.
Snag 3
Stuffing after the top is closed
Pack the fiber fill in before row 29 pulls the Leafy Top opening down to 7 sts; a closed pillow won't take more stuffing without picking out the seam.
Snag 4
Crowding all six leaves to one side
Space the Leaves evenly around the Stem before sewing, checking placement against the closed top before the first tail is knotted off.
04 · QueriesQuestions logged against this build
How much yarn does this take?
The Strawberry Base takes the bulk of the main color since it runs 22 rounds, while the leaf color covers the Leafy Top, Stem, and all six Leaves. For the jumbo yarn version, you'll need approximately 200-250 yards of your main strawberry color, 50-75 yards of green for the leaves and stem, and about 20 yards of your seed color. It's always better to have extra yarn on hand to ensure you don't run out mid-project.
Can the leaves be made ahead of the base?
Yes -- the six Leaves are worked flat and separately from the Strawberry Base, so they can be finished first and set aside. Just leave a sewing tail on each one for attaching later.
Why does the top close in a separate set of rows instead of just finishing off?
Creating the Leafy Top decreases the stitch count from 21 down to 7 over four rows specifically to cinch the opening left by the base closed, rather than gathering it flat. That decrease shaping is also what gives the crown its leaf-like taper before the Stem is added.
What size will my finished strawberry pillow be?
Using the recommended Size 7 jumbo yarn and 10mm hook, your finished strawberry pillow will be approximately 12-14 inches tall and 10-12 inches wide at its widest point. The exact size may vary slightly depending on your tension and how firmly you stuff the pillow.
05 · Made byWho counted this one

Who writes Amigurumi Addict, how a build gets its number, and why every round on the site carries a stitch count.
06 · Next off the benchThree builds that sit near this one

Odds and ends
Crochet a phone bag with strap, flap, and ring closure
How to crochet a phone bag? Join rounds from a 30-chain base, add a strap, flap, and ring.

Odds and ends
Crochet worsted weight socks with a turned heel
How do you crochet socks for winter? Build toe-up in worsted weight with a folded heel and ribbed leg.

Odds and ends
Toe-Up Woodland Walker Crochet Socks With Colorwork Cuff
How do you crochet toe-up socks with a colorwork cuff? Build the Toe, Heel, and stranded Cuff in order.
Join the build log
One message when a build is issued
A drawing and its parts list, when one leaves the bench.