| Shelf | Level | Time | Hook | Yarn |
|---|---|---|---|---|
| Odds and ends | Beginner | 4-6 hours | 3 mm | Worsted |
Easy granny square basket pattern for beginners
How do you crochet a granny square basket? Join five squares, sc trim, add two chain handles.
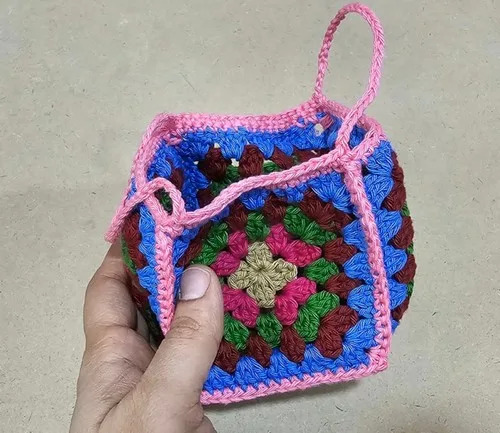
01 · The pieceWhat Easy granny square basket pattern for beginners actually is
The basket is built from five granny squares acting as flat panels rather than a single worked-in-the-round shell. Four squares are joined side by side with single crochet to form a long strip, and the fifth closes the bottom of that strip the same way. A single crochet top row runs around the resulting opening, with three single crochets worked into each corner to keep the rim flat. Two chained handles, slip-stitched into opposite corners, finish the build.
Tolerance sits mostly in the squares: each one needs to match its neighbors in size, since the corner chain-2 spaces and slip-stitch joins are what square up the seams during assembly. The handle chain is the forgiving part -- thirty-three chains or more, with no fixed count required, so length is a matter of preference rather than precision. Corner placement for the handles is the one spot worth checking twice.
The pattern is simple yet versatile, allowing you to choose your favorite yarn colors and even customize the size of the basket to fit your needs. Whether used for home decor, a gift, or storing small items, this project adds a handmade touch to any room.
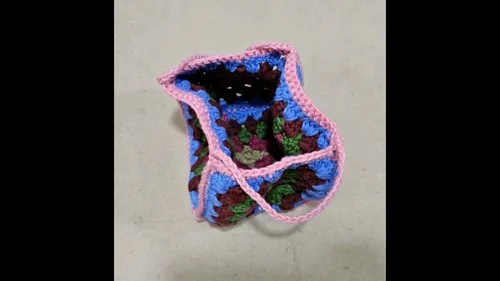
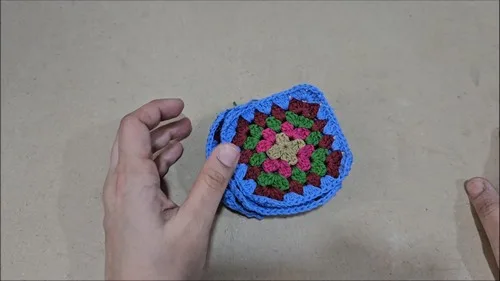
02 · The count run4 rounds across 2 parts, each with its count
US terms throughout. Every row below ends with the count that round finishes on.
| Part | Qty | Finishes on |
|---|---|---|
| Main Pattern | 1 | - |
| Top Row | 1 | - |
Start with a slip knot, chain four, and slip stitch to form a loop.
| Round | Instruction | Count |
|---|---|---|
| Round 1 | Chain three, then work two more double crochets in the loop, followed by two chains.Repeat the pattern of three double crochets and two chains three more times. | - |
| Round 2 | Change to a new color. Start in any corner space with three chains, followed by two double crochets, two chains, and three more double crochets in the same space.Slip stitch to the corner space to join. | - |
| Round 3 | With a new color, chain three. Work a corner with two double crochets, two chains, and three double crochets.Then, work three double crochets in the space between the clusters. | - |
| Round | Instruction | Count |
|---|---|---|
| Round 1 | Add a new yarn to the top edge of the basket. Work one single crochet in each stitch around the top, with three single crochets in each corner.Handle: Chain 33 (or more, for a longer handle). | - |
Techniques on this build
- Granny square construction
- Used for all five panels; watch the chain-2 corner spaces, since they set up the increases every round.
- Single crochet seaming
- Joins the four squares into a strip and attaches the fifth to the bottom; keep tension even so the strip doesn't pull tight or ripple.
- Corner increases in a border round
- The top row works three single crochets into each corner; skipping one flattens the rim instead of letting it turn a right angle.
- Foundation chain handles
- Each handle is a chain of 33 or more, slip-stitched at the opposite corner, then single crocheted back across; loose chain tension keeps the handle from curling.
Final fit-up
- Weave in the color-change ends on each granny square before joining, since Round 2 introduces a new color per square.
- Block each square flat and to the same dimensions so the single crochet seams sit square rather than wavy.
- Join the squares into the basket shape with single crochet seams -- strip of four, then the fifth to the bottom.
- Slip-stitch each handle to its opposite corner, single crochet the final top row, then weave in the remaining ends.
How the parts fit
- Each granny square gains its corners from the chain-2 spaces set up in Round 1 and reinforced in Round 2, where three double crochets are worked either side of every corner space.
- The basket body is assembled flat -- four squares joined into a strip, with the fifth attached to the bottom edge -- so the piece folds into its box shape only after the single crochet seams are in.
- The two handles are worked as separate foundation chains joined at opposite corners rather than as an extension of the granny square rounds, which keeps handle length independent of the square's stitch pattern.
Scaling the build
| Larger | Work the granny squares with a heavier yarn and a larger hook; every panel grows, so the finished basket footprint and height both increase. |
|---|---|
| Smaller | Use a finer yarn with a smaller hook than the 3mm called for; the squares shrink and the basket scales down with them. |
| Longer handles | Chain more than 33 stitches for the handle foundation; the handle drop lengthens without changing the basket body. |
03 · Snag listWhat went wrong on the bench, and the fix
Snag 1
Squares of uneven size
Block all five granny squares to the same measurements before seaming; mismatched squares show as a wavy top edge.
Snag 2
Missing the corner single crochet increase
Mark each corner before the top row and confirm three single crochets land there, not one.
Snag 3
Handle chain worked too tight
Chain the 33 stitches loosely, or size up the hook for the chain only, so the handle sits flat rather than curling.
Snag 4
Handle joined to the wrong corner
Check that the chain is slip-stitched to the corner opposite the starting point before working the return single crochet row.
04 · QueriesQuestions logged against this build
How many granny squares does this basket use?
Five in total. Four are joined side by side into a strip, and the fifth is attached to the bottom of that strip to close the base.
Can the handles be made longer?
Yes. Chain more than the 33 stitches given for a longer handle, then work the same single crochet return row and slip-stitch join at the opposite corner.
Does this basket need stuffing to hold its shape?
No. The shape comes from the granny square panels and the single crochet seams and border, not from filling, so no stuffing step is needed.
05 · Made byWho counted this one

Who writes Amigurumi Addict, how a build gets its number, and why every round on the site carries a stitch count.
06 · Next off the benchThree builds that sit near this one

Odds and ends
Crochet a phone bag with strap, flap, and ring closure
How to crochet a phone bag? Join rounds from a 30-chain base, add a strap, flap, and ring.

Odds and ends
Crochet worsted weight socks with a turned heel
How do you crochet socks for winter? Build toe-up in worsted weight with a folded heel and ribbed leg.

Odds and ends
Toe-Up Woodland Walker Crochet Socks With Colorwork Cuff
How do you crochet toe-up socks with a colorwork cuff? Build the Toe, Heel, and stranded Cuff in order.
Join the build log
One message when a build is issued
A drawing and its parts list, when one leaves the bench.