| Shelf | Level | Time | Yarn |
|---|---|---|---|
| Odds and ends | Intermediate | 2-3 Hours | Worsted |
Crochet Spider Stitch Guide: Step By Step Texture Tutorial
Learn the crochet spider stitch with this clear, step-by-step written guide. Master the open, lacy texture perfect for scarves, wraps, and cowls.
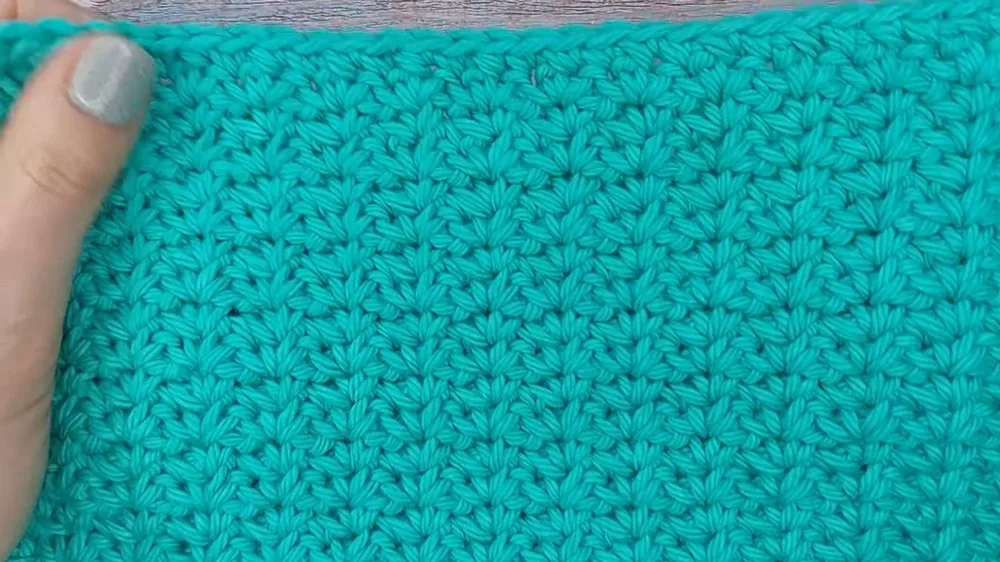
01 · The pieceWhat Crochet Spider Stitch Guide: Step By Step Texture Tutorial actually is
This spider stitch guide walks you through one of crochet's most satisfying textured stitches — an airy, web-like pattern built from simple single crochets and chain-one spaces. The alternating offset creates a woven, lattice-like fabric that looks far more complicated than it actually is. It's perfect for crocheters who love the look of filet or mesh work but want something with a bit more dimension and a name as fun as the finished fabric itself.
The technique relies on just two stitches you already know — single crochet and chain — combined in a clever skip-and-offset rhythm across each row. Because the pattern is a repeat, once you get through the first two rows the motion becomes almost meditative. Expect to spend about 30-45 minutes working a practice swatch, and a bit longer if you're using it for a larger project like a scarf or wrap.
The result is a soft, breathable fabric with a distinct woven texture that catches the light beautifully in a solid color. It drapes more than solid single crochet, making it ideal for scarves, cowls, dish towels, or garment panels. Worked in a light or bright yarn as suggested, the stitch definition really pops, making this a lovely handmade gift for anyone who appreciates a little extra texture in their crochet.
- Chain an odd number of stitches to set your foundation width, using 33 as a helpful reference length.
- Work the first row of alternating single crochets and chain-one spaces across the foundation chain.
- Turn your work and chain two to begin building the signature offset spider-web texture.
- Skip the first stitches and work single crochet, chain one, single crochet into each chain space from the row below.
- Continue skipping and working into chain spaces across the row until you reach the final space.
- Finish each row by working a single crochet into the turning chain to keep your edges neat.
- Repeat this same row pattern again and again until your piece reaches the size you want.
- Optionally add a final row of solid single crochets to create a clean, straight top edge.
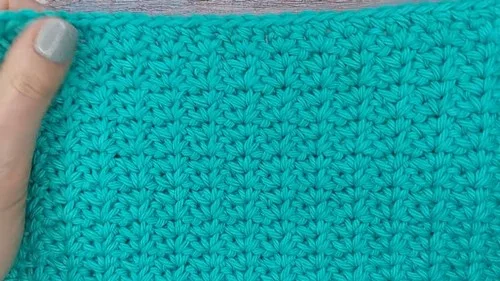
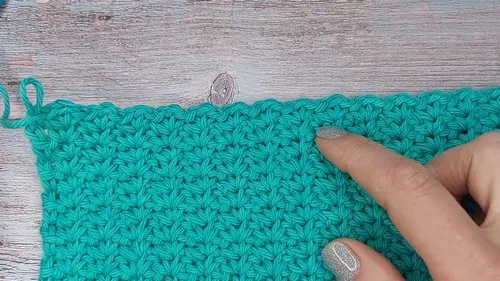
02 · The count run3 rounds across 1 part, each with its count
US terms throughout. Every row below ends with the count that round finishes on.
| Part | Qty | Finishes on |
|---|---|---|
| Main Pattern | 1 | - |
| Round | Instruction | Count |
|---|---|---|
| Round 1 | Chain any odd number of stitches (33 chains used in example). Skip the first two chains from hook (these skipped chains count as one sc). In the third chain from hook, work one sc. Chain one, then work another sc into the same third chain. Skip one chain, then in the next chain work one sc, chain one, and one more sc. Repeat this pattern (skip one chain, then work one sc, chain one, and one more sc into the next chain) across the row until two chains are left. With the last two chains, skip one chain, and work one sc into the last chain to finish the row. | - |
| Round 2 | Chain two (this counts as a sc; keep the chains loose to work into later) and turn your work. Skip the first stitch (the sc from the previous row) and the next sc. Work into the chain space from the previous row with one sc, chain one, and one sc. Skip the two sc and work into the next chain space with one sc, chain one, and one sc. Repeat this pattern across until your last chain space. In the final chain space of the row, work one sc, chain one, and one sc. To finish the row, skip the sc and work one sc into the turning chain. | - |
| Round 3 | and Beyond: Chain two and turn your work (this counts as a sc). Skip the first two sc. Work into the chain space with one sc, chain one, and one sc. Continue this pattern for each chain space across the row. At the end of the row, work one sc into the turning chain. Repeat Round 2 for the pattern until the project reaches the desired size. | - |
03 · Putting it togetherHow the pieces go together
- S1
(Optional) Straight Edge Finish: To create a straight edge on the top (as the bottom edge), you may work a final row of single crochets by chaining one and turning your work, then working one single crochet into each single crochet from the row below and skipping the chain spaces. Repeat across to create a clean and straight edge.
04 · Before it goes to a childWhat has to be right, and what is allowed to drift
- Always start with an odd number of foundation chains — the sample uses 33, but you can adjust up or down as long as the total stays odd.
- The first two skipped chains in Round 1 count as your first single crochet, so don't add an extra stitch there.
- Keep your chain-two turning chains at the start of each row loose enough that you can easily work a stitch into them later.
- Round 3 and all rows after it repeat the same instructions as Round 2, so once you've learned that row you're set for the rest of the project.
- Use a lighter or brighter colored yarn, especially while learning, so the woven texture and chain spaces are easy to see and correct.
- The Straight Edge Finish row is entirely optional — skip it if you like the naturally textured look of the last worked row, or add it for a cleaner finished edge.
05 · Snag listWhat went wrong on the bench, and the fix
Snag 1
Losing track of which chain space to work into on Round 2
Turn your work and lay it flat before starting the row so you can clearly see the chain-one spaces from Round 1 before diving in.
Snag 2
Working the turning chain too tightly
Keep your chain-two turning chains loose and relaxed since you'll need to work a stitch into that space later in the pattern.
Snag 3
Starting with an even number of foundation chains
Double check your foundation chain count is odd before beginning Round 1, since the stitch pattern depends on this for the repeat to line up correctly.
Snag 4
Skipping the wrong number of stitches between chain spaces
Remember Round 2 skips two stitches at a time while Round 1 skips just one chain, so slow down and count carefully as you build confidence.
Snag 5
Forgetting to work into the turning chain at the end of the row
That last sc into the turning chain keeps your edges even and your stitch count consistent, so always check for it before turning your work.
Snag 6
Using a yarn color too dark to see stitch definition
Stick with a lighter or brighter yarn for your first attempt so the chain spaces and offset pattern are easy to spot and correct if needed.
06 · VariantsOther ways to issue this one
Once you've got the spider stitch rhythm down, there's so much room to play. Try working it in a variegated or self-striping yarn to see how the color pooling interacts with the open chain spaces — it can create really unexpected visual effects. For a modern look, alternate two solid colors every few rows to highlight the woven texture even more dramatically than a single color would. If you started with worsted weight for practice, try scaling down to a DK or fingering weight with a smaller hook for a delicate lace-weight scarf, or size up to super bulky yarn and a large hook for a chunky, fast-working blanket square. Since the pattern is based on any odd number of starting chains, you can easily adjust your foundation chain to make anything from a narrow bookmark to a wide table runner — just keep that odd-number rule in mind. Consider working the Optional Straight Edge Finish on both ends of your piece if you want clean, symmetrical borders for a garment panel or blanket square rather than the naturally scalloped edge the stitch produces. For garment pieces, try seaming several spider stitch panels together for an open, breezy summer cardigan or wrap. You could also experiment with adding a contrasting sc border around the entire finished piece to frame the texture and give it a more polished, finished appearance. Metallic or cotton yarns are worth trying too — cotton gives crisp stitch definition for dishcloths, while a touch of metallic thread held together with your main yarn adds subtle sparkle to an evening wrap.
I adore this stitch because it tricks people into thinking you're an advanced crocheter when really it's just single crochets and chains doing a clever little dance. The offset chain spaces from Round 1 into Round 2 are what create that signature woven, spider-web texture, and watching it emerge row by row is genuinely satisfying. I love that it uses basic abbreviations — sc and ch — so there's no learning curve for new stitches, just a rhythm to settle into. It's also incredibly forgiving on yarn choice, though I always recommend a lighter or brighter color for your first swatch so you can actually see the chain spaces you're skipping into. Once you've got Round 2 and 3 down, the repeat becomes second nature, almost like following a heartbeat. It's the kind of stitch that makes swatching fun instead of a chore, and it opens the door to so many project possibilities once you've mastered the pattern.
07 · QueriesQuestions logged against this build
What yarn weight works best for the spider stitch?
Worsted weight is a great starting point because the stitch definition shows up clearly, but this technique works at nearly any weight from fingering to bulky. Just match your hook size to whatever yarn you choose.
Why does my fabric look tighter or looser than expected?
This usually comes down to tension on your chain-one spaces — try to keep them consistent throughout so the woven look stays even. Practicing a small swatch first helps you find a comfortable, repeatable tension.
Can I use this stitch for garments, not just scarves?
Absolutely — the open, drapey fabric works beautifully for lightweight cardigans, wraps, and shawls. Just be mindful that the stitch is more open than solid single crochet, so it's less ideal for structured pieces.
Do I need to memorize the pattern before starting?
Not at all — Round 1 sets up your base, and Rounds 2 and 3 repeat the same instructions, so most crocheters pick up the rhythm within a couple of rows. Keep the written steps nearby until it feels automatic.
What's the purpose of the Straight Edge Finish step?
It's an optional finishing row that fills in the chain spaces with solid single crochets, giving you a flat, straight top edge instead of the naturally open, scalloped look. It's a nice touch for projects where you want a clean border on both ends.
Original pattern: https://crocheteverything.com/crochet-spider-stitch-guide-step-by-step/
08 · Made byWho counted this one

Who writes Amigurumi Addict, how a build gets its number, and why every round on the site carries a stitch count.
09 · Next off the benchThree builds that sit near this one

Odds and ends
Crochet a phone bag with strap, flap, and ring closure
How to crochet a phone bag? Join rounds from a 30-chain base, add a strap, flap, and ring.

Odds and ends
Crochet worsted weight socks with a turned heel
How do you crochet socks for winter? Build toe-up in worsted weight with a folded heel and ribbed leg.

Odds and ends
Toe-Up Woodland Walker Crochet Socks With Colorwork Cuff
How do you crochet toe-up socks with a colorwork cuff? Build the Toe, Heel, and stranded Cuff in order.
Join the build log
One message when a build is issued
A drawing and its parts list, when one leaves the bench.