| Shelf | Level | Time | Yarn |
|---|---|---|---|
| Odds and ends | Intermediate | 1-2 hours | Worsted |
Crochet soap holder pouch with hanging loop
How to crochet a soap holder? Work a flat base, sc sides in the round, add a chain loop to hang.
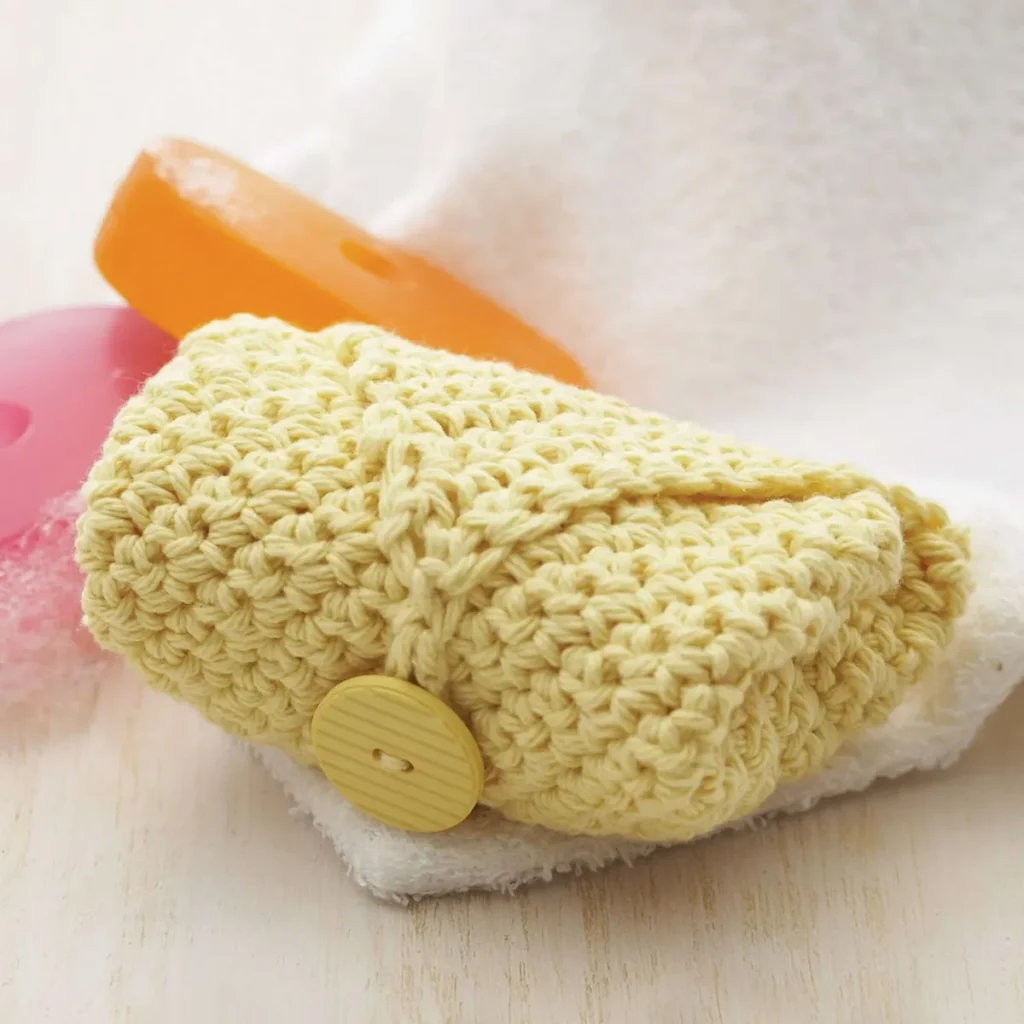
01 · The pieceWhat Crochet soap holder pouch with hanging loop actually is
The soap holder is built as one continuous piece: a flat circular base worked in three increase rounds, followed by straight sides worked without increases to form a pouch, and finished with a chain loop slip-stitched to the top edge. No separate pieces, no seaming — the base rounds and the side rounds share the same stitch count where they meet, and the loop is anchored directly into the last round's first stitch. Everything is joined as it is built.
Stitch counts at each join matter more than stitch height. Round 3 must land on the count the sides start from, or the pouch will pull to one side as it rises. The chain-10 loop, by contrast, is forgiving — length is a matter of taste, not structure, since it only needs to clear whatever hook or hanger it will hang from.
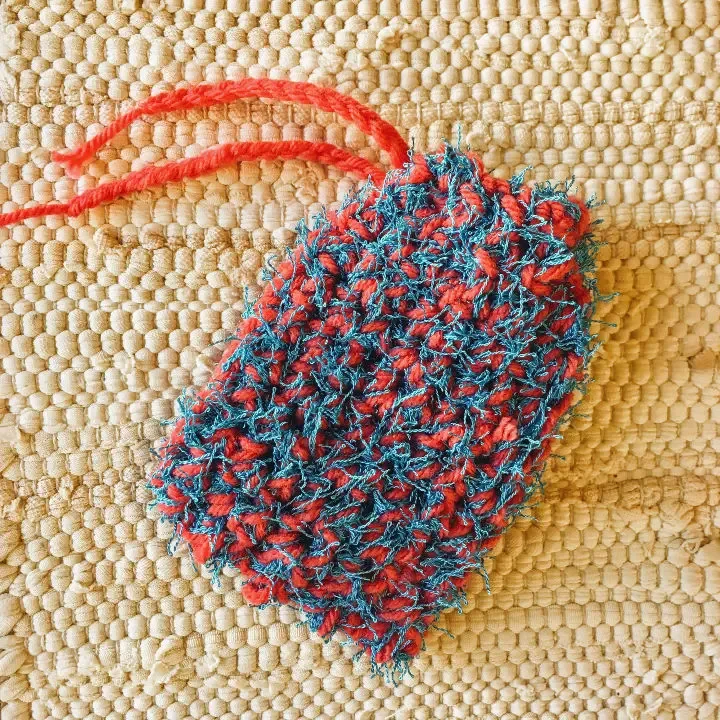
02 · The count run8 rounds across 4 parts, each with its count
US terms throughout. Every row below ends with the count that round finishes on.
| Part | Qty | Finishes on |
|---|---|---|
| Step 1: Create the Base of the Soap Holder | 1 | - |
| Step 2: Build the Sides of the Holder | 1 | - |
| Step 3: Create the Hanging Loop | 1 | - |
| Step 4: Optional Decorative Edging | 1 | - |
Start with a slip knot and chain 4. Join with a slip stitch to form a ring.
| Round | Instruction | Count |
|---|---|---|
| Round 1 | Chain 1 (does not count as a stitch here), then make 6 single crochet (sc) into the ring. Join the round with a slip stitch (sl st) into the first sc. | - |
Tip: Pull the tail of the ring tight to close the center.
| Round | Instruction | Count |
|---|---|---|
| Round 2 | Chain 1, and then work 2 single crochet in each stitch around (12 sc). Join with a slip stitch into the first sc. | - |
| Round 3 | Chain 1, 1 sc in the first stitch, 2 sc in the next stitch . Repeat around (18 sc). Join with a slip stitch into the first sc. | - |
Now that the base is done, you will work the sides of the soap holder to create a pouch for the soap.
| Round | Instruction | Count |
|---|---|---|
| Round 4 | Chain 1, then sc in each stitch around (no increases, just one sc in each stitch). Join with a slip stitch into the first sc. | - |
| Rounds 5–7 | Repeat round 4 for 3 more rounds or until the sides are high enough to cover the soap. | - |
To finish the soap holder, you’ll add a hanging loop so you can hang the holder on a hook or shower caddy.
| Round | Instruction | Count |
|---|---|---|
| Round 8 | After completing the last round of the sides, chain 10 (or more, depending on how long you want the loop).Attach the loop: Slip stitch into the first sc at the top of the soap holder to secure the loop in place. | - |
You can add an extra decorative touch to your soap holder by crocheting a simple border or edging.
| Round | Instruction | Count |
|---|---|---|
| Simple edging | Chain 1, then work a round of sc evenly around the top of the soap holder to create a clean finish. | - |
| Shell edging | Work 1 sc, 3 dc, 1 sc in each stitch around for a decorative shell-like finish. | - |
Techniques on this build
- Magic ring / chain-ring start
- Opens Round 1 of the base; pull the starting tail tight or the center of the base will show a hole under the soap.
- Increase rounds (2 sc in each stitch)
- Rounds 2 and 3 of the base; miscounting here throws off the stitch count the sides depend on.
- Working even in the round
- Rounds 4-7 of the sides; each round is a plain sc round with no shaping, so the only job is keeping the stitch count constant.
- Joined rounds with slip stitch
- Every round closes with a sl st into the first sc; a slanted or skipped join will spiral the sides instead of stacking them level.
Final fit-up
- Weave in the starting tail from the magic ring first, since it sits at the center of the base and gets harder to reach once the sides are built.
- Weave in the finishing tail left after the loop is attached, running it through the last few stitches at the top edge to keep the loop secure.
- Slip stitch the chain-10 loop into the first sc at the top of the sides, checking that the join sits flat rather than twisted.
- Check the base sits flat by pressing it against a table; a base that domes or cups means the increase rounds were worked unevenly.
How the parts fit
- Round 1 starts at 6 sc and each of Rounds 2 and 3 adds a full increase set, taking the base from 6 to 12 to 18 sc — the base is worked flat because every round increases, keeping it from curling into a cup.
- Rounds 4-7 repeat the same instruction with zero increases, which is what turns the flat disc of the base into the upright pouch of the sides — the stitch count set in Round 3 carries through unchanged.
- The hanging loop is not a separate piece; Round 8 chains directly off the last side round and the sl st join anchors it to a single stitch at the top edge, so the loop's strength depends on that one stitch holding.
Scaling the build
| Larger | Add one more increase round after Round 3, following the same 2-sc-in-each-stitch pattern, to widen the base before starting the sides. |
|---|---|
| Taller | Repeat Round 4's plain sc round beyond the stated Rounds 5-7 to raise the sides and cover a taller bar of soap. |
| Texture | Use half double crochet (hdc) or double crochet (dc) for the sides instead of sc to add texture to the soap holder. |
| Color | Try using different yarn colors for the base, sides, and loop to make the soap holder stand out. |
| Closure | a more secure closure, crochet a drawstring instead of a loop to tie the top of the holder. |
03 · Snag listWhat went wrong on the bench, and the fix
Snag 1
Loose center on the base
Pull the starting tail of the ring firmly closed before working Round 1's 6 sc; a gap here shows through the finished base.
Snag 2
Miscounted increase round
Count stitches at the end of Round 2 and Round 3 before moving on — the base should read 12 then 18 sc, and an off count will ripple into the sides.
Snag 3
Sides that spiral instead of stack
Check that the slip stitch join at the end of each round in Rounds 4-7 lands in the actual first stitch, not one stitch over.
Snag 4
Loop attached off-center
Mark the first sc of the final side round before chaining 10, so the loop's join sits centered rather than to one side of the opening.
04 · QueriesQuestions logged against this build
Why does the base need three increase rounds instead of two?
Each round of the base increases the stitch count by six, and three rounds bring it to 18 sc — wide enough to support the sides without the base staying too small for a bar of soap. Fewer rounds would leave a base too narrow for the sides to form a useful pouch.
Can the loop be shortened or lengthened?
Yes — the chain-10 loop is a suggested length, and the pattern itself notes it can be longer depending on what it will hang from. The loop's length has no effect on the base or sides, since it attaches after the pouch is already complete.
How do I know when the sides are tall enough?
The pattern repeats Round 4's plain sc round for three additional rounds, but the real test is whether the sides cover the bar of soap you intend to hold. Work an extra round or two if your soap is larger than a standard bar.
05 · Made byWho counted this one

Who writes Amigurumi Addict, how a build gets its number, and why every round on the site carries a stitch count.
06 · Next off the benchThree builds that sit near this one

Odds and ends
Crochet a phone bag with strap, flap, and ring closure
How to crochet a phone bag? Join rounds from a 30-chain base, add a strap, flap, and ring.

Odds and ends
Crochet worsted weight socks with a turned heel
How do you crochet socks for winter? Build toe-up in worsted weight with a folded heel and ribbed leg.

Odds and ends
Toe-Up Woodland Walker Crochet Socks With Colorwork Cuff
How do you crochet toe-up socks with a colorwork cuff? Build the Toe, Heel, and stranded Cuff in order.
Join the build log
One message when a build is issued
A drawing and its parts list, when one leaves the bench.