| Shelf | Level | Time | Yarn |
|---|---|---|---|
| Odds and ends | Intermediate | 4-6 Hours | Worsted |
Easy Crochet Mittens Pattern with Anatomical Thumb (Slip Stitch Method)
Make cozy crochet mittens with a realistic anatomical thumb using easy slip stitches. A beginner-friendly, elastic, warm design for chilly days.
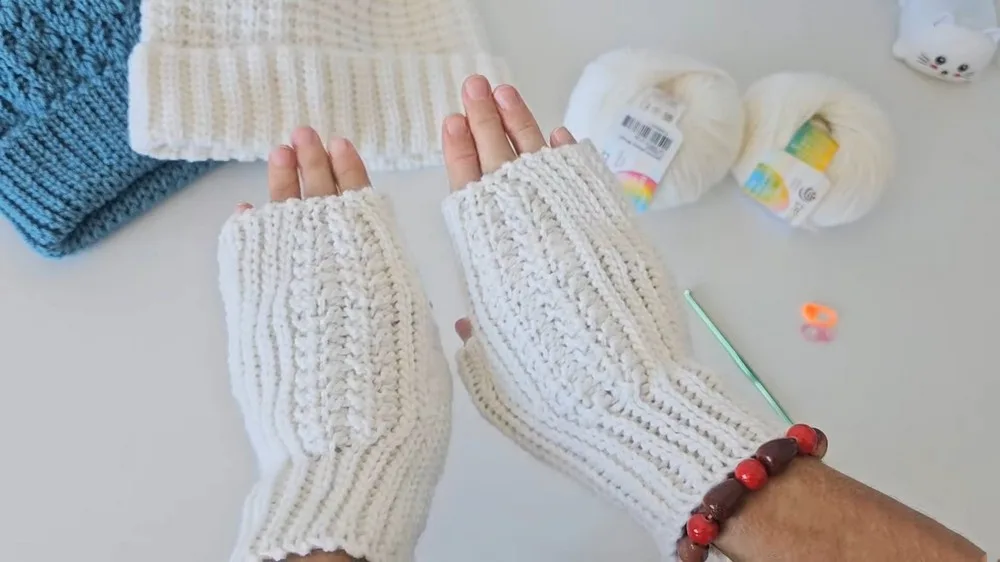
01 · The pieceWhat Easy Crochet Mittens Pattern with Anatomical Thumb (Slip Stitch Method) actually is
These crochet mittens are built almost entirely from slip stitches, which creates a dense, stretchy fabric that hugs the hand instead of hanging loose like typical single crochet mittens. The standout feature is the anatomically shaped thumb, attached in its own dedicated round so it sits naturally against the palm rather than sticking out at an awkward angle. This pattern is perfect for crocheters who want a functional, wearable project that still teaches a slightly unusual technique.
The main body works up in just 10 rounds, plus one additional round to attach the thumb, so the technique count stays low even though the slip stitch fabric takes a bit more patience to complete. Expect to spend an afternoon or a cozy evening on one mitten once you get a feel for keeping your slip stitches relaxed. This is a great next-step project for confident beginners ready to move past basic single crochet into something with real structure.
The finished mittens fit a palm circumference of 17-18 cm and feel incredibly elastic thanks to the merino wool blend and slip stitch construction, stretching comfortably to accommodate different hand sizes. The fabric has a soft, almost knit-like texture rather than the typical bumpy look of crochet, making these mittens look surprisingly polished. They make a wonderful handmade gift for anyone who feels the cold, from a grandparent to a new parent bundling up a little one.
- Set up your hook and stitch markers, then begin the main body worked in dense, stretchy slip stitches.
- Work steadily through the main pattern rounds, keeping your tension relaxed so the fabric stays soft and elastic.
- Use a stitch marker to track the start of each round, since slip stitch fabric can look uniform.
- Check the fit against your hand as you approach the final main pattern round before shaping the thumb.
- Work the single thumb attachment round, positioning it so the thumb sits naturally against the palm.
- Try the mitten on to confirm the anatomical thumb angle looks and feels right before finishing off.
- Weave in any loose ends and give the mitten a light stretch to relax the stitches evenly.
- Repeat the entire process for the second mitten, matching round counts and thumb placement for a pair.
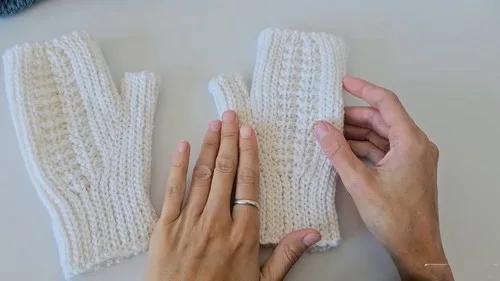
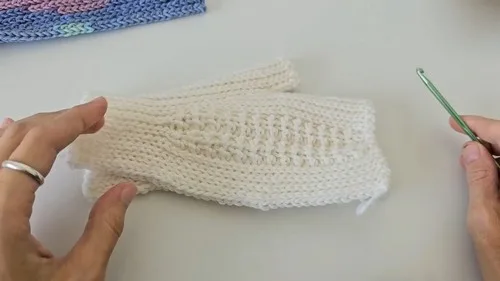
02 · The count run12 rounds across 2 parts, each with its count
US terms throughout. Every row below ends with the count that round finishes on.
| Part | Qty | Finishes on |
|---|---|---|
| Main Pattern | 1 | - |
| Attaching the Thumb | 1 | - |
| Round | Instruction | Count |
|---|---|---|
| Foundation Chain | Cast on 41 chain stitches (ch). This will be your starting loop. | - |
| Round 1 | Start slip stitching (sl st) in the second ch from the hook for a total of 40 slip stitches. Turn your work by making one ch and then continue to row 2. | - |
| Round 2-12 | For each row, make 40 sl st, making sure to grab the back loop only. Each row ends with one ch before turning the work.After Row 13: Make 28 sl st and then leave the remaining 12 unworked. Turn your work with one ch. | - |
| Round 14 | Make 28 sl st back across the 28 stitches from the previous row. Remember to mark the last stitch of the row with a marker for easier visibility. | - |
| Round 15 | Make 25 sl st, leaving three stitches unworked at the end. Turn your work with one ch.In Row 16: Repeat 25 sl st. | - |
| Round 17-19 | Continue to decrease by three stitches at the end of each row. Thus, you will work 22, 19, and then 16 sl st consecutively, each row ending with a ch and turn. | - |
| Round 20-22 | Continue with 16 sl st for three rows, forming the "steps" on the mitten side. For Row 23: With 40 sl st, combine all the steps by inserting the hook into the side strand ("jumper") and the loop below it to work the stitch. | - |
| Round 24 | Work 25 sl st. Then, for the finger, ch 7. | - |
| Round 25 | Starting with the second ch from the hook, make 6 sl st. Complete the row by making 25 sl st on the other side; you should have 31 sl st in total.For Row 26: Work 31 sl st back across. | - |
| Round 27 | Make 22 sl st, skipping the last 11 stitches. Continue with 20 stitches for row 28.Row 29 - 31: Skip 3 stitches at the end of each row for decreasing. Work 17, 14, and 11 stitches respectively, and join the "steps" by slip-stitching into the bridge strands ("jumpers"). | - |
In Row 32 - 35:
Maintain the pattern until the 35th row, where you will connect another step by slip-stitching down.
| Round | Instruction | Count |
|---|---|---|
| Round 36-40 | Work 31 sl st for each row. | - |
Fold the thumb panel in half, mark six stitches on both sides, and connect each pair with slip stitches.
Row 42 - 45: Continue as from row 42 to 45, working the stitches and forming the pattern as instructed (this pattern will alternate between the front and back loops for texture).
After Row 51 - 54:
Create a pattern over the next four rows; this will involve alternating between slip stitches and half double crochets utilizing the front and back loops for textural contrast.
| Round | Instruction | Count |
|---|---|---|
| Round 55-62 | Work 40 sl st for each row to complete the mitten. | - |
03 · Putting it togetherHow the pieces go together
- S1
After reaching row 62, sew the edges of the mitten together along the wrong side, ensuring the seam is neat.
04 · Before it goes to a childWhat has to be right, and what is allowed to drift
- 💡 Keep a light, even tension throughout the main pattern rounds; slip stitch fabric tightens up fast, and the pattern specifically notes that overly tight stitches make the mittens stiff instead of soft and stretchy.
- 💡 Have a 4.5mm hook on hand as a backup in case your natural tension runs tight; sizing up slightly is the easiest fix for stiff fabric without changing your stitch count.
- 💡 Use a stitch marker or a small pin to mark the beginning of each round, since slip stitch fabric can look visually uniform and it's easy to lose your place across all ten rounds.
- 💡 Before starting the single thumb attachment round, double check hand placement so the anatomical thumb shape sits naturally against the palm rather than pointing off at an odd angle.
- 💡 If you're making these for a wider hand than the 17-18 cm palm circumference this pattern is drafted for, add extra rounds near the thumb area or at the cuff rather than changing the stitch pattern itself.
- 💡 Buy your full one and a half skeins of Pekhorka 'Children's Whim Warm' (or your substitute yarn) from the same dye lot upfront, since slip stitch fabric can make subtle color shifts between dye lots more noticeable.
05 · Snag listWhat went wrong on the bench, and the fix
Snag 1
Pulling slip stitches too tight
Consciously relax your tension and let each loop sit a little loose on the hook; the pattern notes specifically warn that overly tight slip stitches make the fabric stiff and lose the elastic quality that makes these mittens comfortable.
Snag 2
Attaching the thumb in the wrong
Before working the thumb attachment round, try the mitten on or hold it against your hand to confirm placement, and use a stitch marker to flag the exact starting stitch so the anatomical shape lines up correctly.
Snag 3
Losing track of round placement since
Place a stitch marker or safety pin at the start of every round before you begin the next one, moving it up as you go so you always know exactly where each round begins and ends.
Snag 4
Skipping gauge and size checks, leading
Since the pattern is sized for a 17-18 cm palm circumference, measure your intended wearer's hand before starting and add extra rounds near the thumb or cuff as needed, per the pattern's own sizing notes.
Snag 5
Running out of yarn mid-project
Even though the pattern calls for about one and a half skeins, weigh or measure your remaining yarn after the first mitten so you can confirm you have enough consistent-dye-lot yarn left for a matching second mitten.
06 · VariantsOther ways to issue this one
I adore this pattern because it proves crochet can mimic knitwear when you lean into slip stitches. Working the main body in that dense stitch creates a fabric that stretches and recovers just like a good pair of knit mittens, but you get there with a hook instead of two needles. The anatomical thumb round is genuinely satisfying to complete; watching it tuck into place and shape itself around your hand feels like a little magic trick after ten rounds of steady, meditative slip stitching. I also love how forgiving the sizing is; the pattern notes make it easy to add rows near the thumb or at the cuff if you're working for someone with wider hands. With just a hook, some markers, and a skein and a half of soft merino blend yarn, this project feels accessible without sacrificing that special, well-made look. It's the kind of pattern I keep coming back to every autumn when I want something quick, cozy, and a little more interesting than a basic hat.
07 · QueriesQuestions logged against this build
What makes this mitten pattern different from a typical crochet mitten?
The main body is worked almost entirely in slip stitches instead of single or double crochet, which creates a denser, more elastic fabric that feels closer to knitwear. Combined with the anatomically shaped thumb round, the fit is noticeably more natural than a basic tube-and-thumb mitten.
What size hand does this pattern fit?
As written, the mittens are sized for a palm circumference of 17-18 cm and are designed to be very elastic, so they'll stretch to fit a small range of hand sizes comfortably. For a larger or smaller fit, the pattern notes suggest adding rows near the thumb or cuff area.
Can I use a different yarn than the Pekhorka 'Children's Whim Warm'?
Yes, any similar worsted-weight yarn with a soft wool or wool-blend fiber content will work well, since the pattern relies on elasticity from both the fiber and the slip stitch technique. Aim for a yarn with good stretch and around 125 meters per 50 grams to keep gauge close to the original.
How long does it take to make one mitten?
Since the main pattern is only 10 rounds plus one round to attach the thumb, most crocheters can finish one mitten in a single sitting of a few hours once they're comfortable with the slip stitch rhythm. Plan on roughly 4-6 hours total for a finished pair.
Original pattern: https://crocheteverything.com/easy-to-make-crochet-mittens-pattern-with-anatomical-finger/
08 · Made byWho counted this one

Who writes Amigurumi Addict, how a build gets its number, and why every round on the site carries a stitch count.
09 · Next off the benchThree builds that sit near this one

Odds and ends
Crochet a phone bag with strap, flap, and ring closure
How to crochet a phone bag? Join rounds from a 30-chain base, add a strap, flap, and ring.

Odds and ends
Crochet worsted weight socks with a turned heel
How do you crochet socks for winter? Build toe-up in worsted weight with a folded heel and ribbed leg.

Odds and ends
Toe-Up Woodland Walker Crochet Socks With Colorwork Cuff
How do you crochet toe-up socks with a colorwork cuff? Build the Toe, Heel, and stranded Cuff in order.
Join the build log
One message when a build is issued
A drawing and its parts list, when one leaves the bench.