| Shelf | Level | Time | Hook | Yarn |
|---|---|---|---|---|
| Odds and ends | Beginner | 1-2 Hours | 5 mm | Worsted |
Easy Crochet Mason Jar Drink Lid Pattern with Straw Opening
Learn to crochet a mason jar drink lid with a built-in straw opening using simple HDC stitches, a magic ring base, and durable cotton yarn—perfect for begi
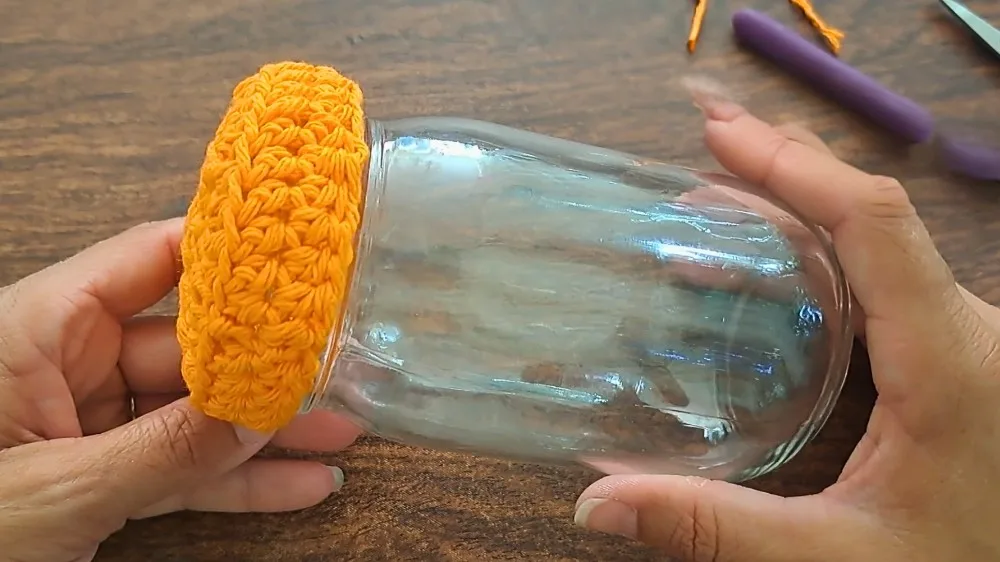
01 · The pieceWhat Easy Crochet Mason Jar Drink Lid Pattern with Straw Opening actually is
This crochet mason jar drink lid is designed to keep bugs out of your beverages while giving your summer drinks a handmade touch. Worked entirely in half double crochet, it features a small straw opening so you can sip straight from the jar without removing the lid. It's ideal for beginners who want a fast, satisfying project using just one stitch.
The techniques here are refreshingly simple: you'll start with a magic ring, work rounds of HDC increases to grow the circle, then chain and skip stitches to open a straw hole. A later round worked only in the back loops creates a snug edge that grips the jar's lip, and a final round finishes the lid in both loops. There's no need for prior amigurumi experience—just basic HDC and simple increases.
The finished lid is a functional and stylish accessory for mason jars, sized to fit snugly over the jar's lip and hold a straw in place. It's perfect for protecting summer beverages from insects and makes cleanup easy since it's washable. Worked in cotton yarn, it's durable and reusable, making it a thoughtful, eco-friendly accessory for picnics and outdoor gatherings.
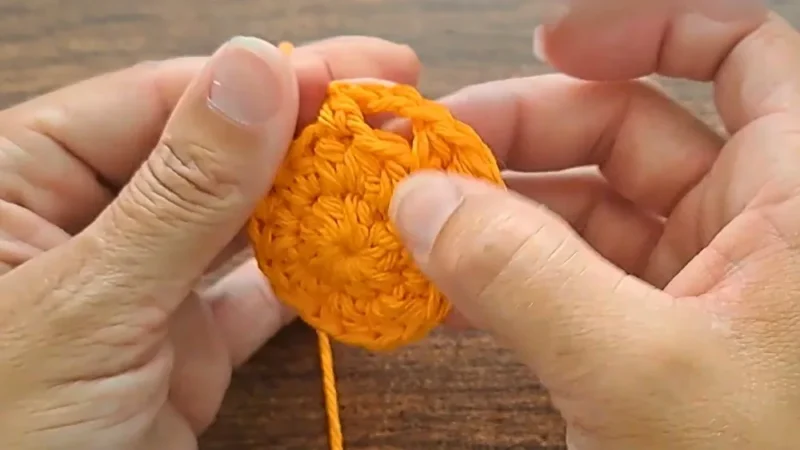
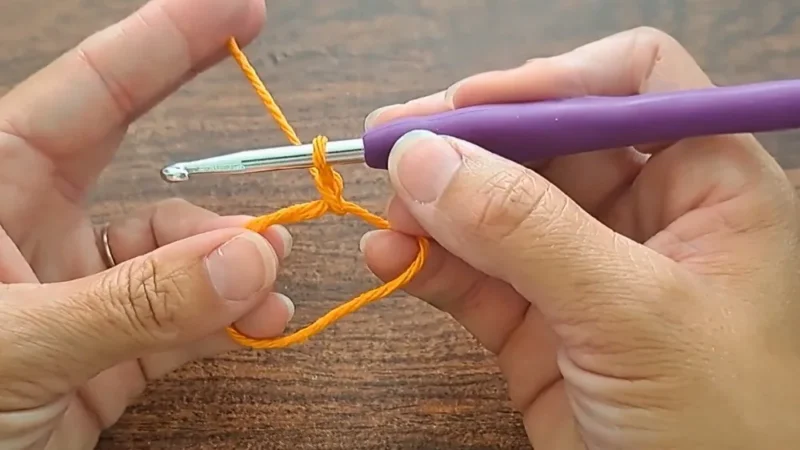
- Form a magic ring and work round one entirely in half double crochet to build a firm, closed center.
- Pull the magic ring tail tight to close the center hole, then join the round with a slip stitch.
- Chain one, then work two half double crochets into every stitch of round two to double the stitch count and widen the circle.
- In round three, chain two and skip one stitch instead of increasing to open up a small straw hole, then join.
- In round four, work three half double crochets into the chain-two space from round three to keep the edge smooth, then join.
- In round five, work in the back loops only of each stitch to create a snug edge that will sit over the jar's lip.
02 · The count run6 rounds across 1 part, each with its count
US terms throughout. Every row below ends with the count that round finishes on.
| Part | Qty | Finishes on |
|---|---|---|
| Main Pattern | 1 | - |
| Round | Instruction | Count |
|---|---|---|
| Round 1 | Creating the Base Start the project with a magic ring for a neat and adjustable base.Chain one for height. | - |
| Round 2 | Increasing the Diameter Chain one to begin the round. Work half-double crochets into each stitch of the previous round.Increase the diameter of the circle by adding two HDCs into each stitch. | - |
| Round 3 | Adding a Straw Opening This round marks the functional portion of the design: Chain one and repeat the increase pattern, but add an opening for the straw.To create the straw hole: chain two, skip one stitch, and continue the pattern. | - |
Once the round is complete, join with a slip stitch.
| Round | Instruction | Count |
|---|---|---|
| Round 4 | Shaping the Straw Opening Continue to expand the diameter of the lid with a pattern of increasing HDCs.For the chain-two space from the previous round, add three HDCs into the gap to maintain a smooth shape. | - |
| Round 5 | Forming the Edge In this round, work exclusively in the back loops to create an edge that will sit snugly over the jar's lip. | - |
This small design detail adds both functionality and style.
| Round | Instruction | Count |
|---|---|---|
| Round 6 | Finishing the Lid Switch back to working in both loops of each stitch. Complete the final round with a basic pattern. Slip stitch to join the round, pull up the loop, tie off, and weave in the ends with a darning needle. | - |
03 · Before it goes to a childWhat has to be right, and what is allowed to drift
- 💡 Use a 5mm hook exactly as the pattern specifies—going smaller will make your HDCs too tight to work into easily, and going larger can leave the fabric too loose to hold its shape over a lid.
- 💡 Choose cotton yarn over acrylic for this project since it holds its shape better around a jar lid and can be washed if it gets sticky from jam or syrup residue.
- 💡 Place a stitch marker in the first stitch of each round so you always know exactly where to join with your slip stitch, especially since there's no color change to help you track rounds.
- 💡 Pull your magic ring tail snug before working the first round of HDCs, and give it a final tug once the round is complete to fully close the center hole.
- 💡 Measure your actual jar lid before starting so you know whether the pattern's rounds will be enough, or whether you'll need an extra increase round for a larger lid diameter.
- 💡 Weave in the magic ring tail directly into the stitches of round one as you crochet, rather than leaving it loose, so the underside of your cover stays flat against the lid.
- 💡 Don't skip the back-loop-only instruction in round five—working into both loops here will leave the edge too loose to hold snugly over the jar's rim.
04 · Snag listWhat went wrong on the bench, and the fix
Snag 1
Starting the magic ring too loosely
Cinch the magic ring tail firmly and check that the loop is fully closed before working your first round of HDCs—give it an extra tug if any gap remains.
Snag 2
Miscounting the HDC stitches in
Count your stitches after completing the first round and before joining with the slip stitch, adjusting immediately if the count is off rather than continuing into the next round.
Snag 3
Forgetting the chain-1 at the start
Make the chain-1 a habit before every round—consider placing a stitch marker in the first real stitch of the round so you don't confuse the chain for a stitch.
Snag 4
Increasing unevenly in the second
Work the increase round slowly and check that literally every stitch from the previous round receives exactly two HDCs, not just some of them, to keep the circle flat and symmetrical.
Snag 5
Not weaving in the magic ring tail
Work the tail into your stitches over the first round as instructed in the pattern, rather than leaving it to weave in at the very end—this keeps the center smooth and tidy.
Snag 6
Losing track of the join point
Always join with a slip stitch into the very first stitch of the round (marked with a stitch marker if needed) before chaining 1 to start the next round.
05 · VariantsOther ways to issue this one
Once you've mastered the basic mason jar drink lid, there are a few simple ways to customize it. Try using different colors for each round to create a striped effect, or match the yarn to your jar's label or a ribbon tied around the rim. If your jar has a wider mouth, work an extra increase round before starting the back-loop edge round to make the lid larger. You can also adjust the straw opening by chaining more or fewer stitches in round three to fit different straw widths. For a matching set, crochet several lids in coordinating summer colors for picnics, cookouts, or outdoor parties.
06 · QueriesQuestions logged against this build
What is this mason jar lid used for?
This crocheted lid fits over a mason jar and includes a small straw opening, so you can sip your drink while keeping bugs out—perfect for picnics, barbecues, and other outdoor summer gatherings.
Can I use acrylic yarn instead of cotton for this jar lid cover?
You can, but cotton is recommended because it's more durable and washable, which matters if the cover will sit near jam, honey, or other sticky contents. Acrylic will work in a pinch but may not hold up as well over repeated use.
Do I need any special stitches beyond half-double crochet?
No, this pattern only uses half double crochet stitches worked into a magic ring, along with basic HDC increases and one round worked in the back loops only to shape the edge. It's a great project if you're comfortable with HDC but haven't tried magic rings or back-loop stitches yet.
How do I keep track of where each round starts and ends?
Use a stitch marker in the first stitch of each round, since you'll be joining with a slip stitch and chaining 1 before continuing. This prevents confusion between the chain-1 and an actual stitch.
Why does my circle look ruffled instead of flat?
A ruffled edge usually means you've added too many increases for the number of rounds worked, causing the fabric to ripple. Try skipping the increase in a few stitches or double-check that you're only increasing exactly as instructed in the second round.
How is the straw opening made?
The straw opening is created in round three by chaining two stitches and skipping one stitch instead of working the usual increase, which leaves a small gap. In round four, three half double crochets are worked into that chain-two space to keep the surrounding stitches smooth and even.
Original pattern: https://redagapeblog.com/crochet-jar-lid-cover/
07 · Made byWho counted this one

Who writes Amigurumi Addict, how a build gets its number, and why every round on the site carries a stitch count.
08 · Next off the benchThree builds that sit near this one

Odds and ends
Crochet a phone bag with strap, flap, and ring closure
How to crochet a phone bag? Join rounds from a 30-chain base, add a strap, flap, and ring.

Odds and ends
Crochet worsted weight socks with a turned heel
How do you crochet socks for winter? Build toe-up in worsted weight with a folded heel and ribbed leg.

Odds and ends
Toe-Up Woodland Walker Crochet Socks With Colorwork Cuff
How do you crochet toe-up socks with a colorwork cuff? Build the Toe, Heel, and stranded Cuff in order.
Join the build log
One message when a build is issued
A drawing and its parts list, when one leaves the bench.