| Shelf | Level | Time | Hook | Yarn |
|---|---|---|---|---|
| Odds and ends | Intermediate | 4-6 hours | 2.5 mm | Fingering |
Crochet floral mandala doily for table decor
How do you crochet a floral mandala doily? Build it round by round from a 12-dc magic ring center.
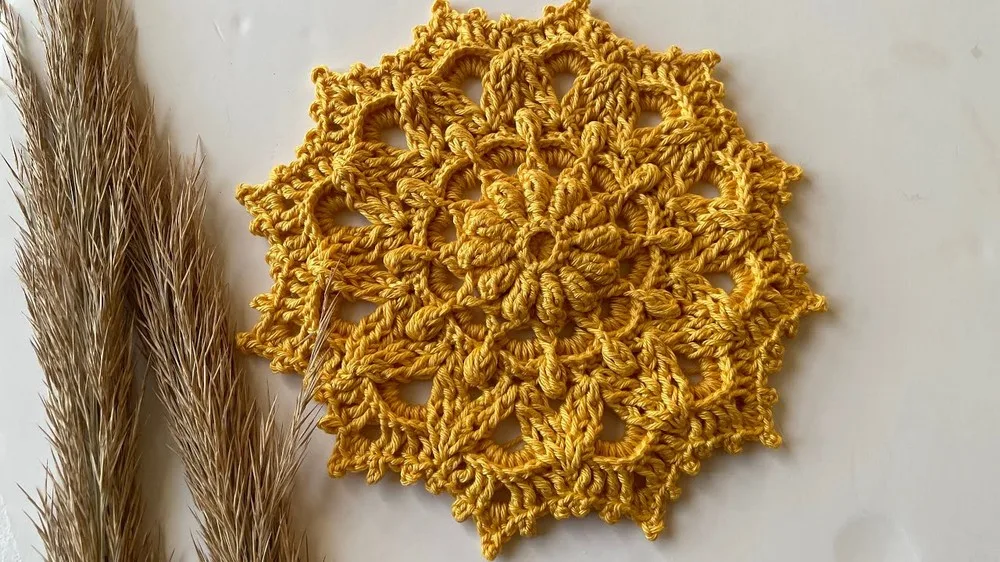
01 · The pieceWhat Crochet floral mandala doily for table decor actually is
The mandala starts as a single unit: a magic ring closed into 12 double crochets, the foundation stitch count for the whole piece. Every later round attaches to this ring by working into the tops of those 12 stitches or into the chain-1 spaces between them — back post stitches in round 2, popcorn clusters in round 3, front post stitches in round 4. No separate pieces are joined afterward; the doily grows outward in one continuous stack of rounds, held together entirely by stitches worked over and around each other, finishing in a picot edge.
Precision matters at the center: the magic ring must cinch fully closed, and round 1's 12 double crochets need an accurate count, since every following round keys off that number. Past round 1, tolerances loosen. Yarn weight and hook size are stated as flexible in the materials list, tension across the popcorn and puff rounds can vary by a stitch or two without the shape collapsing, and the picot edge tolerates minor spacing drift — the eye reads it as decorative texture, not as a fault line.
02 · The count run6 rounds across 1 part, each with its count
US terms throughout. Every row below ends with the count that round finishes on.
| Part | Qty | Finishes on |
|---|---|---|
| Main Pattern | 1 | - |
| Round | Instruction | Count |
|---|---|---|
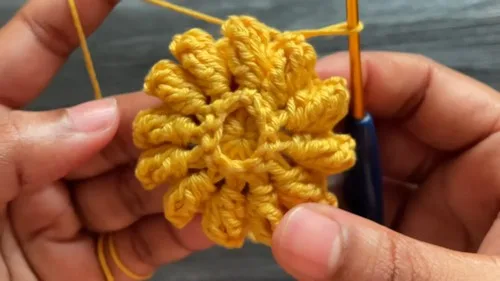
| Round 1 | Make a magic ring; chain one to secure the ring; chain two more (total three chains, counting as your first double crochet); work 11 double crochets into the magic ring; with the initial chain three, you have a total of 12 double crochets; pull the yarn and tie off to secure; insert the hook into the third chain from the beginning chain three and make a slip stitch; work a back post slip stitch into the very first chain three. (12 dc) | - |
| Round 2 | Chain four (this counts as a double crochet and chain one); work a back post double crochet into the next double crochet; chain one, then continue by working a back post double crochet into the next chain space and repeat around; after 12 double crochets and chain ones in between, chain one and make a slip stitch into the third chain from the first chain four. (12 dc) | - |
| Round 3 | Slip stitch into the next chain space; chain four, then work five treble crochets over the double crochet; create a popcorn stitch: drop yarn from hook, insert hook from the fifth treble, grab yarn, pull through, creating the popcorn stitch; chain one afterwards; work a double crochet into the next chain one space, then repeat the process of creating popcorn stitches followed by chain ones and double crochets in the specified spaces around; finish the row with a slip stitch. | - |
| Round 4 | Continue following the pattern as it develops through unique combinations of stitches, such as front post slip stitches, front post double crochets (and making two together), and various spaces filled with double crochets or treble crochets as per the progression described. | - |
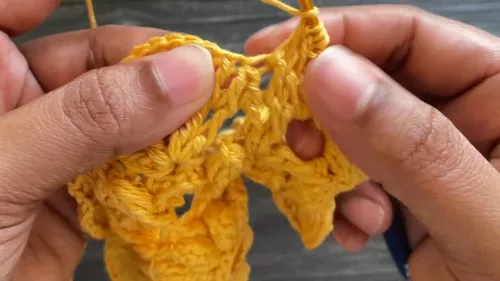
| Round 5 | The pattern concludes with specialty stitches like puff stitches over the front post trebles, front post slip stitches, and picot stitching to create a decorative edging. | - |
| Round 6 | Work a front post single crochet into the chain three space; chain three and create a picot (by inserting the hook into the two loops, yarn over, and pull through for a slip stitch); continue with a front post single crochet in the specified spaces and single crochets in the chain one spaces, interspersed with picots and front/post double crochets as instructed to create a scalloped edge. | - |
Techniques on this build
- Magic ring
- Opens round 1; cinch the center loop closed before working the first chain-3, or the doily's core stays visibly open.
- Back post double crochet
- Used in round 2; the hook goes around the post of the round 1 stitch, not into its top — working into the top by habit flattens the texture.
- Popcorn stitch
- Built in round 3 over groups of treble crochets; dropping the loop and reinserting from the correct treble keeps every popcorn the same tightness.
- Front post stitches with puff and picot edging
- Round 4 works into the post to pull stitches to the front face; round 5 layers puff stitches and picots on top of that raised surface for the edge.
Final fit-up
- Weave in the starting tail left from the magic ring, running it through the base of a few round 1 stitches so the center stays cinched.
- Work the final slip stitch and chain-1 called for at the end of the last round, then cut the working yarn.
- Weave in the ending tail along the picot edge, catching it inside a puff stitch or post so it doesn't show on the front face.
- Block the piece flat and slightly stretched, pinning the picot points outward so the popcorn and puff rounds sit open rather than curled.
How the parts fit
- Round 1 builds all 12 double crochets from a single magic ring, and its closing move — a back post slip stitch into the first chain-3 — sets the anchor point that round 2's back post stitches work from, in place of a standard top-of-stitch join.
- Round 2 works back post double crochets directly into the round 1 stitches with chain-1 spaces between them; round 3 then works its treble and popcorn groups into those chain-1 spaces rather than into stitch tops, which is why the round 3 cluster placement lines up with the spaces, not with the 12 stitches directly.
- Round 4 works into the post of earlier stitches rather than their tops, pulling that round's front post double crochets and dc2tog forward onto the front face of the doily — raising it above the flatter back post surface built in round 2.
Scaling the build
| Smaller | Drop to a finer cotton thread with a smaller hook; the same 12-stitch structure holds, but the finished diameter shrinks and the picot edge sits tighter. |
|---|---|
| Larger by round | Repeat the front post and puff stitch treatment of round 4 as an extra round before the picot edging round; this adds diameter without changing the round 1 stitch count. |
03 · Putting it togetherHow the pieces go together
- S1
To complete your doily, after the last row, work a slip stitch into the first single crochet, chain one, and cut off the yarn.
- S2
Secure the end and weave in loose ends for a neat finish.
04 · Snag listWhat went wrong on the bench, and the fix
Snag 1
Magic ring left loose
Pull the short tail snug before working the first double crochets into the ring, and check again after the round is complete; a loose ring leaves a visible hole at center.
Snag 2
Miscounting the round 1 stitch total
Count the initial chain-3 as one double crochet, then count the 11 worked into the ring separately; the round should total 12, and every later round depends on that number.
Snag 3
Back post stitch worked into stitch top
Insert the hook around the post of the round 1 stitch, front to back to front, not into the two loops at the top; working into the top flattens round 2's texture.
Snag 4
Popcorn stitches pulled uneven
Drop the loop from the hook, insert from the same treble each time, and pull the loop through with even tension so the popcorns stand at matching height around the round.
05 · QueriesQuestions logged against this build
Can I use a yarn other than the cotton listed?
Yes — the materials note states any yarn works with a suitable hook size. Thicker yarn with a larger hook gives a bigger doily; finer thread with a smaller hook gives a daintier one, and the round-by-round structure doesn't change.
Why does round 1 end with a slip stitch and a back post slip stitch instead of a plain join?
That back post slip stitch into the first chain-3 sets the starting point that round 2's back post double crochets work from. Skipping it leaves round 2 without a clear anchor stitch to begin around.
Does this doily need blocking?
Given the popcorn, front post, and picot texture, yes — blocking flat opens the lace pattern and sets the picot points so they read cleanly on a table rather than curling inward.
06 · Made byWho counted this one

Who writes Amigurumi Addict, how a build gets its number, and why every round on the site carries a stitch count.
07 · Next off the benchThree builds that sit near this one

Odds and ends
Crochet a phone bag with strap, flap, and ring closure
How to crochet a phone bag? Join rounds from a 30-chain base, add a strap, flap, and ring.

Odds and ends
Crochet worsted weight socks with a turned heel
How do you crochet socks for winter? Build toe-up in worsted weight with a folded heel and ribbed leg.

Odds and ends
Toe-Up Woodland Walker Crochet Socks With Colorwork Cuff
How do you crochet toe-up socks with a colorwork cuff? Build the Toe, Heel, and stranded Cuff in order.
Join the build log
One message when a build is issued
A drawing and its parts list, when one leaves the bench.