| Shelf | Level | Time | Hook | Yarn |
|---|---|---|---|---|
| Odds and ends | Beginner-Intermediate | 2-3 Hours | 3.5 mm | Worsted |
Crochet Easy Baby Booties Pattern for Winter Wear
Crochet cozy baby booties with this easy two-color pattern featuring a simple 4-round body and 3-round sole—perfect for winter gifts and quick makes.
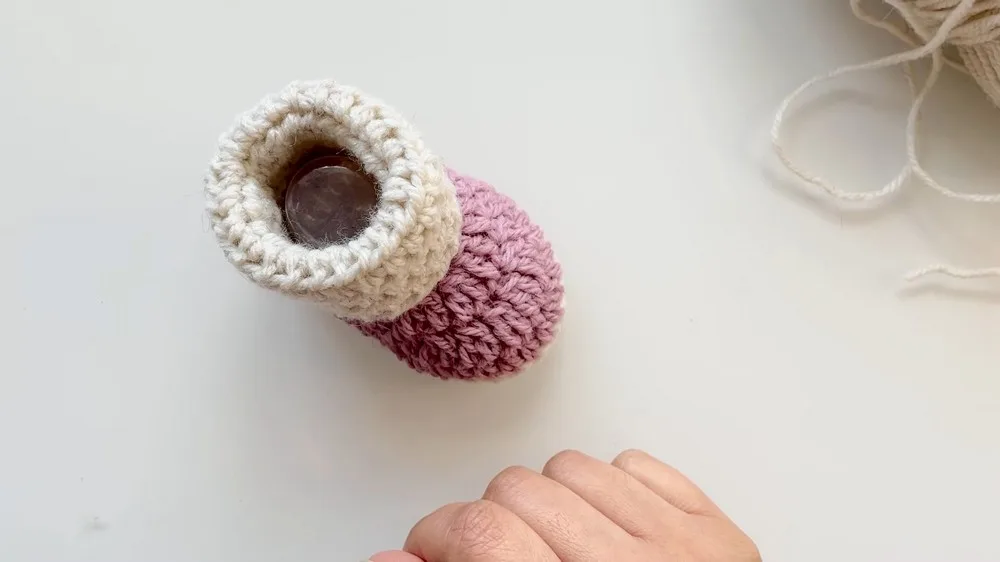
01 · The pieceWhat Crochet Easy Baby Booties Pattern for Winter Wear actually is
These crochet baby booties are the perfect blend of simplicity and charm, coming together in just two easy pieces: a 3-round sole and a 4-round body. What makes this pattern so special is its flexibility—work the sole and body in contrasting colors like pink and beige, or blend your yarns for a soft gradient effect. Whether you're crocheting for a new arrival, a baby shower gift, or your own little one's winter wardrobe, this pattern delivers big charm without a big time commitment.
This is a wonderfully approachable project that relies on foundational amigurumi techniques—working in the round, basic increases to shape the sole, and clean color changes between the two pieces. Beginners who've mastered single crochet and basic shaping will find this pattern very achievable, while more experienced crocheters can whip up a pair during a quiet afternoon. Expect the whole project, sole through body, to take about 2-3 hours including finishing touches.
The finished booties are soft, snug, and irresistibly tiny—sized to slip onto little feet and keep tiny toes warm through the colder months. With their rounded sole and gently shaped body, they have that classic, huggable amigurumi-style softness that makes handmade baby items so special. Add a button, bow, or a bit of embroidery and you've got a genuinely gift-worthy pair that any new parent will treasure.
- Start each sole with a small foundation ring and work three rounds outward, increasing evenly to form a symmetrical oval base.
- Work the body upward from the sole in four rounds, building gentle shape as you go for a snug, rounded fit.
- Keep your stitch tension consistent between rounds so the transition from sole to body sits smoothly without puckering.
- Finish the final body round and fasten off, leaving a generous yarn tail for seaming and weaving in ends.
- Weave in all loose ends neatly so both the interior and exterior of the bootie look clean and finished.
- Repeat the entire process for the second bootie to complete a matching pair.
- Add your chosen embellishment, like a button, bow, or embroidered detail, to personalize each bootie before gifting or wearing.
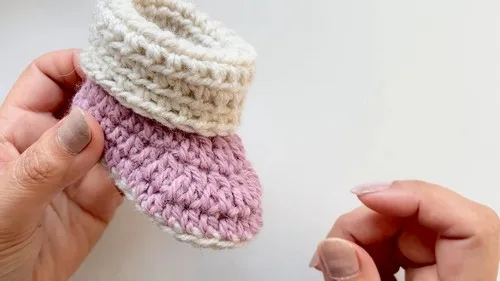
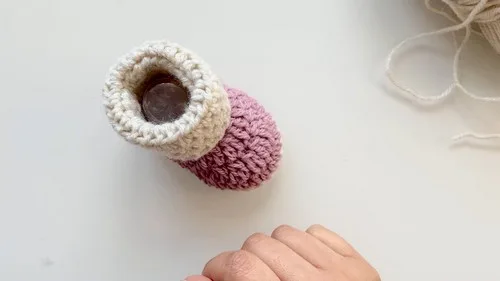
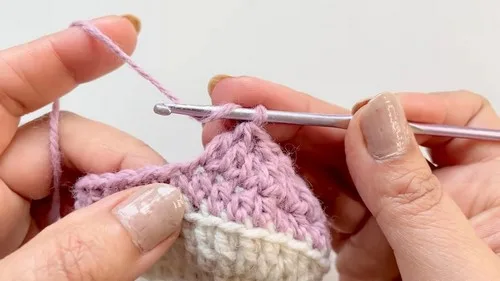
02 · The count run7 rounds across 2 parts, each with its count
US terms throughout. Every row below ends with the count that round finishes on.
| Part | Qty | Finishes on |
|---|---|---|
| Body | 1 | - |
| Sole | 1 | - |
| Round | Instruction | Count |
|---|---|---|
| Round 1 | CH 2, turn. HDC in the first ST, *2HDC in the next ST, repeat from * to the end. Turn. | - |
| Round 2-12 | Repeat Row 1. In Row 13: CH 1, SC in the first ST, *HDC in the next ST, repeat from * to the end. Turn.URows 14-20: Repeat Row 13. | - |
| Round 21 | CH 1, SC in the first ST, *2HDC in the next ST, repeat from * to the end. Turn. In Rows 22-24: Repeat Row 21. | - |
| Round 25 | CH 1, SC in the first ST, *HDC in the next ST, repeat from * to the end. Turn.Rows 26-32: Repeat Row 25. | - |
For Row 1: CH 10, turn.
| Round | Instruction | Count |
|---|---|---|
| Round 2 | SC in the 2nd CH from the hook, *HDC in the next CH, repeat from * to the end. Turn. | - |
| Round 3 | CH 1, SC in the first ST, *2HDC in the next ST, repeat from * to the end. Turn. For Rows 4-7: Repeat Row 3. | - |
| Round 8 | CH 1, SC in the first ST, *HDC in the next ST, repeat from * to the end. Turn.Rows 9-12: Repeat Row 8. | - |
03 · Before it goes to a childWhat has to be right, and what is allowed to drift
- 💡 Use a 3.5mm hook consistently throughout both the sole and body to keep your stitch gauge even and ensure the two pieces fit together properly.
- 💡 If you're adjusting the size, add or subtract stitches in pairs during the sole's increase rounds to keep the oval shape symmetrical and prevent puckering.
- 💡 When working with two colors, keep your yarn ends organized by loosely tying each color's tail in a small knot until you're ready to weave it in—this prevents tangling mid-project.
- 💡 For baby-safe embellishments, always hand-sew buttons extra securely with doubled thread, or better yet, opt for embroidered French knots instead of buttons for children under 3.
- 💡 Block your finished booties lightly with a spray of water and gentle shaping by hand to help the sole lay flat and the body hold its rounded shape.
- 💡 If you want a gradient effect rather than a hard color change, consider using a variegated or self-striping yarn for the body so the transition happens naturally as you crochet.
04 · Snag listWhat went wrong on the bench, and the fix
Snag 1
Working the sole increases unevenly, causing it to curl or become lopsided instead of a symmetrical oval.
Use stitch markers at the beginning of each round and count your increase stitches carefully across all 3 sole rounds—an uneven sole will make the whole bootie sit crooked.
Snag 2
Choosing a hook size that doesn't match your yarn weight, resulting in a sole that's too loose or a body that's too tight.
Stick with the recommended 3.5mm hook for worsted weight yarn, and always test your gauge with a small swatch before starting if your tension tends to run tight or loose.
Snag 3
Forgetting to leave a long enough yarn tail when finishing the body rounds, making it hard to seam or weave in ends neatly.
Leave at least a 6-inch tail at the end of your final round so you have plenty of length to sew any seams and weave the end in securely without pulling on the stitches.
Snag 4
Not accounting for the natural stretch of crochet fabric, resulting in booties that are too large after blocking.
Since worsted weight crochet has some give, aim to make your booties slightly snug when finished—they'll relax and fit more true-to-size once worn a few times.
Snag 5
Attaching embellishments like buttons before trying the booties on for fit, leading to uncomfortable hard spots against baby's foot.
Always finish the full pair and check the fit first, then add buttons, bows, or embroidery on the outer sides only—never on the sole or interior where they could irritate skin.
05 · VariantsOther ways to issue this one
I adore how this pattern proves that small projects can pack maximum cuteness into minimal effort. With only 3 rounds for the sole and 4 rounds for the body, you're never far from that satisfying moment of turning a ball of yarn into a tiny, wearable shoe. I especially love using two contrasting colors—there's something so joyful about picking a soft beige for the sole and a punchy pink (or any color!) for the body, watching the personality of the booties come together round by round. The color-change moment between sole and body is such a simple technique, but it makes the whole project feel polished and intentional. What really gets me excited is the embellishment stage—adding a tiny button, a delicate bow, or a few embroidery stitches transforms these from 'sweet' to 'absolutely swoon-worthy.' This pattern is also endlessly giftable; I've made pairs for baby showers, holiday stockings, and even just because. If you love quick, meaningful makes that let your creativity shine in the details, these booties will become a fast favorite in your pattern rotation.
06 · QueriesQuestions logged against this build
What yarn weight works best for these baby booties?
Worsted weight yarn paired with a 3.5mm hook gives the best structure and drape for this pattern. Cotton-acrylic blends work particularly well since they're soft, washable, and hold their shape nicely for little feet.
How do I make the booties bigger for an older baby?
Simply add stitches evenly during the sole's increase rounds and work one or two extra rounds on the body before finishing. Keep any added stitches symmetrical on both sides of the sole to maintain the correct oval shape.
Can I use just one color instead of two?
Absolutely! While the two-color approach creates a lovely contrast between the sole and body, this pattern works beautifully in a single color too if you prefer a more uniform, classic look.
What's the best way to attach embellishments like bows or buttons?
Hand-sew embellishments securely to the outer body of the bootie using a yarn needle and matching or contrasting thread, avoiding the sole and interior for safety and comfort. Embroidered details like French knots are a great button alternative for younger babies.
How long does it take to make one pair of booties?
Most crocheters can complete both booties in about 2-3 hours, thanks to the quick 3-round sole and 4-round body construction. It's a great project to finish in a single relaxed evening.
Original pattern: https://crocheteverything.com/crochet-easy-baby-booties-pattern-for-winter-wear/
07 · Made byWho counted this one

Who writes Amigurumi Addict, how a build gets its number, and why every round on the site carries a stitch count.
08 · Next off the benchThree builds that sit near this one

Odds and ends
Crochet a phone bag with strap, flap, and ring closure
How to crochet a phone bag? Join rounds from a 30-chain base, add a strap, flap, and ring.

Odds and ends
Crochet worsted weight socks with a turned heel
How do you crochet socks for winter? Build toe-up in worsted weight with a folded heel and ribbed leg.

Odds and ends
Toe-Up Woodland Walker Crochet Socks With Colorwork Cuff
How do you crochet toe-up socks with a colorwork cuff? Build the Toe, Heel, and stranded Cuff in order.
Join the build log
One message when a build is issued
A drawing and its parts list, when one leaves the bench.