| Shelf | Level | Time | Yarn |
|---|---|---|---|
| Odds and ends | Intermediate | 3-4 hours | Double Knitting (DK) |
Crochet baby socks pattern with V-stitch body in four sizes
How to crochet baby socks in 4 sizes? Same 15-DC start, V-stitch body, flat heel, elastic rim.
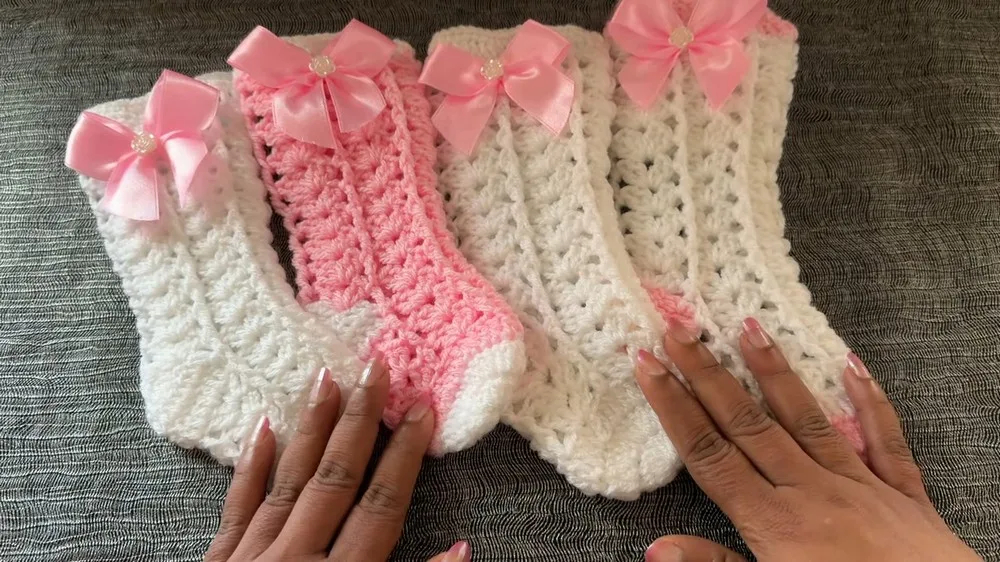
01 · The pieceWhat Crochet baby socks pattern with V-stitch body in four sizes actually is
The sock builds from a magic ring closed into 15 DC, the foundation every size shares. From there the body works in rounds of V stitch — 2 DC, chain 2, 2 DC into every third stitch — joined at the end of each round with a front post single crochet around the starting chain 3. The heel breaks from the round and works flat in DC rows with decreases to cup the foot, and a final single crochet round closes the top rim, doubling as the channel for the elastic.
Precision matters at the heel decreases and the V-stitch skip count — two stitches skipped each side, no more, no less, or the stitch count drifts and the heel sits crooked. It matters far less at the magic ring pull or the exact placement of the ribbon; those are cosmetic and forgive a loose hand. The hook swap between sizes (2.5mm to 4mm) is the one number that must match the size label exactly.
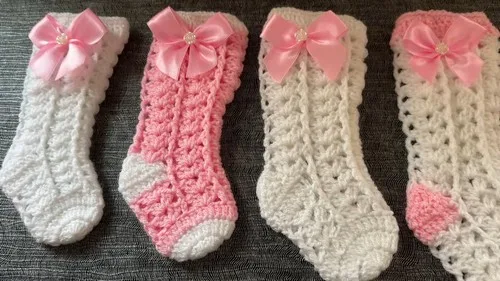
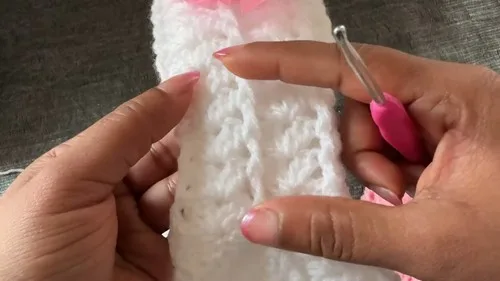
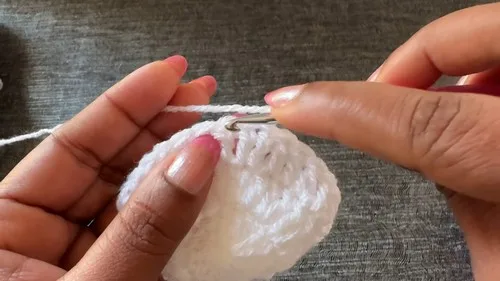
02 · The count run3 rounds across 1 part, each with its count
US terms throughout. Every row below ends with the count that round finishes on.
| Part | Qty | Finishes on |
|---|---|---|
| Sizes | 1 | - |
Size 1: 0-3 months Size 2: 3-6 months Size 3: 6-9 months Size 4: 9-12 months
All sizes start with the same number of stitches but the hook size changes to get the different sizes.
Pattern: Starting the Socks (Applies to All Sizes): Magic Ring: Start with a magic ring.
Chain 3 (counts as the first double crochet [DC]).
Make 14 DC into the magic ring for a total of 15 DC.
Pull the yarn tail to close the magic ring.
Join with a slip stitch to the top of the initial chain 3.
| Round | Instruction | Count |
|---|---|---|
| Round 2 | Chain 3 (counts as a DC). Make 2 DC in the next stitch and each stitch around for a total of 30 DC.Join with a slip stitch to the top of the initial chain 3. | - |
| Round 3 | Chain 3 (counts as a DC). Make 1 DC in each stitch around, for a total of 30 DC.Join with a slip stitch to the top of the initial chain 3. | - |
| Round 4 | (Pattern Start): Chain 3 (counts as a DC). Skip 2 stitches, into the third stitch make 2 DC, chain 2, and 2 more DC (forming a V stitch). Skip 2 stitches. Repeat from * to * around.Make a front post single crochet around the chain 3 from the beginning of the round to join. | - |
Techniques on this build
- Magic ring
- Opens the toe with 15 DC; pull the tail firm before round one so the center doesn't gap.
- V stitch
- Forms the sock body texture; skip exactly 2 stitches on each side of every V or the round count shifts.
- Front post single crochet join
- Closes each round around the starting chain 3; keeps the join flush instead of raising a seam.
- Flat DC rows with decreases
- Shapes the heel cup by turning instead of continuing in the round; track decreases symmetrically on both edges.
Final fit-up
- Thread the elastic through the final single crochet round at the top rim.
- Tie off and secure the elastic ends inside the rim so the join doesn't show.
- Attach the ribbon or bow at the top rim or toe, per the desired finish.
How the parts fit
- All four sizes start from the same 15 DC magic ring; the size difference is produced entirely by the hook (2.5mm through 4mm), not by added stitches.
- The heel is worked flat, back and forth in DC rows, because turning — rather than continuing in the round — is what shapes the opening for the foot.
- The front post single crochet join at the chain 3 keeps each V-stitch round reading as continuous rather than leaving a visible seam at the join point.
Scaling the build
| Larger | Use the 4mm hook for size 4 (9-12 months); stitch count stays at 15 DC, gauge opens up to grow the sock. |
|---|---|
| Smaller | Use the 2.5mm hook for size 1 (0-3 months); same 15 DC start, tighter gauge shrinks the finished sock. |
| Longer foot | Work additional rows in the flat heel/body section before the final single crochet round; this extends length without changing the stitch count. |
03 · Putting it togetherHow the pieces go together
- S1
After completing the heel and body of the sock as per the desired rounds, end with a round of single crochets, possibly incorporating an elastic thread to keep the socks snug around the baby's ankles.
- S2
Optional: Add a decorative bow or other embellishments as preferred.
04 · Snag listWhat went wrong on the bench, and the fix
Snag 1
Loose magic ring center
Pull the tail tight before working round one so the 15 DC don't gap at the toe.
Snag 2
Wrong skip count in V stitch
Skip exactly 2 stitches on each side of every V; a miscount shifts the whole round's stitch total.
Snag 3
Uneven heel decreases
Match decrease placement on both edges of the flat heel rows so the cup doesn't pull to one side.
Snag 4
Hook size mismatched to size
Confirm hook diameter (2.5mm, 3mm, 3.5mm, or 4mm) against the size label before starting round one.
05 · QueriesQuestions logged against this build
Is the elastic in the top rim optional?
The final single crochet round holds its shape on its own, but running elastic through it keeps the sock snug around the ankle. Skip it if a looser fit is preferred.
What yarn does this pattern call for?
A double knitting weight yarn, 100g/330m, with color codes CE001 and CE011 recommended. Any DK yarn of similar yardage will work with the corresponding hook size.
06 · Made byWho counted this one

Who writes Amigurumi Addict, how a build gets its number, and why every round on the site carries a stitch count.
07 · Next off the benchThree builds that sit near this one

Odds and ends
Crochet a phone bag with strap, flap, and ring closure
How to crochet a phone bag? Join rounds from a 30-chain base, add a strap, flap, and ring.

Odds and ends
Crochet worsted weight socks with a turned heel
How do you crochet socks for winter? Build toe-up in worsted weight with a folded heel and ribbed leg.

Odds and ends
Toe-Up Woodland Walker Crochet Socks With Colorwork Cuff
How do you crochet toe-up socks with a colorwork cuff? Build the Toe, Heel, and stranded Cuff in order.
Join the build log
One message when a build is issued
A drawing and its parts list, when one leaves the bench.