| Shelf | Level | Time | Hook | Yarn |
|---|---|---|---|---|
| Odds and ends | Intermediate | 4-6 Hours | 9 mm | Bulky |
Cozy Crochet Slippers for Adults – Free Pattern for Snug Feet
Make cozy crochet slippers for adults with this free pattern using bulky yarn and a 9mm hook. Quick, warm, and easy to size for the whole family.
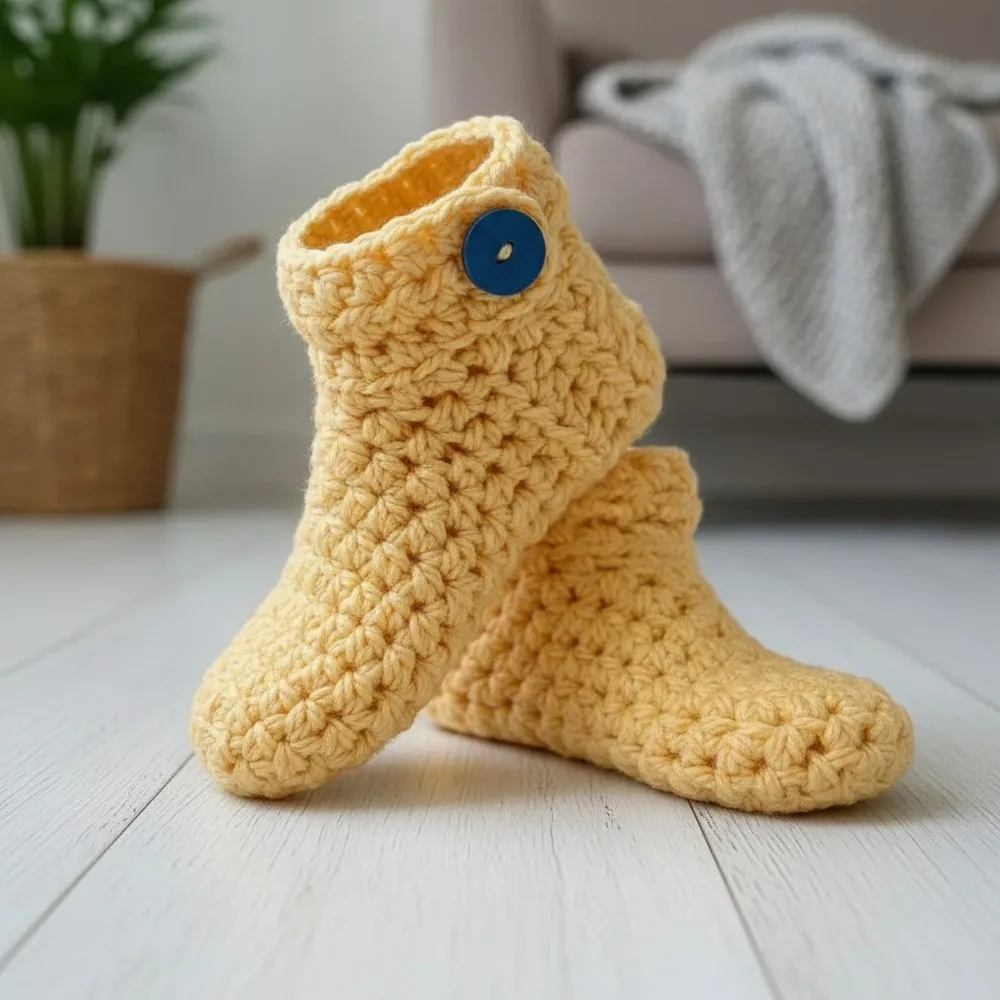
01 · The pieceWhat Cozy Crochet Slippers for Adults – Free Pattern for Snug Feet actually is
These cozy crochet slippers are built from a single continuous sole and foot section, worked in bulky yarn so they grow fast and feel plush underfoot from the very first round. What makes them special is how adaptable they are—one basic shape scales up or down for nearly any foot size, making this the kind of pattern you'll return to again and again for every person on your gift list. They're ideal for crafters who want a fast, satisfying finish without sacrificing a polished, wearable result.
You'll work through a rounded sole and foot base, shape an opening for the foot, build up the instep, and finish with a decrease round that closes the heel. The heel comes together with an invisible join for a seamless-looking finish, and the whole project uses just one seam total. This is a great pattern for confident beginners or intermediate crocheters who've worked magic rings and basic increases/decreases before—expect about 4 to 6 hours per pair, including finishing.
The finished slippers are snug, thick-soled, and cushiony thanks to the bulky yarn and single 100g skein construction, with an ankle cuff that hugs the leg and a button closure tab for a tailored fit. They look like something from a cozy cabin catalog but cost a fraction of store-bought slippers to make. Whether you keep them for yourself or wrap them up as a handmade gift, they're the kind of project that gets worn on repeat.
- Begin at the sole with a magic ring, then build the foot base outward through three shaping rounds.
- Place your stitch markers as you go to keep the oval sole shape even and symmetrical.
- Work the opening for the foot round to create the space your foot will slide into.
- Continue upward into the top or instep section to shape the front of the slipper.
- Work the final decrease round to gently close the heel end of the slipper.
- Join the heel seam invisibly with a tapestry needle so the closure lies flat and neat.
- Weave in all loose ends and close off the magic ring tail securely.
- Add the ankle cuff, then customize the tab for a left or right fit and attach your button.
02 · The count run7 rounds across 9 parts, each with its count
US terms throughout. Every row below ends with the count that round finishes on.
| Part | Qty | Finishes on |
|---|---|---|
| SOLE & FOOT | 1 | - |
| OPENING FOR FOOT | 1 | - |
| TOP/INSTEP SECTION | 1 | - |
| FINAL ROW (DECREASE/HEEL CLOSURE) | 1 | - |
| HEEL SEAM – INVISIBLE JOIN | 1 | - |
| WEAVING ENDS & CLOSING MAGIC RING | 1 | - |
| ANKLE CUFF (SHAFT) | 1 | - |
| Find stitches for cuff foundation | 1 | - |
| LEFT & RIGHT SLIPPER TAB MODIFICATIONS | 1 | - |
| Round | Instruction | Count |
|---|---|---|
| Round 1 | Start with a magic (adjustable) ring . Ch 1 (does NOT count as a st), work 8 hdc into the ring .Pull tail to close ring firmly. | - |
| Round 2 | Ch 1 (does NOT count as st). 2 hdc in each st around. Join with sl st to first hdc. (16 hdc) | - |
| Rounds 3-11 | Ch 1, hdc in each st around. Join with sl st to first hdc. (16 hdc) Repeat for a total of 9 “straight” rounds after increases.Total: 11 rounds: 1 foundation, 1 increase, 9 straight | - |
| Round | Instruction | Count |
|---|---|---|
| Round 12 | Ch 1, hdc in next 14 sts (leave last 2 sts unworked to create foot opening). Do not join the round—stop here.Turn work. Now you will work back and forth (rows) for the instep/top. | - |
| Round | Instruction | Count |
|---|---|---|
| Rows 13-15 | Ch 1, hdc in each st across (14 hdc). Turn. Repeat for a total of 4 rows (1 made above + 3 more), always working 14 hdc per row.Adaptation To make a smaller slipper, work fewer stitches in Round 1 (e.g. 7, 6, or even 5 hdc depending on your target size) and always double in Round 2; your straight rows/rounds will be based on this adjusted foundation. For a wider opening, leave more than 2 stitches unworked after Round 12. For a longer instep or cuff, work additional back-and-forth rows above. | - |
| Round | Instruction | Count |
|---|---|---|
| Row 16 | (Across 14 sts): Ch 1, hdc2tog (decrease) across entire row: [Yarn over, insert hook into next st, yarn over and pull up a loop, yo and draw through all three loops.]Repeat in every pair of sts across. | - |
You will have 7 decreases (one for every pair), and will finish with 7 sts .
Fold worked part so RS’s are together, aligning the 7 decrease stitches with the opposite side.
Working through inner loops only of matching stitches on both sides, sl st seam across the 7 sts.
Fasten off, secure with a knot, and weave in end on WS.
Use tapestry needle to close and secure the magic ring tail from the sole, weaving tail in a circle for extra security.
Weave in all ends horizontally and vertically within your rounds/rows.
Using same or contrasting yarn, and your stitch markers:
Use markers to identify the 2 skipped sts from before and the 12 main sts along the top/heel.
Mark each key point for accuracy.
| Round | Instruction | Count |
|---|---|---|
| Row 1 | Begin on the right (outer side) for the right slipper, or on the left for the left slipper. With RS facing you, join yarn at the first marked st. Work 1 hdc in each marked st and each row-edge st around the opening (should have approximately 13-16 sts depending on adjustments). Continue for 4 rows, turning at the end of each row, working hdc stitches into each st (add 3 chains for button tab at start of the 2nd row). On the 2nd row, after the hdc stitch pattern, ch 3 at end to form button loop, then turn and continue as before. | - |
For the right foot, work button tab at outer right top of the opening.
For the left foot, start at the opposite side to ensure the tab is on the outer left.
03 · Putting it togetherHow the pieces go together
- S1
Using tapestry needle and yarn, sew button at the correct place:
- S2
Place 2 rows down from the cuff, checking fit as you go.
- S3
Make sure the button is snug (not loose) so tab stays closed.
- S4
Secure and hide ends on inside with a double knot and weave in tail.
- S5
Try slipper on to ensure button loop fits tightly over button.
04 · Before it goes to a childWhat has to be right, and what is allowed to drift
- 💡 Keep your 5 stitch markers moving with you round by round rather than removing them early; they're your best defense against losing the sole's oval shape.
- 💡 Since this pattern uses a single 100g skein, wind your yarn into a center-pull ball first so you don't run into tangling issues mid-round.
- 💡 When you reach the heel seam, lay both slipper halves flat and match stitch counts before sewing—this guarantees your invisible join lies flat with no puckering.
- 💡 Choose a sturdy button around 1 inch in diameter and sew it on with doubled yarn or embroidery floss, since bulky-weight slippers see regular wear and tugging.
- 💡 If you're making a left and right pair, note your tab modifications as you finish the first slipper so the second one mirrors it correctly instead of matching exactly.
- 📏 Finished measurements: this pattern is sized to fit an adult women's foot (approx. foot length 23 cm). The sole measures approximately 24 cm in length and 10 cm in width, and the ankle cuff measures approximately 11 cm in circumference and 5 cm in height.
- 💡 All turning chains do NOT count as stitches unless otherwise stated in the pattern.
- 💡 To make the slipper bigger or smaller, adjust the initial stitch count of the foundation round (Round 1). To widen the foot opening, leave 3-4 stitches unworked instead of 2 when splitting for the opening. To lengthen or shorten the slipper, adjust the number of straight hdc rounds worked before the opening.
- 💡 This pattern is seamless except for the button placement—try your slipper on at every key stage to check the fit as you go.
05 · Snag listWhat went wrong on the bench, and the fix
Snag 1
Starting the magic ring too loosely
Pull the tail firmly after your first round of stitches and give it a second tug once you've worked a couple more rounds—check it's fully closed before weaving in the end.
Snag 2
Losing track of where the opening
Place a stitch marker at the exact start and end point of the opening round the moment you work it, not after—this keeps your instep section centered and symmetrical.
Snag 3
Skipping stitch markers on the sole
Use all 5 stitch markers as directed, one at each key increase point, and move them up each round so you can visually confirm your increases are landing in the same spots.
Snag 4
Working the final decrease round
Keep your decrease stitches at the same tension as the rest of your piece; if you tend to pull tight on decreases, go up half a hook size just for that final round.
Snag 5
Sewing the heel seam with a visible
Slow down on the heel seam step and match up stitch-for-stitch using a tapestry needle, weaving through corresponding loops rather than whipstitching over the top edge.
Snag 6
Guessing at foot size
Measure the intended wearer's foot length and width with a measuring tape before starting, and try the piece on (or compare to a well-fitting shoe) after the sole and foot section is complete.
06 · VariantsOther ways to issue this one
This pattern is a playground for customization once you've made one pair. For a bold, modern look, try color-blocking the sole in charcoal gray and the cuff in a bright mustard or rust— Wool-Ease Thick & Quick or Bernat Blanket both work beautifully in bulky weight and come in gorgeous heathered tones. For a softer, cottage-core feel, go with cream and sage green, and swap the button for a wooden toggle or a fabric-covered button for extra texture. Sizing up or down is simple: for a child's size, reduce your foundation magic ring stitch count by 2-4 stitches per round before starting the sole shaping, and check fit against the measuring tape as you go rather than relying on round count alone; for a wider or plus-size foot, add 2-4 stitches evenly around the opening for foot round instead of changing hook size. If you want a thicker, more insulated sole for hardwood floors, hold two strands of worsted weight together instead of one strand of bulky—this also stretches your stash if you don't have bulky yarn on hand. For a seasonal twist, work the cuff in alternating stripes of red and cream for a winter-cabin vibe, or add a small crocheted flower or leaf appliqué at the toe for spring. You can also swap the single button closure for a set of two smaller buttons for a cuter, mary-jane-inspired look, or skip the button entirely and make the tab a simple fold-over cuff for slip-on ease. However you modify it, the core construction—sole, opening, instep, heel closure—stays exactly the same.
I adore this pattern because it takes almost nothing—one skein of bulky yarn, a 9mm hook, and an evening or two—to end up with slippers that actually look intentional. The sole and foot section works up in just three rounds, so you get that instant gratification of watching a shoe shape appear almost immediately. I love how the invisible join at the heel seam gives you that clean, professional finish without any fussy weaving mid-project, and the single seam construction means less time finishing and more time wearing. The ankle cuff and button tab are my favorite details; they turn a basic slipper into something that feels finished and gift-worthy. Placing those five stitch markers as you go keeps the shaping honest, especially through the decrease round that closes the heel—no guessing, no frogging. And because the whole thing is so easily resized, I've made this same pattern for my mother-in-law, my teenage niece, and myself, and every single pair fit perfectly. It's the kind of make that rewards you quickly and looks far more complicated than it actually is.
07 · QueriesQuestions logged against this build
What yarn weight works best for these slippers?
This pattern is designed for bulky (thick) weight yarn, either wool or acrylic, paired with a 9mm hook. Sticking to bulky weight keeps the sole nice and cushioned and helps the project work up quickly.
How do I resize these slippers for kids or larger adult feet?
Adjust your starting magic ring stitch count up or down by a few stitches and check fit against a measuring tape as you go, since the sole and foot section shapes the whole slipper. Always compare to an actual foot measurement rather than guessing from round count alone.
Do I need special skills to make these slippers?
You should be comfortable with a magic ring, basic increases and decreases, and a simple seam using the invisible join technique. If you've made a basic amigurumi or hat before, you'll pick this up quickly.
How much yarn do I need for one pair?
One 100g skein of bulky yarn is generally enough for a single adult pair, though exact yardage can vary slightly with foot size. It's a good idea to keep a little extra on hand if you're making a larger size.
Can I skip the button and still get a good fit?
Yes, you can turn the tab into a simple fold-over cuff without a button for an easy slip-on style. Just make sure the ankle cuff is snug enough to stay in place without the closure.
Original pattern: https://redagapeblog.com/cozy-free-crochet-slippers-for-adults-pattern/
08 · Made byWho counted this one

Who writes Amigurumi Addict, how a build gets its number, and why every round on the site carries a stitch count.
09 · Next off the benchThree builds that sit near this one

Odds and ends
Crochet a phone bag with strap, flap, and ring closure
How to crochet a phone bag? Join rounds from a 30-chain base, add a strap, flap, and ring.

Odds and ends
Crochet worsted weight socks with a turned heel
How do you crochet socks for winter? Build toe-up in worsted weight with a folded heel and ribbed leg.

Odds and ends
Toe-Up Woodland Walker Crochet Socks With Colorwork Cuff
How do you crochet toe-up socks with a colorwork cuff? Build the Toe, Heel, and stranded Cuff in order.
Join the build log
One message when a build is issued
A drawing and its parts list, when one leaves the bench.