| Shelf | Level | Time | Hook | Yarn |
|---|---|---|---|---|
| Odds and ends | Beginner | 2-4 hours | 9 mm | Super Bulky |
A beginner-friendly chic beret pattern in five rounds
How do you crochet a chic beret in one skein? Five rounds of double crochet, no shaping pieces.
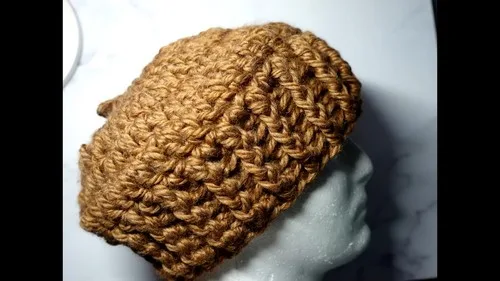
01 · The pieceWhat A beginner-friendly chic beret pattern in five rounds actually is
The beret is a single build: one crown, no separate brim piece, no seams to sew. Round 1 packs 11 double crochets into the first chain of a ch-3 ring, setting all 12 stitches at once. From there, 5 rounds stack outward, each opened with a ch-2 and closed with a slip stitch join, so the whole hat comes off the hook as one continuous, joined spiral of rounds rather than a shaped, multi-panel construction.
Tolerances split cleanly. The starting ring at Round 1 needs to hold its shape — too loose and the crown center gapes, too tight and the first 12 stitches won't seat. Everything past that is forgiving: super bulky yarn and a 9mm hook mask minor tension drift round to round, and since this is a single skein, single-piece pattern, there's no second piece to match for size or gauge.
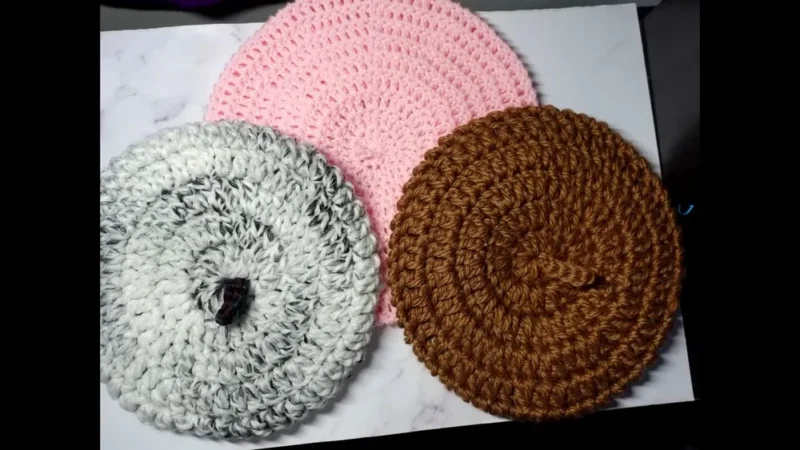
02 · The count run9 rounds across 1 part, each with its count
US terms throughout. Every row below ends with the count that round finishes on.
| Part | Qty | Finishes on |
|---|---|---|
| Main Pattern | 1 | - |
| Round | Instruction | Count |
|---|---|---|
| Round 1 | Create a slip knot. Chain (ch) 3.Yarn over (yo) and make 11 double crochets (dc) into the first ch. | - |
You will have 12 stitches.
| Round | Instruction | Count |
|---|---|---|
| Round 2 | Ch 2 (this does not count as a stitch). Place 2 dc into each stitch around.Sl st to join in the first dc. | - |
You will have 24 stitches.
| Round | Instruction | Count |
|---|---|---|
| Round 3 | Ch 2 (does not count as a stitch). 1 dc in the first stitch, 2 dc in the next stitch; repeat from to around.Sl st to join. | - |
You will have 36 stitches.
| Round | Instruction | Count |
|---|---|---|
| Round 4 | Ch 2 (still not counting as a stitch). 1 dc in the next two stitches, 2 dc in the following stitch; repeat from to around.Sl st to join. | - |
You will have 48 stitches.
| Round | Instruction | Count |
|---|---|---|
| Rounds 5–7 | Ch 2 at the beginning of each round. Place 1 dc in each stitch around.Sl st to join each round. | - |
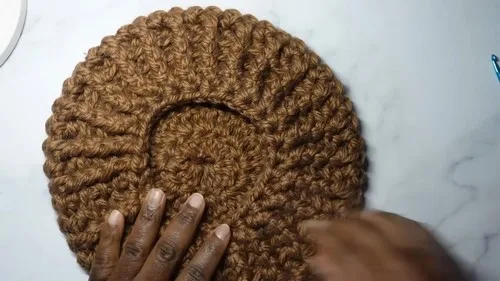
| Round 8 | Ch 2. Front post double crochet (fpdc) around the first dc, back post double crochet (bpdc) around the next dc; repeat from to around.Sl st to join. | - |
| Rounds 9–10 | Ch 2. Match each stitch by placing a fpdc into each fpdc from the previous round and a bpdc into each bpdc from the previous round.Sl st to join. | - |
| Round 11 (Optional) | Ch 2. Front post half double crochet (fp hdc) and back post half double crochet (bp hdc) alternately around each corresponding stitch.Sl st to join. | - |
| Optional Nub | Create a slipknot. Chain 5. Starting at the second chain from the hook, slip stitch in each chain back to the start. Fasten off, leaving a tail. | - |
Techniques on this build
- Chain ring foundation
- Round 1 opens on a ch-3 ring; keep it snug enough to hold shape but loose enough to work 11 dc into it.
- Double crochet crowding
- All 11 dc of Round 1 land in the single first chain — watch that the count lands at 12 stitches before joining.
- Joined (non-spiral) rounds
- Every round closes with a slip stitch and opens with a ch-2 that doesn't count as a stitch; track the join so it doesn't drift sideways.
- Bulky-yarn hook control
- Super bulky (6) yarn on a 9mm hook moves more yarn per stitch than standard weights; keep grip consistent through all 5 rounds so stitch height stays even.
Final fit-up
- Cut the yarn after the final round, chain 1, and pull the tail through to fasten off.
- Weave in the starting tail left at the Round 1 ring using a tapestry needle with a large eye.
- Weave in the ending tail at the fastened-off edge, running it through several stitches to lock it against the bulky fiber.
- Stretch the crown over a bowl or head-shaped form while slightly damp to set the brim flat before wear.
- the optional nub: chain 5, slip stitch back along the chain from the second chain from the hook, fasten off leaving a tail, and secure the finished nub to the center top of the beret.
How the parts fit
- All shaping is front-loaded: the 11 increase stitches of Round 1 are worked into a single starting chain, meaning the crown's full stitch count is established in the first round and not built up gradually.
- Rounds are joined with a slip stitch and opened with a ch-2 rather than worked as a continuous spiral, which leaves a visible seam line marking the boundary of each of the 5 rounds.
- The stitch-counting rule changes after Round 1: the ch-3 there counts as the first stitch, but the ch-2 opening each later round explicitly does not — two different counting models in one 5-round piece.
Scaling the build
| Larger | Move up to a larger hook than the 9mm called for; stitches open up, each of the 5 rounds sits wider, and yardage beyond the stated 223 yards may be needed. |
|---|---|
| Smaller | Drop to a smaller hook within the super bulky range; stitches tighten, the crown finishes narrower, and the single skein may go further than the full 340g. |
| Deeper crown | Repeat the stitch pattern of one of the later rounds before finishing; this adds height to the crown, though it moves the piece off the tested 5-round structure and calls for a test swatch first. |
03 · Putting it togetherHow the pieces go together
- S1
Ch 1, cut the yarn leaving a tail, and pull through to fasten off.
- S2
Weave in the ends with your tapestry needle.
- S3
Secure the nub to the center of the beret.
04 · Snag listWhat went wrong on the bench, and the fix
Snag 1
Miscounting the Round 1 ring
The ch-3 counts as the first dc, so 11 more dc into the same chain brings the total to 12 stitches before the join — count all 12, not just the 11 worked.
Snag 2
Counting the ch-2 as a stitch
In Round 2 onward, the ch-2 is a riser only. Skip it when counting stitches per round or the count will run high.
Snag 3
Letting the join point drift
A slipping join point turns stacked rounds into an accidental spiral. Mark the first stitch of each round with a stitch marker before working the slip stitch join.
Snag 4
Cinching the starting chain too tight
Packing 11 dc into one chain can pull it closed as you work. Keep the first chain loose, or work the initial round over a finger to hold the ring open.
05 · QueriesQuestions logged against this build
How much yarn does this beret take?
One skein of super bulky (6) yarn, approximately 340g or 223 yards, covers the entire piece. No second skein or color is called for.
What hook size is required?
A size N, or 9mm US, hook. This matches the drape and stitch definition needed for the super bulky yarn used throughout.
Does this beret need to be blocked?
It isn't required, but stretching the finished crown over a bowl or head-shaped form while slightly damp helps the brim lay flat. Since it's a single joined piece with no seams, blocking is mostly cosmetic here.
06 · Made byWho counted this one

Who writes Amigurumi Addict, how a build gets its number, and why every round on the site carries a stitch count.
07 · Next off the benchThree builds that sit near this one

Odds and ends
Crochet a phone bag with strap, flap, and ring closure
How to crochet a phone bag? Join rounds from a 30-chain base, add a strap, flap, and ring.

Odds and ends
Crochet worsted weight socks with a turned heel
How do you crochet socks for winter? Build toe-up in worsted weight with a folded heel and ribbed leg.

Odds and ends
Toe-Up Woodland Walker Crochet Socks With Colorwork Cuff
How do you crochet toe-up socks with a colorwork cuff? Build the Toe, Heel, and stranded Cuff in order.
Join the build log
One message when a build is issued
A drawing and its parts list, when one leaves the bench.